
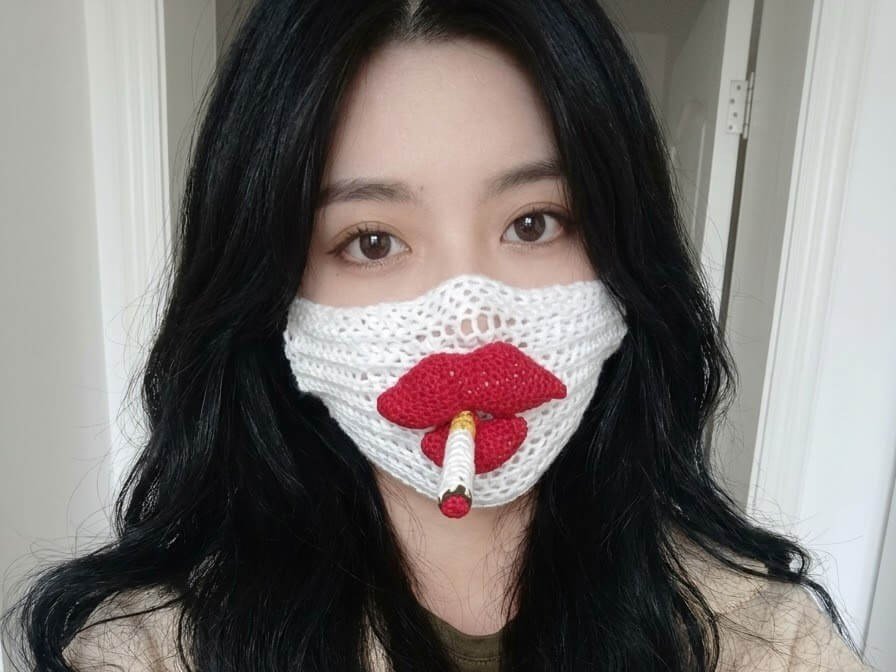
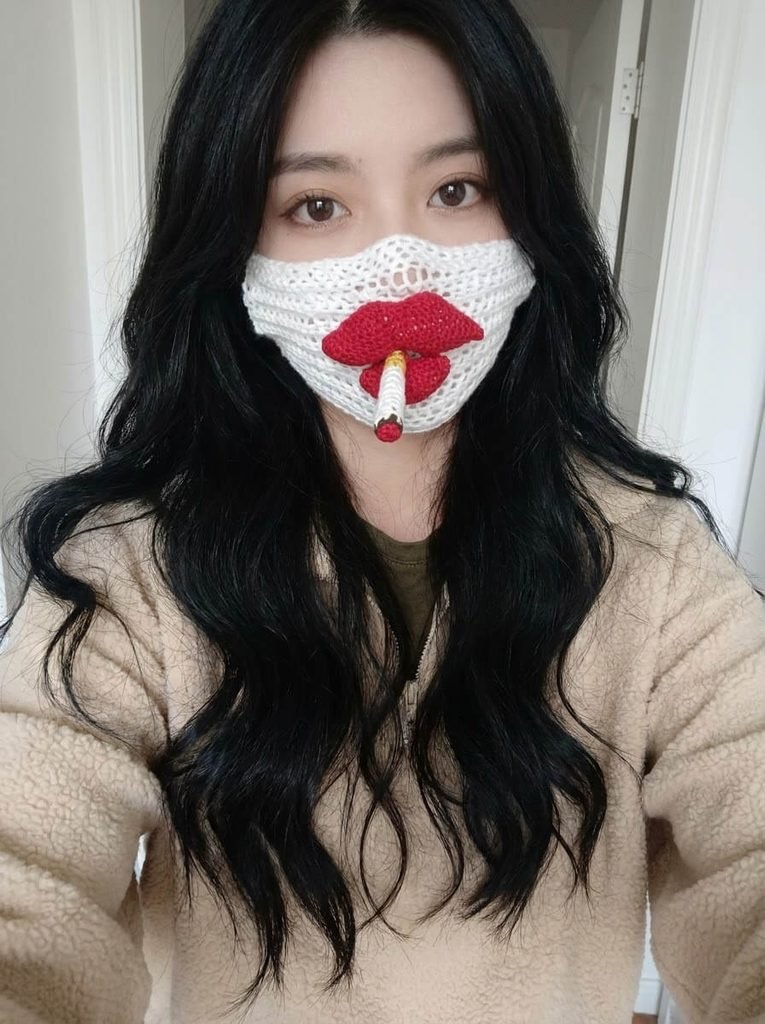
Discover the witty and playful world of crochet with this Cute 3D Lips & Cigarette Face Mask!
This unique mask combines 3D Amigurumi techniques with basic flat rows to create a hilarious, head-turning accessory. The pattern below is written in standard US Crochet Terms so you can follow along seamlessly.
Materials and Preparation
Materials:
- Yarn:
- Red yarn for the voluptuous 3D lips and glowing ember tip.
- Yellow yarn for the cigarette filter.
- White yarn for the cigarette body and mask base.
- Stuffing: Polyfill stuffing to give the lips and cigarette their plush 3D shape.
Tools:
- Crochet Hook: 2.5 mm to 3.0 mm (a smaller hook size is recommended to keep stitches tight and prevent stuffing from showing).
- Yarn Needle: For assembling the lips, attaching the cigarette, and sewing onto the mask base.
- Stitch Marker: To mark the beginning of continuous rounds.
- Scissors: For cutting yarn.
Preparation Notes:
- You should be comfortable with basic US crochet stitches such as single crochet (
sc), double crochet (dc), increases, decreases, and the magic ring (MR). - Keep your tension firm and even when working on the lips and cigarette to ensure no polyfill peek-throughs.
Abbreviations and Notes
Abbreviations:
- MR: Magic Ring
- ch: Chain
- sc: Single Crochet
- inc: Single Crochet Increase (2 sc in the same stitch)
- dec: Single Crochet Decrease (sc2tog)
- dc: Double Crochet
- dc inc: Double Crochet Increase (2 dc in the same stitch)
- dc3tog: Double Crochet 3 Together (Double crochet decrease across 3 stitches)
- sl st: Slip Stitch
- BLO: Back Loop Only
Pattern Notes:
- The Upper Lip, Lower Lip, and Cigarette are worked in continuous spiral rounds.
- The Lower Lip is worked directly from the end of the Upper Lip without cutting the yarn.
- The Main Mask Body is worked in flat rows (turning back and forth) with turning chains for height.
Gauge, Approximate Size, and Pattern Notes
Gauge:
Exact gauge is not critical for this project, but work with tight tension for the 3D elements to securely hold the polyfill stuffing.
Finished Size:
Fits an adult face comfortably, featuring a prominent 3D lip piece measuring roughly 10 to 12 cm across.
Special Techniques:
- Amigurumi 3D Shaping: Strategic increases at the corners and central decreases create the iconic Cupid’s bow and pouty lower lip curve.
- BLO (Back Loop Only): Used at the base of the cigarette filter to create a crisp, flat edge.
- Center Contouring (dc3tog): Decreases placed in the center of the mask body allow it to contour nicely over the bridge of the nose and chin.
Step-by-Step Pattern
Part 1: Upper Lip
Worked in red yarn in continuous 3D rounds:
- R1: MR 4 sc (4)
- R2: (sc, inc)*2 (6)
- R3: (2 sc, inc)*2 (8)
- R4: (3 sc, inc)*2 (10)
- R5: (4 sc, inc)*2 (12)
- R6: (2 sc, inc)*2, 10 sc (14)
- R7: sc, 2 inc, 11 sc (16)
- R8: sc, inc, 2 sc, inc, 11 sc (18)
- R9: 18 sc (18)
- R10: sc, dec, 2 sc, dec, 11 sc (16)
- R11: (2 sc, dec)*4 (12)
- R12: 2 sc, dec, 4 sc, dec, 2 sc (10)
- R13: 2 sc, inc, 4 sc, inc, 2 sc (12)
- R14: sc, (inc, 2 sc)*3, inc, sc (16)
- R15: 3 sc, inc, 2 sc, inc, 9 sc (18)
- R16: 18 sc (18)
- R17: 3 sc, dec, 2 sc, dec, 9 sc (16)
- R18: 3 sc, 2 dec, 9 sc (14)
- R19: 2 sc, 2 dec, 8 sc (12)
- R20: sc, 2 dec, 7 sc (10)
- R21: sc, dec, 3 sc, dec, 2 sc (8)
- R22: sc, dec, 2 sc, dec, sc (6)
- R23: (sc, dec)*2 (4)
Part 2: Lower Lip
Do not cut yarn; continue crocheting directly from the 4 stitches of R23:
- R24: (sc, inc)*2 (6)
- R25: (2 sc, inc)*2 (8)
- R26: (3 sc, inc)*2 (10)
- R27: (4 sc, inc)*2 (12)
- R28: 2 inc, 10 sc (14)
- R29: sc, 2 inc, 11 sc (16)
- R30–R39: 16 sc (16) (10 rounds total)
- R40: 3 sc, 2 dec, 9 sc (14)
- R41: 2 sc, 2 dec, 8 sc (12)
- R42: sc, 2 dec, 7 sc (10)
- R43: sc, dec, 3 sc, dec, 2 sc (8)
- R44: sc, dec, 2 sc, dec, sc (6)
- R45: (sc, dec)*2 (4)
- R46: 2 dec (2) Fasten off, leaving a long tail for sewing.
Part 3
Cigarette
Worked in continuous round tubes:
- R1: MR 8 sc (Yellow yarn) (8)
- R2: BLO 8 sc (8)
- R3–R6: 8 sc (8)
- R7–R16: 8 sc (Switch to White yarn) (8)
- R17: 8 sc (Switch to Red yarn for the burning ember) (8) Fasten off and lightly stuff with polyfill.
Main Mask Body
Worked in flat rows:
- Foundation: Ch 21
- R1: 21 sc (21)
- R2: 21 sc (21)
- R3: ch 2, 10 dc, dc inc, 10 dc, sl st (23)
- R4: ch 1, 23 sc, sl st (23)
- R5: ch 2, 11 dc, dc inc, 11 dc, sl st (25)
- R6: ch 1, 25 sc, sl st (25)
- R7: ch 2, 12 dc, dc inc, 12 dc, sl st (27)
- R8: ch 1, 27 sc, sl st (27)
- R9: ch 2, 13 dc, dc inc, 13 dc, sl st (29)
- R10: ch 1, 29 sc, sl st (29)
- R11: ch 2, 14 dc, dc inc, 14 dc, sl st (31)
- R12: ch 1, 31 sc, sl st (31)
- R13: ch 2, 15 dc, dc inc, 15 dc, sl st (33)
- R14: ch 1, 33 sc, sl st (33)
- R15–R22:
- Odd Rows (R15, R17, R19, R21): ch 2, 33 dc, sl st (33)
- Even Rows (R16, R18, R20, R22): ch 1, 33 sc, sl st (33)
- R23: ch 2, 15 dc, dc3tog, 15 dc, sl st (31)
- R24: ch 1, 31 sc, sl st (31)
- R25: ch 2, 14 dc, dc3tog, 14 dc, sl st (29)
- R26: ch 1, 29 sc, sl st (29)
- R27: ch 2, 13 dc, dc3tog, 13 dc, sl st (27)
- R28: ch 1, 27 sc, sl st (27)
- R29: ch 2, 12 dc, dc3tog, 12 dc, sl st (25)
- R30: ch 1, 25 sc, sl st (25)
- R31: ch 2, 11 dc, dc3tog, 11 dc, sl st (23)
- R32: ch 2, 23 dc, sl st (23)
- R33: ch 2, 10 dc, dc3tog, 10 dc, sl st (21)
- R34: ch 1, 21 dc, sl st (21)
- R35: ch 1, 21 dc, sl st (21)
Part 4: Edging, Assembly & Finishing
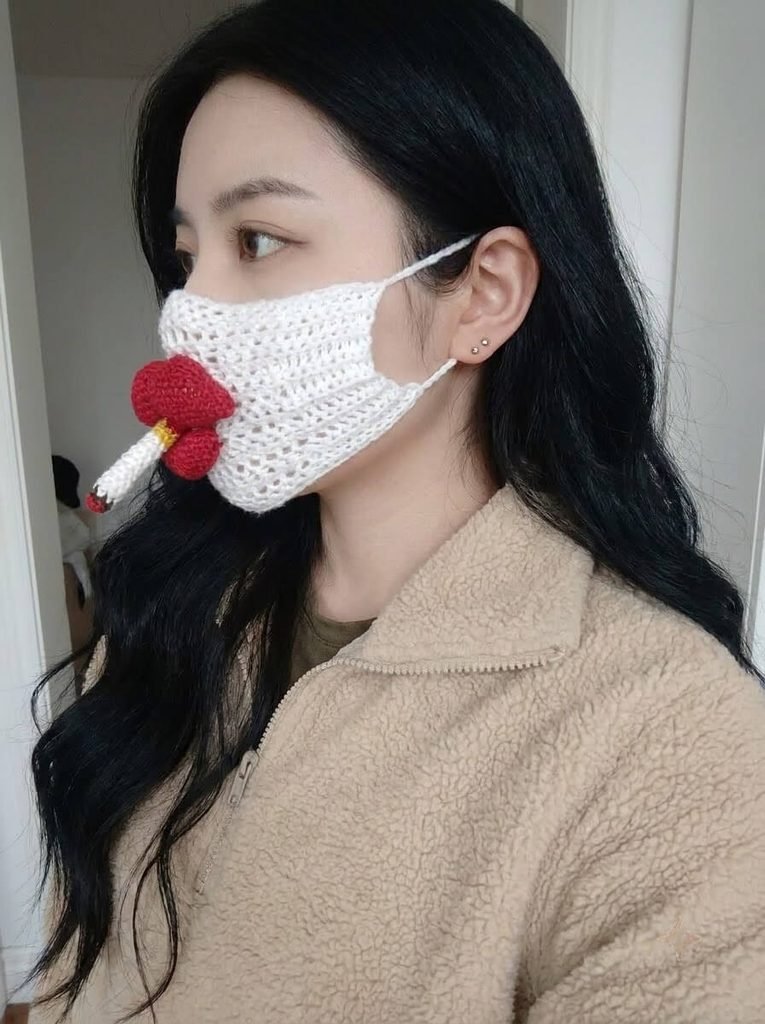
- Edging & Straps: sl st, ch 1, 51 sc around the mask border, ch 42 (first ear strap), 51 sc along the opposite edge, ch 42 (second ear strap), sl st to join.
- 3D Assembly:
- Lightly fill the upper and lower lip tubes with polyfill stuffing.
- Use a yarn needle to stitch the inner edges of the upper and lower lips together flat.
- Place the cigarette in the center between the lips and sew it firmly into place.
- Center the entire 3D lip arrangement onto the mask base and stitch it down securely around the perimeter.
Pattern Questions
Question 1: How do I ensure the 3D lips stay plump without sagging or letting the cigarette droop?
Answer: Fill the lips with just enough polyfill to make them round without stretching the stitches open. Once stuffed, use a yarn needle to stitch the inner opening of the upper and lower lips together.
When adding the cigarette, pass your yarn needle through both the cigarette body and the inner lip seam multiple times before securing the complete lip piece to the mask.
Question 2: Can I adjust the size of the mask or ear straps?
Answer: Yes! To widen or narrow the mask body, adjust the starting chain count in increments of 2. To customize the ear straps for a perfect fit, simply increase or decrease the 42 chain stitches (ch 42) on each side before securing.