
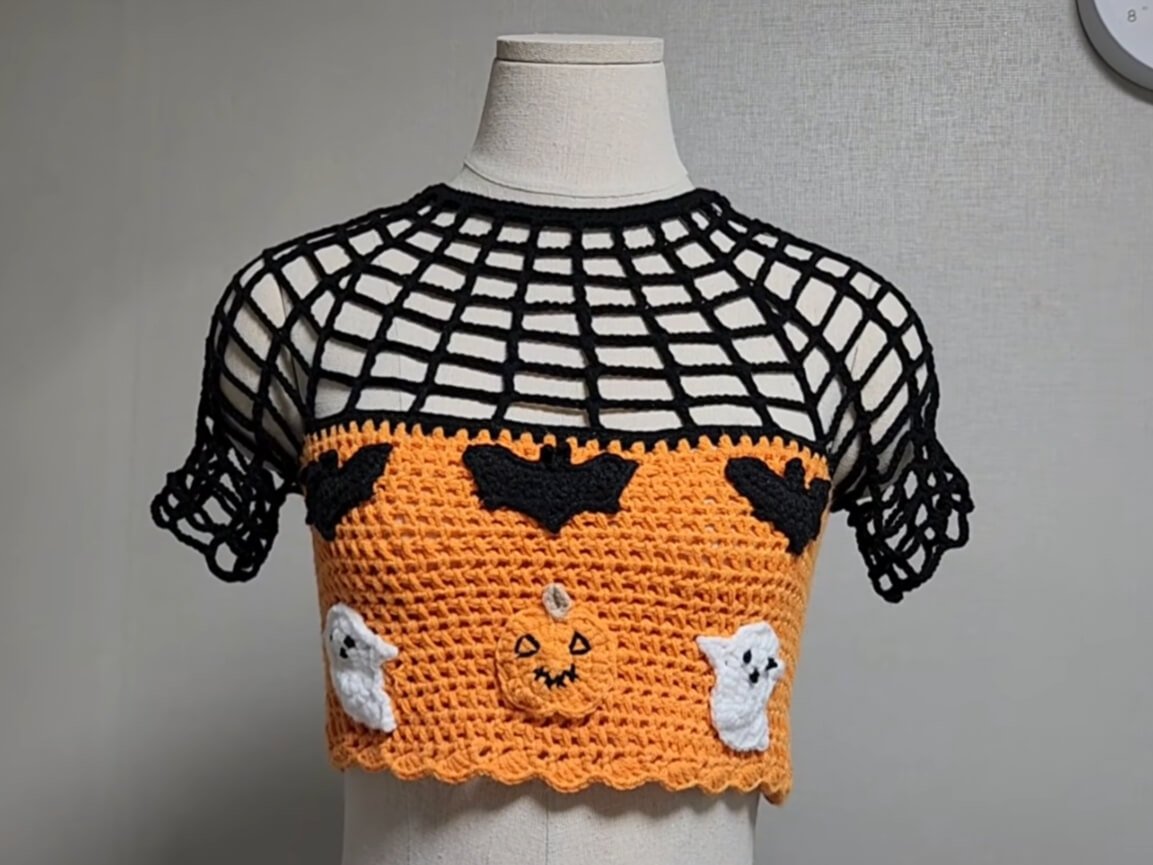
Who says spooky season can’t be stylish, flirty, and downright fabulous? If your wardrobe is screaming for a show-stopping piece that perfectly bridges the gap between creepy and cute, you are in for a treats-no-tricks kind of day!
This gorgeous Halloween Crop Top pairs a dramatic, fishnet-inspired black yoke with a vibrant orange bodice, finished off with classic festive appliques: adorable little ghosts, spooky bats, and a friendly jack-o’-lantern.
Whether you are heading to a Halloween party, heading out for pumpkin picking, or just want to make every day in October feel extra magical, this fast-working project will have you turning heads in no time.
Grab your hooks, play your favorite spooky playlist, and let’s whip up this trendy spooky-season staple!
Materials and Preparation
Materials:
- Yarn: Milky Cotton Yarn (60% Cotton, 40% Acrylic, 2 mm thickness / Sport weight)
- Black: For the fishnet neck mesh yoke, upper back section, sleeves, and bat appliques.
- Orange: For the solid bodice lower section and pumpkin applique.
- White: For ghost appliques and small pumpkin stem details.
- Notions: Black and white embroidery thread (for ghost faces and pumpkin details).
Tools:
- Crochet Hook: 3.0 mm crochet hook.
- Yarn Needle: Tapestry needle for sewing appliques onto the top and weaving in yarn ends.
- Stitch Markers: 4 stitch markers (essential for separating back, shoulders, and front yoke sections).
- Scissors: Sharp craft scissors.
Preparation Notes:
- Sizing Customization: This written pattern is designed for Size Small (S). However, the top is easily customizable: to alter the neckline circumference, adjust your starting chain count in multiples that fit comfortably around your neck; add extra mesh rows to reach your upper bust line; or adjust the chain length under the armhole for a wider bust.
- Tension & Drape: The upper black yoke features open treble-mesh stitches that should flow effortlessly, while the orange body provides structured coverage using textured half double crochet stitch spaces. Keep your tension relaxed on the mesh sections so the netting drapes smoothly across the shoulders.
Abbreviations and Notes
Abbreviations:
- ch: Chain
- sl st: Slip Stitch
- sc: Single Crochet
- hdc: Half Double Crochet
- dc: Double Crochet
- tr: Treble Crochet
- inc: Increase (2 tr, ch 2, 1 tr in the same stitch / increase V-stitch)
- sk: Skip stitch(es)
- st(s): Stitch(es)
- ch-sp: Chain space
Pattern Notes:
- Top-Down Construction: The top is constructed from the neck downward starting with the open black mesh yoke worked in flat turning rows, joined at the armpits to create armhole loops, and then seamlessly transitioning into the orange lower bodice worked in rounds.
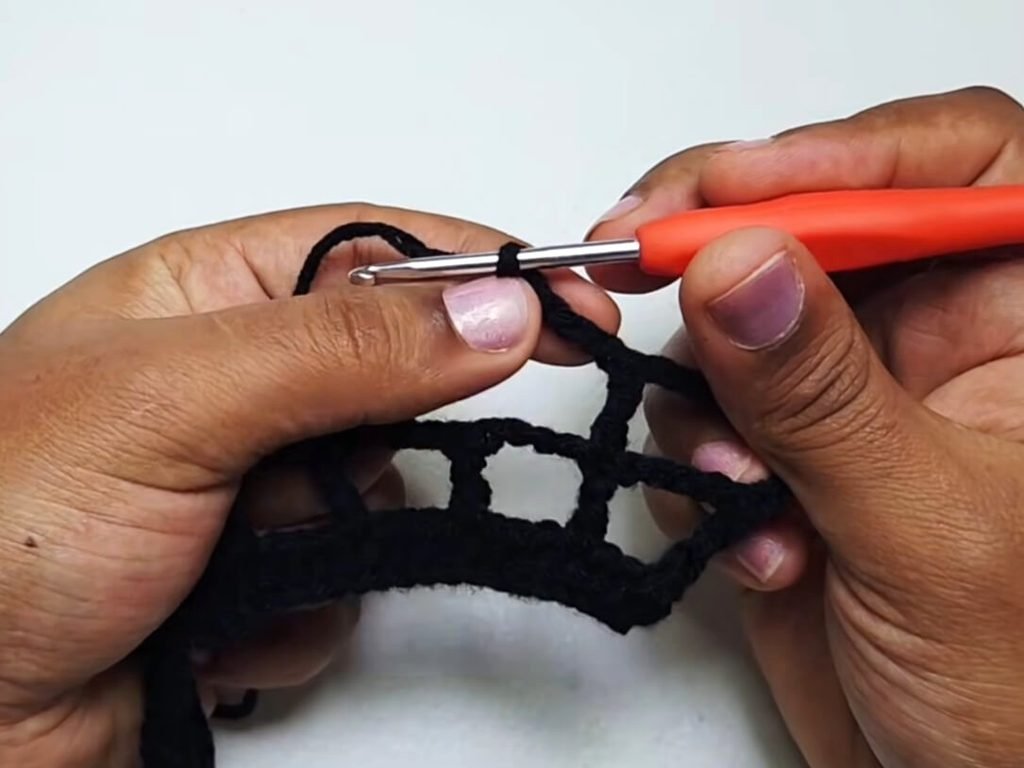
- Mesh Turning Chains: In the black mesh section, a ch 4 at the start of a row counts as 1 treble crochet (
tr). - Bodice Texture: The orange bodice uses a modified hdc mesh pattern where stitches are placed directly into the
ch-spof the previous row for a clean, textured fabric.
Gauge, Approximate Size, and Pattern Notes
Gauge:
- Black Mesh Yoke: 4 mesh boxes x 2 rows = approx. 2 inches x 2 inches (5 cm x 5 cm) using a 3.0 mm hook.
- Orange Bodice: 9 hdc spaces x 8 rows = approx. 4 inches x 4 inches (10 cm x 10 cm).
Finished Size:
- Size: Women’s Small (US Size 4-6 / EU Size 36).
- Neckline Width: Approx. 15 inches (38 cm) flat across.
- Total Length: Approx. 13.5 inches (34.3 cm) from shoulder to bottom edge scallop.
- Bust Circumference: Approx. 31-33 inches (78.7-83.8 cm) around.
Special Techniques:
- Raglan V-Stitch Mesh Increases: Expanding the black fishnet neck yoke at 4 marked corners using open treble-crochet V-stitches separated by chain loops.
- Applique Attachment: Invisible hand-stitching with a tapestry needle to secure small amigurumi-style flat patches onto the textured lower body.
Step-by-Step Pattern
Part 1: Black Neck Yoke & Mesh Raglan
Using Black Yarn and 3.0 mm hook:
- Foundation Row: Make a slip knot, ch 95.
- R1: Sk 2 ch (does not count as st), hdc in 3rd ch from hook and in each ch across. (93 hdc)
- R2: Turn, ch 4 (counts as 1 tr), ch 4, sk 3 sts, tr in next st. *Ch 4, sk 3 sts, tr in next st; repeat from * across to end. (Total: 23 mesh boxes)
- R3: Turn, ch 4 (counts as 1 tr), ch 5, tr in next tr. *Ch 5, tr in next tr; repeat from * across to end (last tr in 4th ch of turning chain).
- R4: Turn, ch 4 (counts as 1 tr), ch 6, tr in next tr. *Ch 6, tr in next tr; repeat from * across to end.
Section Marking (Raglan Setup):
Count mesh spaces from one end to the other and place stitch markers on the treble crochet stitches separating sections:
- Back Right: 3 mesh spaces -> Place Marker 1 on next tr st.
- Right Shoulder: 5 mesh spaces -> Place Marker 2 on next tr st.
- Front Yoke: 7 mesh spaces -> Place Marker 3 on next tr st.
- Left Shoulder: 5 mesh spaces -> Place Marker 4 on next tr st.
- Back Left: 3 remaining mesh spaces.
Continuing Mesh Rows with Corner Increases:
- R5: Turn, ch 4, work ch 7 and tr in each tr up to marked st. On marked st, work (2 tr, ch 2, 1 tr) into the same marked st; repeat from * across all 4 markers, ch 7 and tr in remaining sts to end.
- Join Yoke into Round: Bring the two back ends together and sl st into the 4th ch of the starting chain to join in the round.
- R6: Ch 4, work ch 7 and tr in each st. At each corner increase space, work (tr, ch 4, tr) into the corner ch-sp.
- R7: Ch 4, work ch 7 and tr in each st. At each corner space, work (tr, ch 6, tr) into the corner ch-sp.
- R8: Ch 4, work ch 7 and tr in each st. At each corner space, work (tr, ch 8, tr) into the corner ch-sp.
- R9: Work 1 sc in every chain stitch and treble stitch across until you reach the 1st marked corner.
Armhole Creation (Dividing Body and Sleeves):
- Armhole Join: At the 1st marked corner, ch 25 (or chain desired length to fit underarm/chest), sk all sleeve mesh spaces, and sc into the 2nd marked corner.
- Sc in each ch and st across the front section to the 3rd marked corner.
- Ch 25, sk all sleeve mesh spaces, and sc into the 4th marked corner.
- Sc across remaining back sts to starting point. Sl st to join.
- Fasten off black yarn and weave in ends.
Part 2: Orange Bodice & Hemline Edging
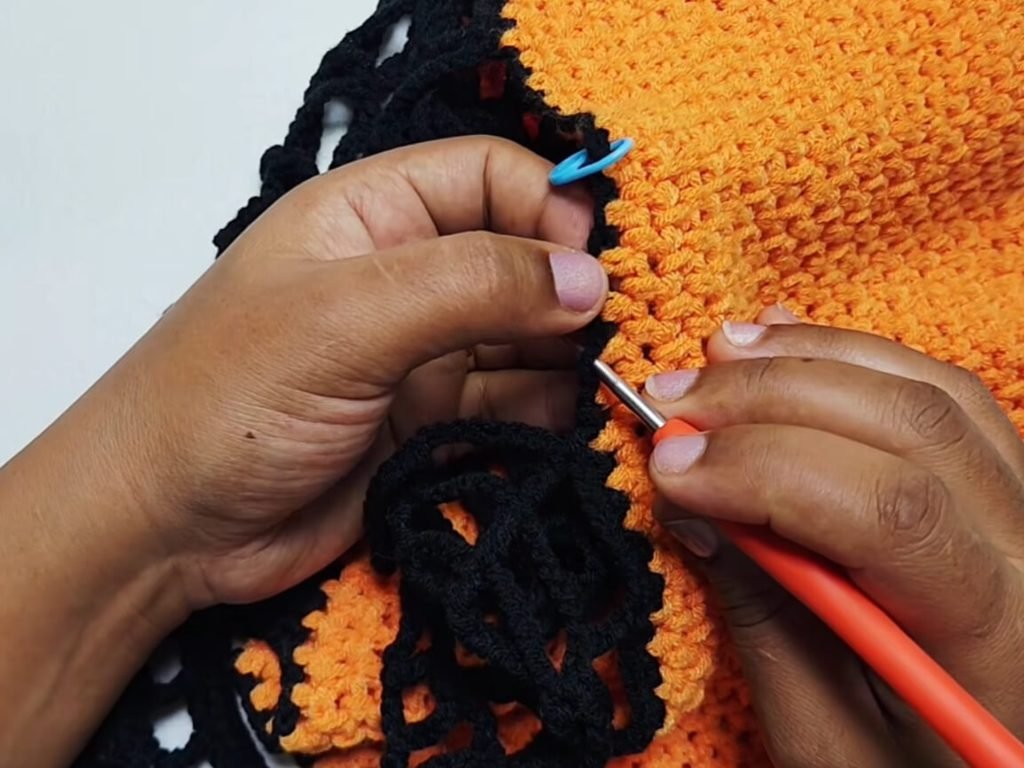
Attach Orange Yarn in any underarm sc stitch:
- R1: Ch 2, hdc in first st, *ch 1, sk 1 st, hdc in next st; repeat from * all the way around the armholes, front, and back bodice. Join with sl st to first hdc.
- R2: Turn, ch 1, sc in first ch-sp, sl st into loop to form turning space (counts as 1 hdc). *Ch 1, hdc in next ch-sp; repeat from * around. Join with sl st.
- R3–R22 (or desired bodice length): Repeat R2, working
hdc, ch 1in everych-sparound to build a solid, textured bodice.
Bottom Hemline Shell Edging:
- R23: *Sk 1 st, 3 dc into next ch-sp, sk 1 st, sc in next ch-sp; repeat from * around to create a subtle scalloped edge along the bottom hem. Sl st to first st to finish.
- Fasten off and weave in all yarn ends.
Part 3: Netting Sleeves
Reattach Black Yarn at the center underarm of one armhole loop:
- R1: Count 4 sts from center underarm, attach yarn, ch 4 (counts as tr), ch 8, tr in next mesh base st. Continue working around the armhole mesh opening with
ch 8, trspaces. - R2: Sk 4 sts on base, sc to join end of round. Sl st across next 4 sts, ch 8, turn.
- R3: Tr into previous row’s mesh loops across sleeve,
ch 8, tracross. - R4–R6: Repeat mesh rows back and forth to build short netting sleeve coverage down the upper arm.
- Fasten off black yarn. Repeat entire procedure for the opposite sleeve.
Final Assembly:
- Lay the completed crop top flat on a clean table.
- Position the 3 black bats horizontally across the top section of the orange bodice.
- Position the pumpkin in the center bottom area, with 1 white ghost on each side.
- Pin all appliques in place and use a tapestry needle with matching yarn/thread to sew them securely onto the orange bodice.
- Thread black yarn through the top back corners of the black yoke to create a lacing back tie cord (or attach small buttons if preferred).
Detailed Pattern Breakdown
1. Black Fishnet Yoke Construction
The upper shoulder section relies on open-work geometric mesh mechanics designed to sit flat across the collarbone while fanning out over the shoulders:
- Starting Base (R1–R4): Begins with a foundation of
hdcstitches to provide stability around the neck rim, immediately expanding into opentrmesh boxes (tr, ch 4up totr, ch 6). - Raglan Expansion (R5–R8): By marking 4 strategic points (2 back, 2 shoulders, 1 front), the mesh expands at an angle using custom corner V-stitches (
2 tr, ch 2, 1 trexpanding up toch 8spaces). This increases the overall diameter to match upper bust dimensions smoothly. - Armhole Separation (R9): Once the yoke reaches upper bust depth, chains are worked directly across underarm gaps to isolate the sleeve mesh loops from the main body section.
2. Textured Bodice & Hemline Transition
Transitioning from open black netting to a solid orange crop bodice creates contrast and coverage:
- Textured Mesh Stitches (R1–R22): The lower body uses alternating
hdcandch 1spaces worked into the open spaces of the previous round rather than into top loops. This builds a sturdy, slightly elastic fabric that holds its shape nicely while keeping the crop silhouette snug. - Hem Edge (R23): Finished off with classic 3-dc shell clusters anchored by single crochets to soften the bottom hem.
3. Applique Details & Final Touches
- Bespoke Motifs: The flat bat, ghost, and pumpkin appliques add dimensional character to the solid orange canvas.
- Laced Back System: A handmade chain cord woven through the back mesh openings allows full adjustability for a snug fit.
Pattern Questions & Answers
Q: Can I adjust this pattern to make a full-length top instead of a crop top?
A: Absolutely! To turn this crop top into a full-length top, simply continue repeating Row 2 of the orange bodice section (hdc, ch 1 in each ch-sp) until the top reaches your desired length from underarm to waist or hips. Once you reach your ideal length, finish off with the scallop shell edging row (Part 2, R23).
Q: My black mesh yoke is curling up at the shoulders. How can I fix this?
A: Curling usually happens if your tension on treble crochets (tr) is too tight or if the chain spaces between trebles are too short for your individual hand tension. Try going up half a hook size (to a 3.5 mm hook) specifically for the black mesh section, or add 1 additional chain stitch to the mesh loops across rows to allow the fishnet pattern to lie flat. Light wet blocking or steam blocking the black yoke before sewing appliques will also instantly smooth out any curling!
Q: How do I change the size from Small to Medium or Large?
A: Sizing up is very straightforward! Start by adding 8 or 16 additional stitches to your starting chain (Part 1 Foundation) so the neckline sits comfortably. When working the raglan increase rows (R5–R8), simply repeat R8 for 1 to 3 additional rows until the mesh length reaches your upper bust line. Finally, increase the underarm chain length in Part 1 from 25 chains to 30 or 35 chains to provide extra room across the bust.