
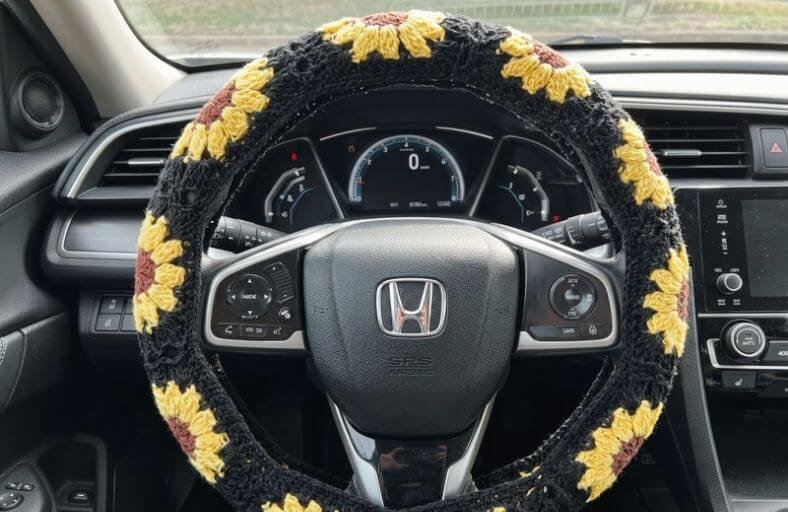
Is your car steering wheel feeling a bit plain, or getting way too hot in the summer and freezing in the winter?
Why not give your daily commute a charming, vintage upgrade with a handmade sunflower granny square steering wheel cover?
This project combines classic retro vibes with practical functionality, transforming simple yarn into a cozy, eye-catching car accessory that brightens every drive.
Materials and Preparation
Materials:
- Yarn: 100% Cotton yarn (recommended to prevent pilling and ensure durability through repeated washings) in three colors:
- Brown (for the sunflower centers)
- Yellow (for the sunflower petals)
- Black (for the main cover background and edging)
- Buttons: 4 black buttons (ensure the button holes are large enough for easy sewing and that they fit securely through the crochet grid gaps).
Tools:
- Crochet Hook: Size 4.5 mm (used intentionally with cotton yarn rated for 2.0–3.0 mm to achieve a looser, more flexible drape).
- Yarn Needle: For weaving in ends and sewing buttons.
- Tape Measure: To measure the steering wheel diameter and grip thickness.
- Stitch Marker: To mark the beginning of continuous rounds.
- Pins: For alignment during assembly.
- Scissors: For cutting yarn ends.
Preparation Notes:
- Measure your steering wheel prior to starting. Measure both the total outer circumference and the grip thickness (the circumference around the wheel tube itself).
- Account for stretch: total granny strip length should be approximately 4 inches (10 cm) shorter than your steering wheel circumference so the finished cover fits snugly without slipping.
Abbreviations and Notes
Abbreviations:
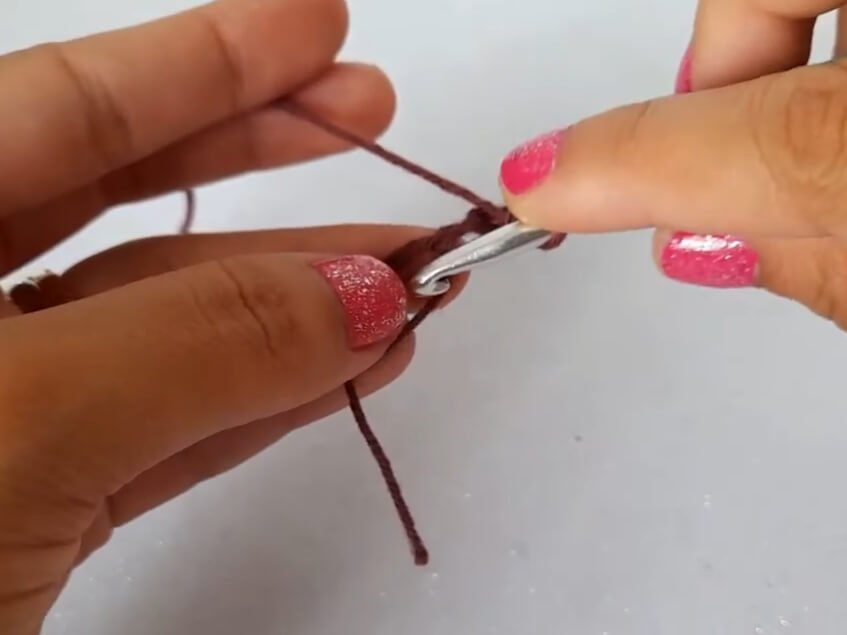
- MR: Magic Ring
- ch: Chain
- sc: Single Crochet
- dc: Double Crochet
- extended dc: Extended Double Crochet (yarn over, insert hook, pull up loop, yarn over and pull through 1 loop on hook, yarn over and pull through 2 loops, yarn over and pull through remaining 2 loops)
- dc3tog: Double Crochet 3 Together (used for cluster petals and worked in the same base stitch)
- sl st: Slip Stitch
- BLO: Back Loop Only
Pattern Notes:
- The motif center uses extended double crochets to create elongated petals for the sunflower center.
- The first granny square motif is completed in full (4 corners).
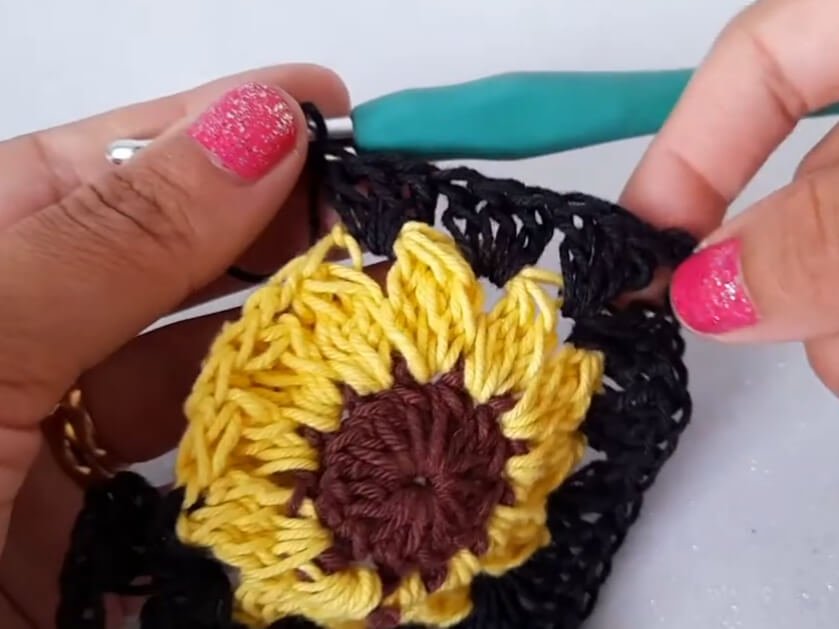
- Subsequent granny squares are joined to the previous square along one side on the final round using slip stitches.
- After joining all granny squares into a full ring, border rounds of single crochet are worked along both long outer edges to tighten the fit.
- Original pattern by Tejidos Joss.
Gauge, Approximate Size, and Pattern Notes
Gauge:
- Each individual sunflower granny square measures approximately 3.5 inches x 3.5 inches (9 cm x 9 cm).
Finished Size:
- Individual Square: 3.5 in x 3.5 in (9 cm x 9 cm).
- Total Strip Length (10 squares joined): ~43 in (~109 cm–110 cm), stretching comfortably to fit standard 15 in (38 cm) diameter steering wheels with a 47.2 in (120 cm) circumference.
- Grip Width Coverage: ~4 in (~10 cm).
Special Techniques:
- Extended Double Crochet Cluster (Petals): Creates elongated sunflower petals by pulling through one loop first before completing the stitch.
- Join-As-You-Go (JAYG): Connects each new granny square to the edge of the adjacent motif using slip stitches during the final round.
Step-by-Step Pattern
Part 1: Sunflower Granny Square Motifs
First Granny Square (Complete Motif):
Using Brown Yarn:
- R1: MR, ch 3 (counts as first dc), 11 dc into MR. Sl st to 3rd ch of initial ch-3 to join. Fasten off brown yarn. (12 sts)
Switch to Yellow Yarn:
- R2: Join yellow yarn in any st. Ch 3, [extended dc, extended dc] into same st (do not close each st until all 3 loops are on hook, then yarn over and pull through all loops to complete cluster), ch 2. [Work 3 extended dc cluster into next st, ch 2] repeat 11 times. Sl st to top of first cluster to join. Fasten off yellow yarn. (12 petals, 12 ch-2 spaces)
Switch to Black Yarn:
- R3: Sl st into first ch-2 space. Ch 3 (counts as 1 dc), 2 dc in same space, ch 3, 3 dc in same space (first corner made).
- [3 dc in next ch-2 space, 3 dc in next ch-2 space, (3 dc, ch 3, 3 dc) in next ch-2 space for corner] repeat 3 times.
- 3 dc in next ch-2 space, 3 dc in next ch-2 space. Sl st to top of initial ch-3 to join. Fasten off and weave in ends. (4 corners, 8 3-dc blocks)
Part 2: Joining Subsequent Motifs (Join-As-You-Go)
Motifs 2 through 10:
Work R1 and R2 exactly as in Part 1.
Switch to Black Yarn for R3 (Joining Side):
- R3: Work along 3 sides normally with (3 dc, ch 3, 3 dc) at corners and 3 dc in edge spaces.
- At Joining Corner: 3 dc in corner space, ch 1, sl st into corner space of adjacent finished granny square, ch 1, 3 dc back into working corner space.
- Along Joining Edge: [Sl st into corresponding space of adjacent granny square, 3 dc into next space of working granny square] repeat across edge.
- At Second Joining Corner: 3 dc in corner space, ch 1, sl st into corresponding corner space of adjacent granny square, ch 1, 3 dc back into working corner space.
- Complete remaining unjoined side(s) of working square as normal. Sl st to join, fasten off.
- Repeat process until all 10 granny squares form a single continuous strip.
Part 3: Ring Assembly and Edging
Part 3.1: Joining into a Circle
- Align the two open end edges of the 10-square strip together.
- Working with black yarn, sl st through both thickness loops edge-to-edge across the corners and spaces to close the strip into a continuous circular loop.
Part 3.2: Outer Side Borders (Top and Bottom Edges)
Work on both long outer circular edges of the cover:
- Round 1 (Edge 1): Join black yarn at any stitch along outer edge. Ch 1, sc in each stitch around. (Note: Skip center junction gaps between motifs to maintain tension). Sl st to join.
- Round 2 (Edge 1): Ch 1, sc in each sc around. Sl st to join. Fasten off.
- Rounds 1 & 2 (Edge 2): Repeat Round 1 and Round 2 for the opposite circular edge of the cover.
Part 4: Edging, Assembly & Finishing
- Weave in all remaining yarn tails securely on the inside of the work using a yarn needle.
- Space 4 black buttons evenly along the inner edge of the cover (one button at each quarter mark).
- Sew buttons securely using matching black thread or yarn.
- To install, wrap the cover over the car steering wheel and push each button through the corresponding crochet mesh space on the opposite edge to lock the cover tightly into place.
Detailed Pattern Breakdown
1. Sunflower Center & Elongated Petal Construction:
- Round 1 (Brown Center): Establishes a firm 12-stitch base within a Magic Ring (
MR), creating 12 anchor points for the petals. - Round 2 (Yellow Petals): Employs extended double crochets (
extended dc) combined into 3-stitch clusters (dc3togin same stitch). By drawing yarn through a single loop first, each petal achieves extra vertical height, giving the sunflower a radiant, defined look.
2. Squaring the Circle & Join-As-You-Go Strategy:
- Round 3 (Black Frame): Converts the 12-point circular flower into a 4-corner granny square by placing corner shells (
3 dc, ch 3, 3 dc) separated by two side blocks (3 dc). - Seamless Joining: Utilizing slip stitches (
sl st) directly into the chain spaces of the neighboring motif eliminates thick sewn seams, ensuring the wheel cover remains smooth and comfortable under hand grip.
3. Structural Tension & Closure Mechanics:
- Dual-Round Single Crochet Borders (
sc): Working 2 continuous rounds of single crochet along both outer ring edges reduces stretch fatigue, pulling the cover edges inward so it wraps snugly around the wheel rim. - Button Anchor System: Sewing 4 buttons at 90-degree intervals allows easy removal for laundering while utilizing the natural crochet grid gaps as buttonholes.
Pattern Question
Question: Why does the pattern use a larger 4.5 mm hook when cotton yarn usually recommends a 2.0 mm to 3.0 mm hook, and how do I prevent the cover from slipping on the wheel?
Answer: Using a 4.5 mm hook with standard cotton yarn creates a softer, more flexible fabric with greater elasticity, making it easier to stretch over the thick rim of a steering wheel.
To prevent slipping, ensure your total strip of granny squares is crocheted roughly 10% shorter (about 4 inches / 10 cm less) than the measured circumference of your steering wheel.
The natural tension from stretching the smaller cover onto the larger wheel, combined with tightening the single crochet border rounds, creates a secure friction fit.