
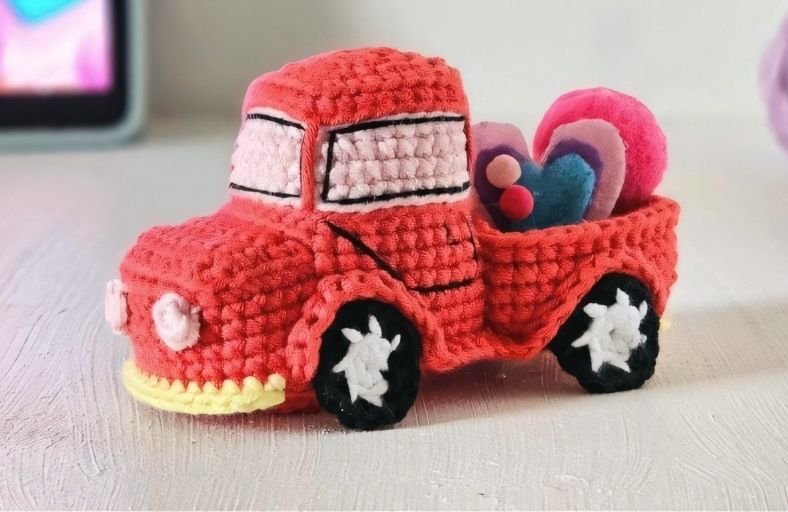
Who said toy trucks are only for kids?
Whether you want to haul a bed full of crocheted hearts, seasonal pumpkins, mini plushies, or simply build a charming desktop display, this Crochet Vintage Pickup Truck is the ultimate cozy crafting project.
Featuring clear glass-style windows, distinct wheel wells, cute pink headlights, and a sturdy 3D body structure, this pattern turns simple yarn into a masterpiece full of nostalgic charm.
Materials and Preparation
Materials:
- Red Yarn: Main body color for the cab, hood, and truck bed (approx. 26 g / 0.92 oz).
- Pink Yarn: Window glass details and cute headlights (approx. 3.5 g / 0.12 oz).
- Black Yarn: Tires and embroidered outline details (approx. 2.5 g / 0.09 oz).
- White Yarn: Wheel hubs/rims (approx. 1.5 g / 0.05 oz).
- Pastel Yellow Yarn: Front and rear bumpers (approx. 1.0 g / 0.04 oz).
- Stuffing: Fiberfill / Polyfill to give the cab and body structure without overstuffing.
- Embroidery Floss: Black embroidery thread for outlining windows and door handles.
Tools:
- Crochet Hook: 3.0 mm (or 4.0 mm for worsted weight yarn, depending on preferred gauge).
- Yarn Needle: Tapestry needle for sewing panels, attaching tires, and embroidering details.
- Stitch Marker: Essential for tracking joined rounds and row turns.
- Scissors: For trimming yarn tails.
Preparation Notes:
- Maintain a snug, even tension throughout the project so the stuffing does not poke through the stitches.
- Pay close attention to joining rounds and working into specific loops (
BLO/FLO), as these create crisp 3D geometric edges for the truck body.
Abbreviations and Notes
Abbreviations:
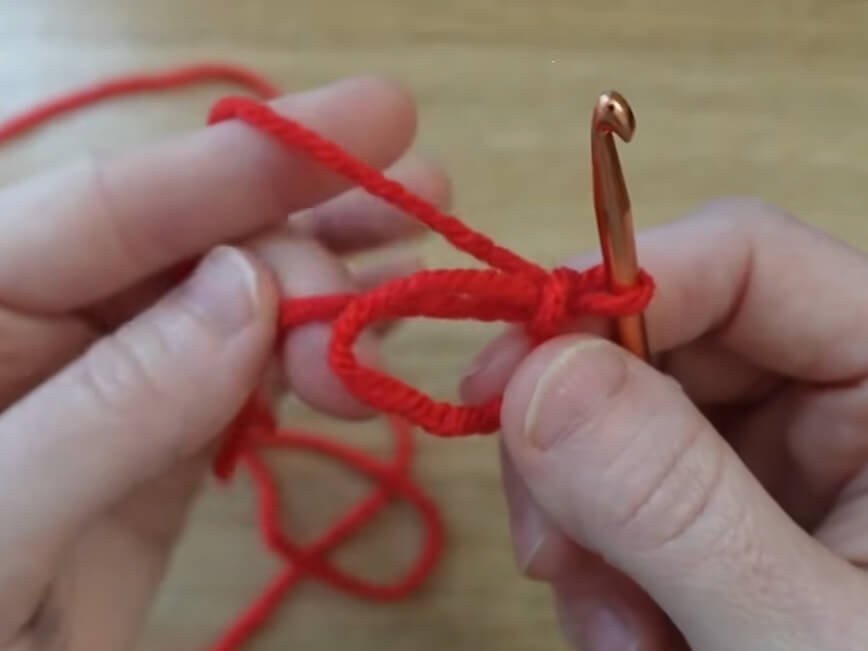
- MR: Magic Ring
- ch: Chain stitch
- sc: Single crochet
- inc: Single crochet increase (2 sc in the same stitch)
- dec: Single crochet decrease (sc2tog)
- sc3tog: Single crochet 3 together (3 sc joined into 1 stitch)
- sl st: Slip stitch
- BLO: Back Loop Only
- FLO: Front Loop Only
Pattern Notes:
- The truck cab and truck bed are worked in joined rounds (sl st to the first stitch and ch 1 before starting each new round).
- The hood, bottom panel, and wheel wells transition into flat row crocheting before assembly.
- Do not overstuff the cab section; keeping the fill firm yet flexible allows the windows and hood to hold their flat, boxy shape.
Gauge, Approximate Size, and Pattern Notes
Gauge:
Gauge is not critical for this pattern. However, using a hook size smaller than yarn label recommendations ensures tight stitches that hold their shape.
Finished Size:
Approximately 5.5 inches (14 cm) long, 3.2 inches (8 cm) wide, and 3.5 inches (9 cm) tall when using standard DK/Worsted yarn with a 3.0 mm – 4.0 mm hook.
Special Techniques:
- Corner Sculpting (3 sc in 1 st): Placed strategically at four points to convert circular magic rings into rectangular box shapes.
- Structural Ridge Creation (BLO / FLO): Used when transitioning between horizontal panels and vertical walls.
- Surface Join & Whipstitch: Seamlessly attaches flat panels to rounded bases without adding bulk.
Step-by-Step Pattern
Part 1: Truck Cab & Hood
Worked from top to bottom in Red and Pink yarn:
- R1: Using Red yarn, MR 8 sc, sl st to first st, ch 1 (8)
- R2: inc in each st around, sl st, ch 1 (16)
- R3: (1 sc in next 3 st, 3 sc in next st)*4, sl st, ch 1 (24)
- R4: 1 sc in next 4 st, 3 sc in next st, (1 sc in next 5 st, 3 sc in next st)*3, 1 sc in last st, sl st, ch 1 (32)
- R5: BLO 32 sc around, sl st (32)
- R6: Attach Pink yarn, BLO sl st in all 32 st around, sl st, ch 1 (32)
- R7: BLO 32 sc around in Pink yarn, sl st, ch 1 (32)
- R8: 1 sc in next 13 st, 3 sc in next st, 1 sc in next 8 st, 3 sc in next st, 1 sc in next 9 st, sl st, ch 1 (36)
- R9–R10: 36 sc around, sl st, ch 1 (36)
- R11: Attach Red yarn, BLO sl st in all 36 st around, sl st, ch 1 (36)
- R12: BLO 36 sc around in Red yarn, sl st, ch 1 (36)
Truck Hood Extension:
Fasten on Red yarn at the 16th stitch of R12 to work the hood in flat rows:
- Row 1: BLO 10 sc across, ch 1, turn (10)
- Row 2–Row 4: 10 sc across, ch 1, turn (10)
- Row 5: 10 sc across, fasten off and weave in end (10)
Joining Cab & Hood:
Reattach Red yarn to the long loop left hanging on R12 of the cab:
- R13: 1 sc in next 15 st of cab, 5 sc up side of hood, 10 sc across top front of hood, 5 sc down other side of hood, 11 sc across remaining cab stitches, sl st, ch 1 (46)
- R14: 1 sc in next 15 st, BLO 20 sc across hood region, 1 sc in next 11 st, sl st, ch 1 (46)
- R15–R17: 46 sc around, sl st, ch 1 (46)
- R18: 46 sc around, sl st to first st, fasten off leaving a 24-inch tail (46)
Part 2: Bottom Panel & Truck Bed
Bottom Panel (Base)
Work with Red yarn in rows:
- Foundation: Ch 9
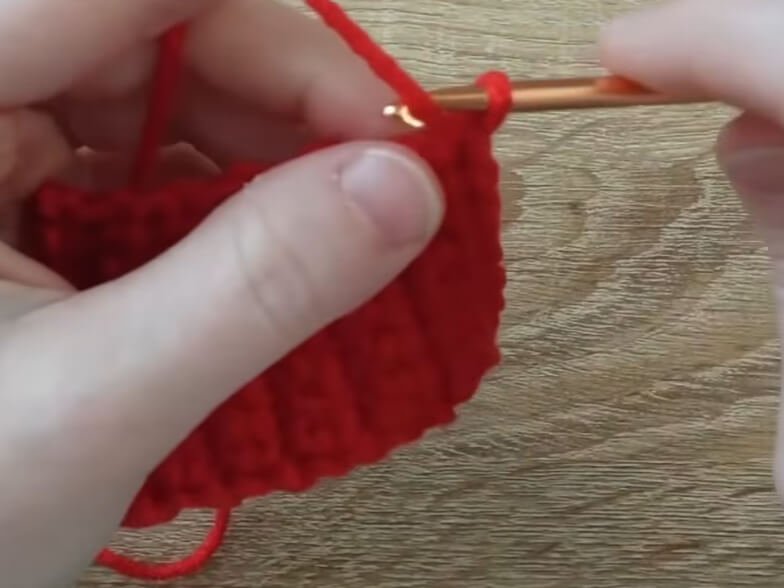
- Row 1: Starting in 2nd ch from hook, 8 sc, ch 1, turn (8)
- Row 2–Row 12: 8 sc across, ch 1, turn (8)
- Row 13 (Edging): 1 sc in side of current row, 12 sc along side edge, ch 1, 8 sc along bottom foundation chain, ch 1, 12 sc along opposite side edge, sl st to join, fasten off leaving a 24-inch tail for assembly.
Truck Bed (Cargo Box)
Work with Red yarn in joined rounds:
- R1: MR 8 sc, sl st, ch 1 (8)
- R2: inc in each st around, sl st, ch 1 (16)
- R3: (1 sc in next 2 st, 3 sc in next st, 1 sc in next 4 st, 3 sc in next st)*2, sl st, ch 1 (24)
- R4: 1 sc in next 3 st, 3 sc in next st, 1 sc in next 6 st, 3 sc in next st, 1 sc in next 4 st, 3 sc in next st, 1 sc in next 6 st, 3 sc in next st, 1 sc in last st, sl st, ch 1 (32)
- R5: 1 sc in next 4 st, 3 sc in next st, 1 sc in next 8 st, 3 sc in next st, 1 sc in next 6 st, 3 sc in next st, 1 sc in next 8 st, 3 sc in next st, 1 sc in last 2 st, sl st, ch 1 (40)
- R6: BLO 40 sc around, sl st, ch 1 (40)
- R7–R9: 40 sc around, sl st, ch 1 (40)
- R10: BLO 40 sc around, sl st, ch 1 (40)
- R11–R13: 40 sc around, sl st, ch 1 (40)
- R14: FLO (1 sc in next 4 st, sc3tog, 1 sc in next 8 st, sc3tog, 1 sc in next 6 st, sc3tog, 1 sc in next 8 st, sc3tog, 1 sc in last 2 st), sl st, ch 1 (32)
- R15: 1 sc in next 3 st, sc3tog, 1 sc in next 6 st, sc3tog, 1 sc in next 4 st, sc3tog, 1 sc in next 6 st, sc3tog, 1 sc in last st, sl st, ch 1 (24)
- R16: (1 sc in next 2 st, sc3tog, 1 sc in next 4 st, sc3tog)*2, sl st, ch 1 (16)
- R17: 8 dec around, sl st to join, fasten off leaving a 24-inch tail (8)
- Bed Lip Edging: Attach Red yarn to the FLO ridges left on R10, sc in each loop around (40 sc), sl st, fasten off leaving a long tail for attachment.
Part 3: Accessories & Details
Wheels (Make 4)
- R1: Using White yarn, MR 7 sc (7)
- R2: Change to Black yarn, BLO inc in each st around (14 sc), sl st, fasten off leaving a long tail for sewing.
Headlights (Make 2)
- R1: Using Pink yarn, MR 4 sc, sl st to first st, fasten off leaving a tail to attach.
Bumpers (Front & Back)
- Attach Pastel Yellow yarn next to the wheel well edge on the bottom of the truck.
- Front Bumper: 13 sc across front edge, sl st to corner, fasten off.
- Rear Bumper: 13 sc across rear edge, sl st to corner, fasten off.
Part 4: Assembly, Edging & Finishing
- Window & Door Embroidery:
- Use Red yarn to stitch vertical dividing lines between the side windows and windshield.
- Use Black embroidery floss to outline the perimeter of each pink window section.
- Embroider an inverted “L” shape on each side cab door for the door frame and handle.
- Stuffing & Bottom Panel Attachment:
- Align the rectangular Bottom Panel to the lower open base of the Cab and Hood.
- Whipstitch three sides securely using Red yarn and a tapestry needle.
- Fill the hood and cab firmly with Polyfill (do not overstuff to keep walls flat), then whipstitch the final side closed.
- Truck Bed Attachment:
- Cinch the bottom of the Truck Bed closed using the 24-inch tail and fold it into a rectangular box shape.
- Position the front of the Truck Bed flat against the rear of the Cab.
- Whipstitch the lower base of the bed to the bottom truck panel, then stitch up the sides to secure it firmly to the back of the cab.
- Wheel Wells & Tires:
- Sew two tires on each side of the truck (positioned so the lower half hangs slightly below the bottom edge).
- Attach Red yarn near the rear wheel on the truck bed, sc around the top rim of the back tire, sc along the side panel, sc around the top rim of the front tire, and fasten off to create continuous wheel wells.
- Bumpers & Headlights:
- Crochet Pastel Yellow bumpers directly between the wheel wells on the front and back base.
- Sew the two Pink headlight circles onto the front grille space right above the bumper.
Detailed Pattern Breakdown
1. Cab and Hood Box Shaping Breakdown
Building a 3D vehicle requires converting rounded crochet circles into sharp rectangular structures:
- Top Roof (R1–R4): Starts as a basic
MR 8 sc. In R3 and R4, placing3 sc in 1 stat four evenly spaced corners forces the round circle into a sharp square roof shape. - Window Inset (R5–R7): Working R5 in
BLOcreates a horizontal ledge that drops 90 degrees downward to form vertical cabin walls. The pink yarn transition in R6–R7 simulates glass paneling. - Hood Extension (Rows 1–5): Rather than crocheting a separate piece, 10 sc are worked directly into the front roof ridge in back-and-forth flat rows. R13 then circles around all 3 open sides of the hood to lock it directly into the main truck body.
2. Double-Walled Cargo Bed Breakdown
The truck bed uses a clever double-wall technique to create a hollow container that holds its shape without stuffing:
- Outer Base & Walls (R1–R9): The outer box is formed through corner increases (
3 sc in 1 st) until it reaches 40 stitches. Working R6 inBLOcreates a crisp lower perimeter ridge. - Inner Fold Line (R10): Working R10 in
BLOcreates an internal fold point. - Inner Lining & Cinch (R11–R17): Rounds 11–13 rise upward before R14–R17 perform mirror-image decreases (
sc3tog). When cinched shut at R17 and pushed inward, the inner layer nests inside the outer layer, creating a thick, rigid 3D cargo box.
3. Wheel Wells, Bumpers, and Finishing Breakdown
Small custom accents elevate this project from a plain block into a detailed vintage truck:
- Two-Tone Wheels: R1 in white yarn forms the wheel hub, while R2 in black yarn (
BLO inc) expands into a dark tire rim. - Sculpted Wheel Wells: Working single crochet stitches across the top back loops of attached tires creates an integrated fender flare that ties the wheels directly into the truck body.
- Embroidered Accents: Black embroidery thread defines individual window panes and door handles, giving the completed amigurumi truck its iconic classic look.
Pattern Question:
Question: How do I ensure my crochet truck keeps its crisp rectangular shape and flat roof without sagging over time?
Answer: To maintain a sharp, boxy look, focus on three key techniques:
- Hook Size & Tension: Use a hook size slightly smaller than standard for your yarn weight (such as a 3.0 mm hook with worsted yarn) to produce tight, rigid stitches.
- Sharp Loops (
BLO/FLO): Do not skip the back-loop-only rounds (BLO). These stitches create sharp 90-degree corner folds that hold the cab walls and hood flat. - Smart Stuffing: Fill the main cab firmly with fiberfill, but avoid overstuffing. Overstuffing turns flat panels into rounded balls. If you want extra-rigid walls, you can place small rectangular pieces of plastic canvas or heavy cardboard inside the roof and hood panels before closing up the bottom.