
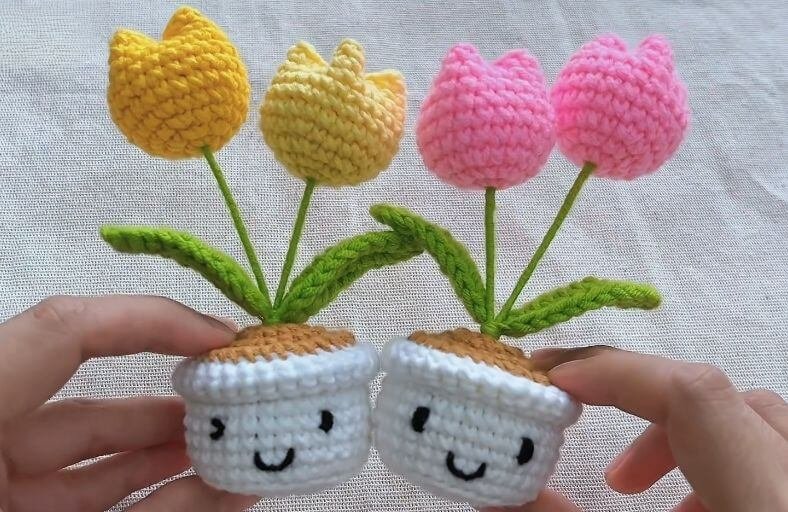
Looking to bring a touch of eternal spring onto your desk or windowsill without the hassle of daily watering?
This adorable Crochet Mini Tulip Pot is the ultimate desk companion and hand-crafted gift that will never wither!
Featuring two cheerful tulip buds peeking out of a tiny potted plant base, this project blends simple stitches with clever wire-shaping techniques to create a sturdy, freestanding decorative piece.
Materials and Preparation
Materials:
- Yarn:
- White yarn for the flower pot.
- Light brown or beige yarn for the soil inserts.
- Green yarn for the stems and leaves.
- Pink or Yellow yarn (or your favorite blossom color) for the tulip buds.
- Black thread/yarn for embroidered facial details (optional).
- Stuffing: Polyfill fiberfill cotton for stuffing the pot base and tulip buds.
- Craft Wire:
- Two 16 cm (approx. 6.3 in) pieces of craft wire for the leaf support.
- Two 10 cm (approx. 3.9 in) pieces of wire for the main flower stems.
- Adhesive: Craft glue or hot glue for wrapping yarn around stem wires.
Tools:
- Crochet Hook: 2.0 mm – 2.5 mm hook (recommended to keep stitches snug and prevent stuffing leak).
- Yarn Needle: Tapestry needle for sewing parts together and cross-stitching tulip tops.
- Stitch Marker: To mark the end of continuous rounds.
- Scissors & Wire Cutters: For cutting yarn and shaping stem wires.
Preparation Notes:
- Practice your basic stitches like single crochet (
sc), half double crochet (hdc), and working into specific loops (BLOandFLO). - Have your craft wire pre-cut to size so you can easily incorporate it into the leaf stitches and assemble the stems without breaking your crochet flow.
Abbreviations and Notes
Abbreviations:
- MR: Magic Ring
- ch: Chain stitch
- sc: Single Crochet
- inc: Single Crochet Increase (2 sc in the same stitch)
- dec: Single Crochet Decrease (sc2tog / 2 sc worked together)
- hdc: Half Double Crochet
- sl st: Slip Stitch
- BLO: Back Loop Only
- FLO: Front Loop Only
Pattern Notes:
- The flower pot, soil, and tulip buds are worked in continuous or joined rounds. Pay attention to specific round instructions for joining with
sl standch 1. - When making the leaves, craft wire is crocheted directly along the base chain to give them structure and flexibility.
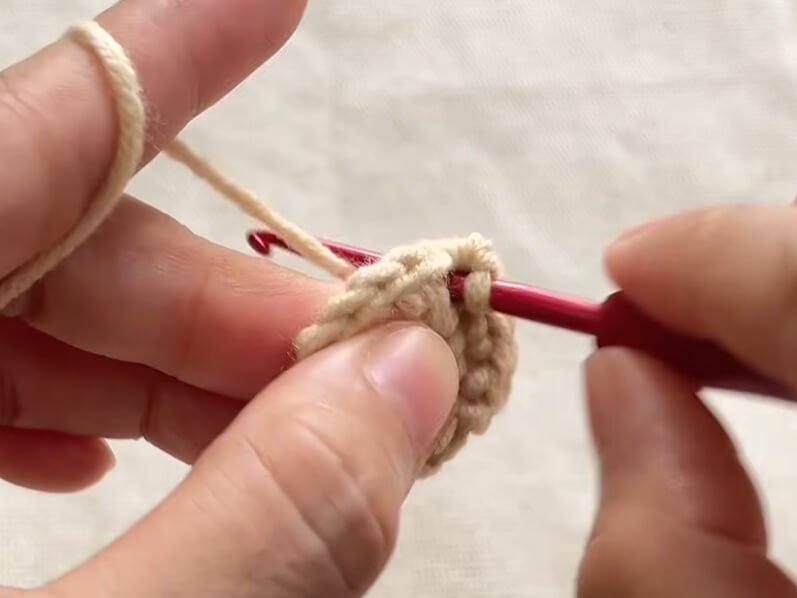
Gauge, Approximate Size, and Pattern Notes
Gauge:
Gauge is not strictly essential for this project, but keeping a firm, uniform tension ensures that the polyfill cotton stays hidden inside the pot and flower buds.
Finished Size:
Approximately 4 inches to 5 inches (10 cm to 13 cm) tall including the tulip flowers and pot.
Special Techniques:
- Wire Crocheting: Laying craft wire on top of base chains while working stitches over it to embed the wire seamlessly inside the leaves.
- Cross-Stitch Tulip Top: Folding the top open edge of the tulip cylinder into four equal quadrants and sewing a cross-stitch to create a signature 3D tulip bloom shape.
- BLO / FLO Ridge Shaping: Using
BLOon the pot bottom creates a crisp flat base, whileFLOon the pot rim creates a folded lip.
Step-by-Step Pattern
Part 1: Plant Pot & Soil
Flower Pot
Using White Yarn:
- R1: MR 8 sc, sl st into first sc, ch 1 (8)
- R2: 8 inc, sl st, ch 1 (16)
- R3: (1 sc, inc)*8, sl st, ch 1 (24)
- R4: (2 sc, inc)*8, sl st, ch 1 (32)
- R5: BLO 32 sc, sl st, ch 1 (32)
- R6–R11: 32 sc, sl st, ch 1 (32) (6 rounds in total)
- R12: FLO 32 sc, sl st, ch 1 (32)
- R13: 32 sc, sl st, ch 1 (32) Fasten off, cut yarn, and weave in ends. Fold the top edge along R12 to form the pot rim.
Soil Insert
Using Light Brown/Beige Yarn:
- R1: MR 8 sc, pull tightly leaving a tiny center hole for flower stems, sl st, ch 1 (8)
- R2: 8 inc, sl st, ch 1 (16)
- R3: (1 sc, inc)*8, sl st, ch 1 (24)
- R4: (2 sc, inc)*8, sl st, ch 1 (32) Fasten off, leaving a long yarn tail for sewing to the pot.
Part 2: Tulip Buds
Make 2 using Pink, Yellow, or preferred blossom color yarn:
- R1: MR 6 sc (6)
- R2: 6 inc (12)
- R3: (1 sc, inc)*6 (18)
- R4: (2 sc, inc)*6 (24)
- R5–R10: 24 sc (24) (6 rounds in total)
- R11: 1 sl st, ch 1 to fasten off. Leave a long tail for sewing and shaping. Stuff the tulip bud firmly with polyfill cotton.
Part 3: Leaves & Accessories
Leaves
Make 2 using Green Yarn and 16 cm craft wire:
- Base Chain: Ch 12.
- Working over wire: Place craft wire on top of working yarn and under the hook.
- R1: Starting in 2nd ch from hook: 1 sc, 1 hdc, 6 hdc, 3 sc, ch 2.
- Turn & work on opposite side of chain: 1 sc into same ch, 2 sc, 7 hdc, 1 sc into last ch.
- Finish: Sl st into first st, ch 1 to fasten off. Cut yarn and wrap remaining yarn tails neatly around the bottom wire ends.
Stems & Assembly Preparation
- Stem Wires: Take two 10 cm wire pieces. Apply craft glue and wrap green yarn around both wires to create sturdy flower stems.
- Tulip Bud Shaping: Push the top of a wrapped green stem through the small hole in the base of a stuffed tulip bud. Pin the top edge of the tulip cylinder together in a cross shape, sewing across opposite sides to form four rounded tulip petals.
Part 4: Edging, Assembly & Finishing
- Attach Flowers to Soil: Insert the lower ends of the wrapped stem wires through the central opening of the brown soil insert.
- Join Stem & Leaves: Wrap green yarn around the lower section where both stems join together, securing the wire ends of the two leaves onto the stems roughly 5 cm below the flowers.
- Assemble Pot: Fill the white flower pot base with polyfill cotton stuffing.
- Sew Soil to Pot: Position the soil disc onto the top of the stuffed pot and use the long brown yarn tail with a tapestry needle to whip stitch the outer edge of the soil to the inner loop ridge of the pot.
- Facial Details (Optional): Use black embroidery floss to sew cute eyes and a smile onto the front of the white pot for an adorable kawaii finish!
Detailed Pattern Breakdown
1. Flower Pot & Soil Structure
- Base Stability: Working R1 through R4 expands the flat circular base to 32 stitches. Switching to BLO on R5 forces the wall of the pot to turn upward at a crisp 90 degree angle, ensuring the finished pot stands upright smoothly.
- Rim Folding: Working in FLO on R12 leaves the back loops exposed internally while building a 2-round lip. When folded downward, this creates a realistic terracotta pot rim texture.
- Soil Fitting: The soil circular disc replicates the exact 32 stitch count of the pot opening, guaranteeing a seamless round-for-round match when whip-stitching the two components together.
2. Tulip Bud Geometry
- Dome Base to Cylinder: The tulip starts with standard Amigurumi round increases (
MR 6 scexpanding to 24 stitches). Holding 24 stitches straight across R5–R10 forms an open cup shape. - 4-Point Cross Closing: Rather than decreasing down to a point, stuffing the cylinder and sewing a 2-pass cross stitch across the open top folds the circular edge into four distinct rounded petals, instantly producing a iconic tulip silhouette.
3. Wire Integration & Branching
- Structured Leaves: Encasing 16 cm craft wire underneath the single crochet and half double crochet stitches along the central leaf spine provides complete poseability so the leaves can curve naturally around the stems.
- Dual Stem Binding: Staggering the stem joins and wrapping green yarn tightly along the junction binds the two flowers, wire ends, and leaf bases into a single stable trunk that embeds securely inside the stuffed pot.
Pattern Question
Question 1: Why are my tulip leaves floppy, and how can I ensure the wire stays hidden inside the stitches?
Answer: Floppy leaves occur if the craft wire is too thin or if stitch tension is loose. Make sure to use a firm craft wire (around 20–22 gauge) and hold the wire snugly against the top of your foundation chains as you yarn over. The hook should grab the yarn from under the wire so every stitch wraps directly around it.
Question 2: How do I prevent the stems from leaning over or pulling out of the soil?
Answer: Make sure you bend the bottom ends of the stem wires into small L-shapes or loops beneath the soil insert before stuffing the pot. The polyfill cotton inside the pot will compress around these wire loops, anchoring the stems firmly upright.
Question 3: Can I customize the size of the pot to hold three tulips instead of two?
Answer: Absolutely! To add a third tulip, expand the pot and soil base by adding one more increase round (R5: 3 sc, inc * 8 = 40 sts) before making the BLO wall turn. This expands the pot diameter slightly, providing plenty of room for three stems and extra leaves.