
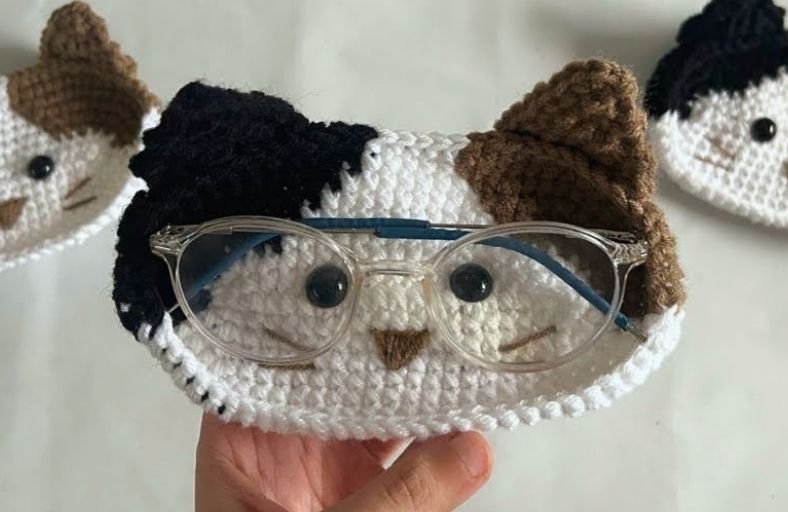
Ever set your glasses down on the nightstand or desk, only to spend ten frantic minutes searching for them the next morning?
What if a cozy, adorable calico cat was waiting right there to hold them for you?
This cute Crochet Calico Cat Eyeglass Holder brings functional charm to your daily routine, serving as a clever desk organizer and an undeniable conversation starter!
Crafted with simple stitches and colorful patches, this project works up surprisingly fast.
Whether you are creating a thoughtful handmade gift or giving your specs a purr-fect resting place, this written pattern provides everything you need to bring this cute kitty to life!
Materials and Preparation
Materials:
- Yarn:
- Main Color: White yarn (double-stranded if using 3-ply, or single-stranded 4-ply / DK / Worsted weight)
- Contrast Colors: Brown yarn and Black yarn for the calico patch details
- Safety Eyes: 1 pair of 8mm – 10mm black safety eyes with backings
- Embroidery Thread / Yarn: Small amount of brown yarn or embroidery thread for the nose and whisker details
Tools:
- Crochet Hook: Size 3.5 mm (E-4) crochet hook
- Yarn Needle: Tapestry / yarn needle for embroidery and sewing ears
- Stitch Marker: Essential for tracking rounds
- Scissors: Sharp craft scissors
Preparation Notes:
- If you are working with lighter 3-ply yarn, hold two strands together throughout the project to ensure the base is sturdy enough to cradle your glasses.
- Keep your yarn tails organized while changing colors across rounds. Carrying unused strands loosely along the back side of your work keeps the front neat and clean!
Abbreviations and Notes
Abbreviations:
- ch: Chain stitch
- sc: Single crochet
- inc: Single crochet increase (2 sc in the same stitch)
- dec: Single crochet decrease / sc2tog (2 sc worked together)
- sl st: Slip stitch
- st(s): Stitch(es)
- MC: Main color (White)
- CC1: Contrast color 1 (Brown)
- CC2: Contrast color 2 (Black)
Pattern Notes:
- The main body is worked in continuous oval rounds around a foundation chain, transitioning into tapestry crochet colorwork for the brown and black patches.
- The ears are worked separately in flat rows, finished with an edging, and then sewn securely onto the upper rim.
- Color changes should be executed on the final yarn-over of the preceding stitch to ensure smooth transitions between patches.
- Original design and pattern credit belongs to Plakshi Jain Crochet.
Gauge, Approximate Size, and Pattern Notes
Gauge:
Gauge is not critical for this functional holder, but maintaining a firm, even tension will keep the structure upright and secure.
Finished Size:
Approximately 6.5 inches (16.5 cm) wide by 4 inches (10 cm) tall (including ears), fitting most standard reading glasses and prescription frames seamlessly.
Special Techniques:
- Tapestry Color Changes: Seamlessly switch between White, Brown, and Black yarn strands to create asymmetrical calico markings.
- Surface Embroidery: Simple straight stitches form the cute triangular nose and classic feline whiskers.
Step-by-Step Pattern
Part 1: Main Holder Body (Calico Pouch Base)
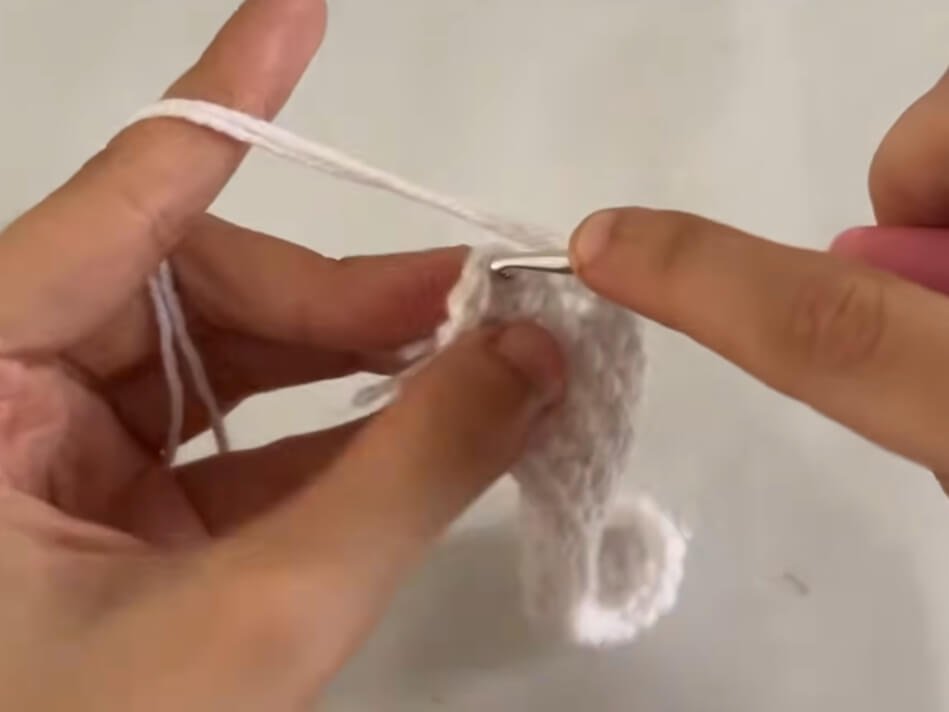
Start with White Yarn (or double-stranded 3-ply white yarn):
- Foundation: Ch 20.
- R1: Skip 1st ch from hook, inc in 2nd ch, 17 sc, 3 sc in last ch. Turn to work along opposite side of foundation chain: 16 sc, inc in last ch, sl st to 1st sc, ch 1. (40 sts)
- R2: inc in same st, inc in next st, 17 sc, 3 inc, 17 sc, inc, sl st to 1st sc, ch 1. (46 sts)
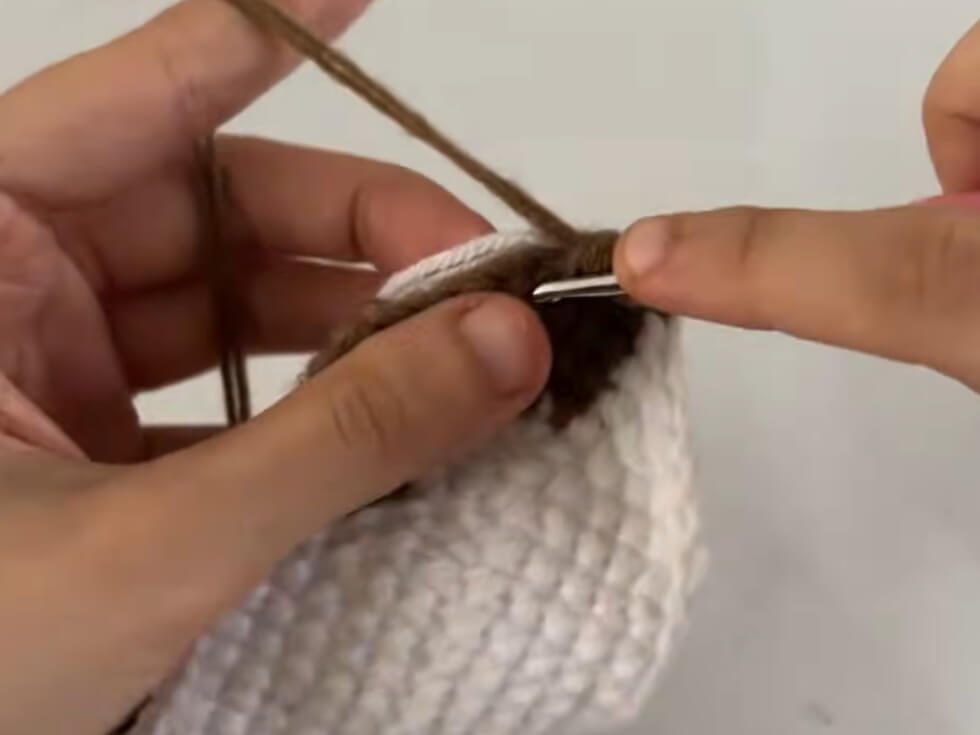
- R3: Join Brown yarn (CC1). 1 sc, inc, 1 sc, inc, 2 sc in Brown (switch to White in 2nd sc), 15 sc in White (switch to Black in 15th sc), 2 sc in Black (CC2), inc in Black, 1 sc in Black, inc in Black (switch to White in 2nd sc of inc), 1 sc in White, inc in White, 17 sc in White, 1 sc in White, inc in White, sl st to 1st sc, ch 1. (52 sts)
- R4: Attach Brown yarn. 2 sc in Brown, inc in Brown, 2 sc in Brown, inc in Brown, 1 sc in Brown (switch to White), 14 sc in White (switch to Black), 1 sc in Black, inc in Black, 2 sc in Black, inc in Black (switch to White), 2 sc in White, inc in White, 17 sc in White, 2 sc in White, inc in White, sl st to 1st sc, ch 1. (58 sts)
- R5: 3 sc in Brown, inc in Brown, 3 sc in Brown, inc in Brown, 1 sc in Brown (switch to White), 13 sc in White (switch to Black), 1 sc in Black, inc in Black, 3 sc in Black, inc in Black (switch to White), 3 sc in White, inc in White, 17 sc in White, 3 sc in White, inc in White, sl st to 1st sc, ch 1. (64 sts)
- R6–R8:Working even rounds with no increases (1 sc in each st around):
- Continue carrying Brown and Black yarns on their respective sides, expanding each color patch by 1 extra stitch per round as desired for an organic calico look.
- Work remaining stitches across the back and center in White. (64 sts)
- Fasten off White, Brown, and Black yarns, leaving a clean tail to weave in.
Part 2: Cat Ears (Make 2: 1 in Brown, 1 in Black)
Worked in flat rows:
- Foundation: Ch 9.
- R1: Skip 1st ch, 8 sc. (8)
- R2: Ch 1, turn. Skip 1st st, 5 sc, skip 1 st, 1 sc in last st. (6)
- R3: Ch 1, turn. 4 sc, skip 1 st, 1 sc in last st. (5)
- R4: Ch 1, turn. Skip 1st st, 4 sc. (4)
- R5: Ch 1, turn. 2 sc, skip 1 st, 1 sc in last st. (3)
- R6: Ch 1, turn. Skip 1st st, 2 sc. (2)
- R7: Ch 1, turn. Skip 1st st, 1 sc. (1)
- Edging: Ch 1, single crochet evenly down the side of the ear to create a clean border. Sl st across bottom edge.
- Fasten off, leaving a long tail (approx. 10–12 inches) for sewing.
Part 3: Assembly & Finishing
- Ear Placement: Position the Black Ear on the upper left patch and the Brown Ear on the upper right patch of the holder rim. Using your yarn needle and the long yarn tails, stitch the bottom of each ear securely to the top edge of the holder.
- Eye Attachment: Place safety eyes between Round 4 and Round 5 of the white face area, spacing them approximately 5 stitches apart. Secure backings inside the holder.
- Embroider Nose & Whiskers:
- Thread a needle with brown yarn.
- Embroider a small inverted triangle in the center between the eyes for the nose.
- Stitch 2 to 3 straight horizontal whisker lines extending outward on each cheek.
- Final Touch: Tuck in and weave all loose ends inside the pouch. Insert your favorite pair of eyeglasses or sunglasses into the holder!
Detailed Pattern Breakdown
1. Oval Base Construction & Patch Foundations (R1 – R5)
- Foundation & Rim Width: Starting with 20 chain stitches allows the base to lay flat while establishing an oval foundation wide enough to support standard glasses frames without bending.
- Corner Increases: Working 3 single crochets into the end chains expands the short sides, smoothly converting the chain strip into a continuous rounded loop.
- Calico Patch Placement: In R3, tapestry crochet techniques are introduced. By dividing stitches into color sections (Brown on the right, White in the center, Black on the left), the distinct patches take shape natively within the continuous work.
2. Tapered Ear Geometry (R1 – R7)
- Decreasing Structure: Starting with an 8-stitch foundation, systematic row-by-row decreases (skipping initial or penultimate stitches) taper the flat fabric gradually into a sharp triangular point.
- Side Edging: Working a border of single crochets down the outer edge smooths out stair-stepped turns, creating a finished rim for sewing onto the base.
3. Face Detailing & Assembly
- Safety Eye Placement: Setting the eyes 5 stitches apart across the main White center creates balanced, expressive facial proportions.
- Functional Eyeglass Nesting: The open-top pouch structure allows the bridge of your glasses to rest comfortably right over the cat’s nose, making the glasses appear as if the cat itself is wearing them!
Pattern Questions
Question 1: Can I use a single strand of thicker yarn instead of doubling lighter yarn?
Answer: Absolutely! If you have 4-ply, DK, or Worsted weight yarn available, you can work with a single strand throughout. The goal is to create a dense, firm stitch structure so that the eyeglass holder maintains its shape upright without floppy sides.
Question 2: How do I keep the carried yarn strands from tangling on the inside?
Answer: When switching colors in tapestry crochet, drop the inactive color toward the back inside wall of your pouch before pulling through the new color. Do not carry inactive yarn across long stretches of opposite colors; instead, let it float loosely across its dedicated patch section on the inside.
Question 3: My holder feels a bit flexible. How can I make it sturdier to support heavy frames?
Answer: You can drop down half a hook size (e.g., to a 3.0 mm hook) to tighten your gauge further, or insert a thin piece of cut plastic canvas or heavy felt along the inside bottom to provide an extra structured base!