
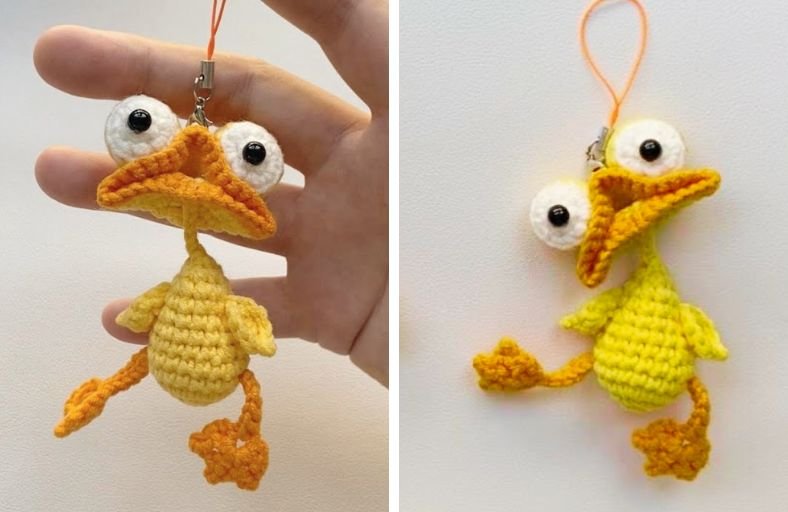
Ever looked at a yarn stash and thought, “I urgently need a derpy, wide-eyed duck staring back at me”?
If your answer is a resounding yes, you are in for a hilarious treatment!
This quirky little duck keychain features an oversized gaping beak, big googly-style crocheted eyes, long dangling feet, and a skinny neck that gives it endless charm.
Whether you hook it onto your backpack, set it up as a car mirror charm, or gift it to a friend who appreciates goofy handmade crafts, this project is guaranteed to bring smiles everywhere it goes.
Materials and Preparation
Materials:
- Yarn: 4-ply cotton yarn in Yellow (main body & wings), Orange (beak & feet), and White (eyes).
- Safety Eyes: 1 pair of small black safety eyes or beads for the pupils.
- Stuffing: Polyfill fiberfill for the head, body, and eyes.
- Keyring / Lanyard Strap: Keychain hardware or phone lanyard cord for attaching.
Tools:
- Crochet Hook: 2.5 mm crochet hook.
- Yarn Needle: Tapestry needle for sewing parts together and weaving in ends.
- Stitch Marker: To keep track of rounds.
- Scissors: For cutting yarn.
Preparation Notes:
- Master your basic stitches including the magic ring, single crochet, double crochet, half double crochet, increases, and decreases.
- Keep your tension moderately firm, especially when making the body and eyes, so the polyfill stuffing does not peek through the stitches.
Abbreviations and Notes
Abbreviations:
- MR: Magic Ring
- ch: Chain stitch
- sc: Single Crochet
- inc: Single Crochet Increase (2 sc in the same stitch)
- dec: Single Crochet Decrease / sc2tog (2 sc worked together)
- hdc: Half Double Crochet
- dc: Double Crochet
- sl st: Slip Stitch
- st(s): Stitch(es)
Pattern Notes:
- Unless stated otherwise, rounds are worked by joining with a slip stitch and chaining 1 at the beginning of each round.
- The neck is created by chaining directly from the base of the head, giving it a playful skinny dangling effect.
- Make sure to stuff the head and body firmly before closing up the final rounds.
- Original design and pattern credit belongs to Ada’s Handmade.
Gauge, Approximate Size, and Pattern Notes
Gauge:
Gauge is not critical for this project. Keep stitches tight to prevent stuffing from popping out.
Finished Size:
Approximately 4.5 inches (11.5 cm) in height from the top of the eyes to the bottom of the webbed feet.
Special Techniques:
- Invisible Slip Stitch: Used on flat round pieces like the beak base to create a clean, seamless border.
- Spike Webbed Foot Technique: Working double crochets combined with chain picots into a single stitch to form cute webbed duck toes.
Step-by-Step Pattern
Part 1: Beak Base (Mouth Backing)
Worked in Orange Yarn:
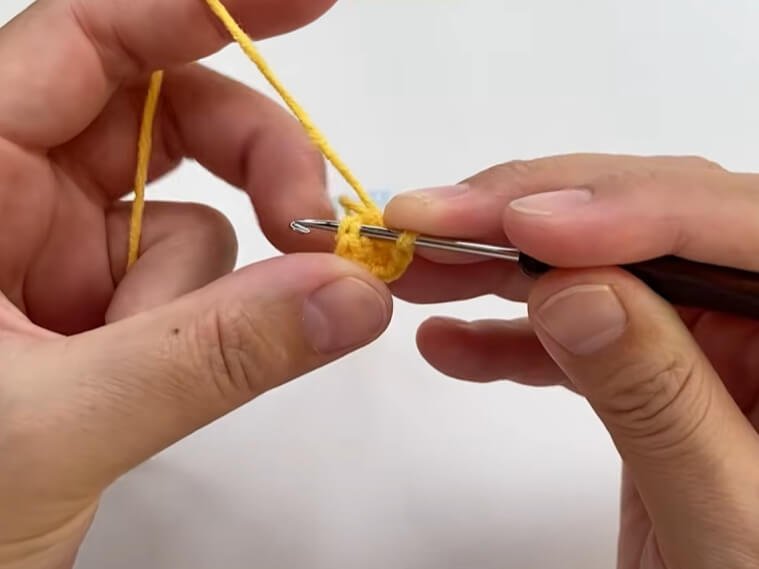
- R1: MR 6 sc, sl st in the first st, ch 1 (6)
- R2: inc x 6, sl st in the first st, ch 1 (12)
- R3: (sc, inc) x 6, sl st in the first st, ch 1 (18)
- R4: (2 sc, inc) x 6, sl st, ch 1 (24)
- R5: (3 sc, inc) x 6, change yarn in the last stitch, sl st, ch 1 (30)
- R6: (4 sc, inc) x 6 (36) Fasten off with an invisible slip stitch.
Part 2: Head & Skinny Neck
Worked in Yellow Yarn:
- R1: MR 6 sc, sl st in the first st, ch 1 (6)
- R2: inc x 6, sl st in the first st, ch 1 (12)
- R3: (sc, inc) x 6, sl st in the first st, ch 1 (18)
- R4–R5: 18 sc, sl st, ch 1 (18) (2 rounds)
- R6: (4 sc, dec) x 3, sl st, ch 1 (15)
- R7: 15 sc, sl st in the first st, ch 1 (15)
- R8: (3 sc, dec) x 3, sl st in the first st, ch 1 (12)
- R9: 12 sc, sl st, ch 1 (12) Stuff the head firmly with polyfill.
- R10: (2 sc, dec) x 3, sl st, ch 1 (9)
- R11: (1 sc, dec) x 3, sl st (6) Do not cut yarn yet!
- Neck Extension: Insert hook into the remaining opening, ch 5 to form the skinny neck chain. Leave a long tail for sewing onto the body.
Part 3: Eyes, Feet, Wings & Body
Eyes (Make 2)
Eye Backing (Outer Eye) worked in White Yarn:
- R1: MR 6 sc, sl st in the first st, ch 1 (6)
- R2: inc x 6, sl st, ch 1 (12)
- R3: 12 sc, sl st, ch 1 and cut yarn, leave a long tail for sewing (12)
Eye Front Cap worked in White Yarn:
- R1: MR 6 sc, sl st in the first st, ch 1 (6)
- R2: inc x 6, sl st, ch 1 and cut yarn (12) Insert safety eye into the center cap, lightly stuff between front cap and backing, then sew together to form a rounded 3D eyeball.
Webbed Feet & Legs (Make 2)
Worked in Orange Yarn:
- Leg Chain: ch 8.
- Foot Base: In the 3rd chain from the hook, work 1 dc.
- Toe 1: ch 2, sl st in the 2nd chain, 1 dc into base.
- Toe 2: ch 2, sl st into base.
- Toe 3: Repeat 1 dc, ch 2, 1 sl st into base.
- Leg Stem: sl st in each remaining chain back to the top. Fasten off, leaving a long tail for sewing.
Wings (Make 2)
Worked in Yellow Yarn:
- R1: MR 5 sc, sl st in the first st, ch 1 (5)
- R2: inc, sc, hdc, ch 2, sl st, sc, 3 sc in last st, sl st in the first st (9) Fasten off, leaving a long tail for sewing.
Body
Worked in Yellow Yarn:
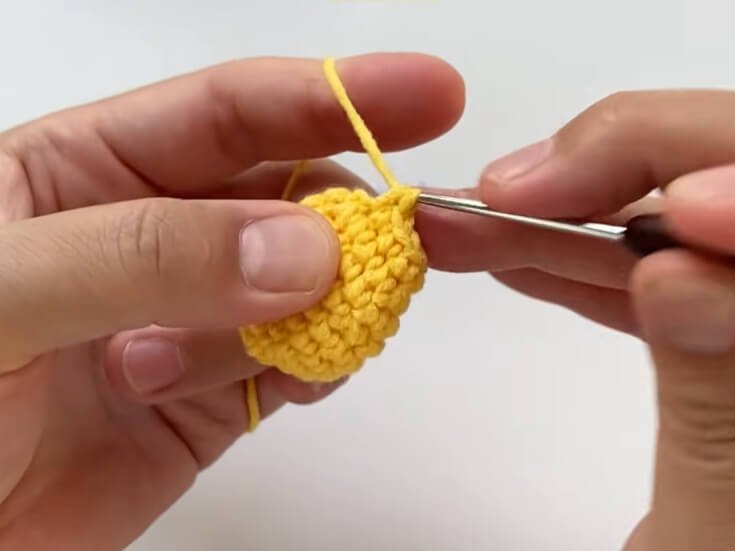
- Follow standard rounded body shaping (MR 6 sc, increasing up to 18 sc for 3 rounds, then decreasing back down to 6 sc while stuffing with polyfill before closing).
Part 4: Assembly & Finishing
- Fold and Shape the Beak: Take the flat Orange Beak circle from Part 1. Fold it in half to create an open wide duck bill, then sew the rear crease directly onto the lower half of the Head.
- Attach the Googly Eyes: Position the two large 3D white eyes side-by-side right above the wide open orange beak. Sew securely onto the upper head.
- Connect Head to Body: Take the skinny neck chain hanging from the head and sew the base firmly into the top of the stuffed Yellow Body.
- Attach Wings: Sew one wing on each side of the body, pointing slightly backward.
- Attach Feet: Sew the tops of the leg chains underneath the bottom of the body so they dangle freely.
- Add Hardware: Attach a keychain ring or lanyard cord to the top of the head between the two big eyes.
Detailed Pattern Breakdown
1. Beak and Mouth Construction:
- The beak begins as a flat circular base. By increasing evenly from an MR 6 sc up to 36 sts across 6 rounds, it forms a pliable disk.
- Folding this circular piece in half instantly creates a hilarious three-dimensional gaping mouth, allowing the duck to look surprised or mid-quack without complex shaping.
2. Head, Neck, and Googly Eye Mechanics:
- The head starts with standard sphere construction (MR 6 sc expanding to 18 sc), but tapers smoothly using gradual decreases down to 6 sts.
- Instead of cutting the yarn, chaining 5 straight out of the neck base forms an instant, floppy skinny neck.
- The eyes use two distinct layered disks stuffed with polyfill and fitted with black safety pupil pins, giving the duck its iconic expressive 3D appearance.
3. Foot and Leg Geometry:
- The legs use a clever chain and picot combination. Starting with a chain of 8, working double crochets with chain 2 slip-stitch picots all into the 3rd chain creates three distinct webbed toes in a single cluster.
- Slit-stitching back up the remaining chain length builds a sturdy, flexible hanging leg cord.
Pattern Question:
Question: How do I get the wide orange beak to stay wide open without sagging or closing over time?
Answer: When folding the beak disk in half, do not sew the entire top and bottom edges together. Instead, only sew the back folded crease directly onto the face of the head across 4 to 5 stitches.
Pinch the sides slightly while sewing to force the upper and lower halves to spring outward. You can also add a tiny pinch of stiffening spray or a micro drop of fabric glue along the back interior crease to preserve that hilarious open quack forever!