
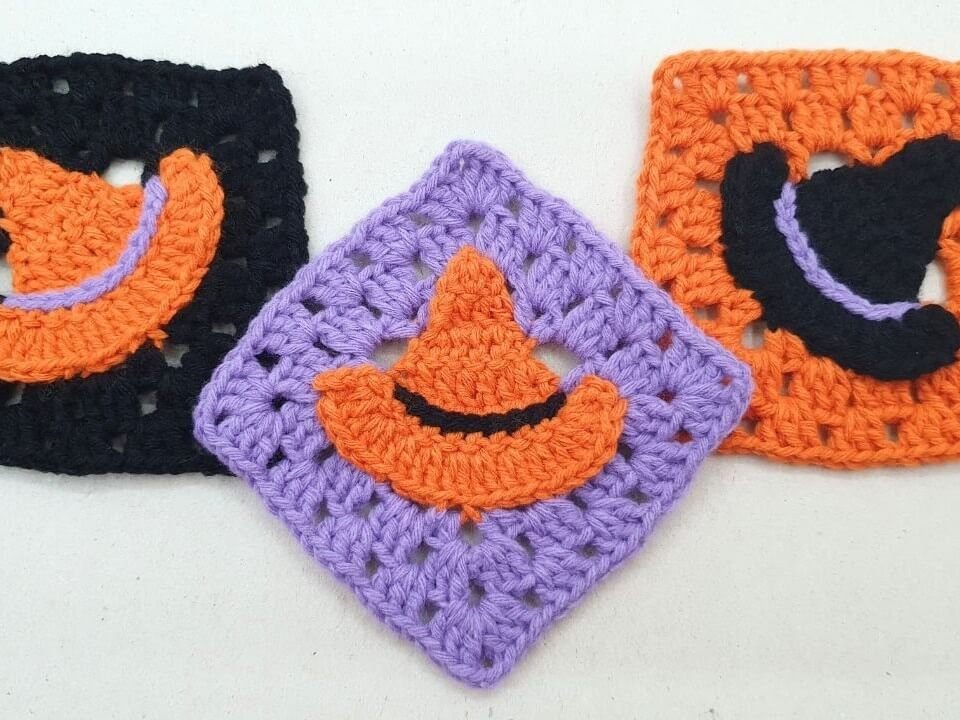
Ready to brew up some spooky magic with your yarn and hook?
Halloween and autumn crafting are all about bringing festive whimsy to life, and what better way to do that than combining a classic motif with a mystical twist?
The Witch Hat Granny Square brings together a vibrant 3D-effect witch hat emblem seamlessly wrapped inside a traditional granny square frame.
Whether you’re planning to assemble a bewitching Halloween blanket, a cozy autumn cardigan, or a festive trick-or-treat tote bag, this versatile pattern is pure crafting magic!
Materials and Preparation
Materials:
- Yarn: DK weight acrylic yarn in three vibrant colors:
- Orange yarn (for the hat body)
- Black yarn (for the hat band)
- Purple yarn (for the granny square frame)
Tools:
- Crochet Hook: 3.0 mm (Size 5/0)
- Yarn Needle: Tapestry needle for weaving in ends
- Scissors: Sharp craft scissors
Preparation Notes:
- Before starting, ensure you are comfortable with foundational stitches such as chains (
ch), single crochet (sc), half double crochet (hdc), and double crochet (dc). - Maintain a smooth, consistent tension throughout so your hat motif lies flat and integrates neatly into the granny square border.
Abbreviations and Notes
Abbreviations:
- ch: Chain
- sl st: Slip stitch
- sc: Single crochet
- hdc: Half double crochet
- dc: Double crochet
- st / sts: Stitch / Stitches
- sp / sps: Space / Spaces
- rep: Repeat
- BLO: Back Loop Only
Pattern Notes:
- The pattern is divided into three distinct sections: the Witch Hat Applique, the Hat Band Surface Stitching, and the Granny Square Frame.
- The witch hat can be made on its own as a standalone applique or attached directly into the granny square frame as you work Row 2.
Gauge, Approximate Size, and Pattern Notes
Gauge:
Gauge is not critical for this project, but keeping your stitches uniform ensures that the hat sits comfortably within the square without buckling.
Finished Size:
Approximately 4.5 in x 4.5 in (11.5 cm x 11.5 cm) when using recommended DK yarn and a 3.0 mm hook.
Special Techniques:
- Surface Slip Stitch: Worked across the front of the hat rows with black yarn to create a clean, crisp hat band.
- Integrated Joining: Attaching the tip and sides of the witch hat directly into the granny square corners during Row 2 for a seamless finish.
Step-by-Step Pattern
Part 1: Witch Hat Applique
Worked in turned rows using Orange yarn:
- Foundation: Make a slip knot, ch 3.
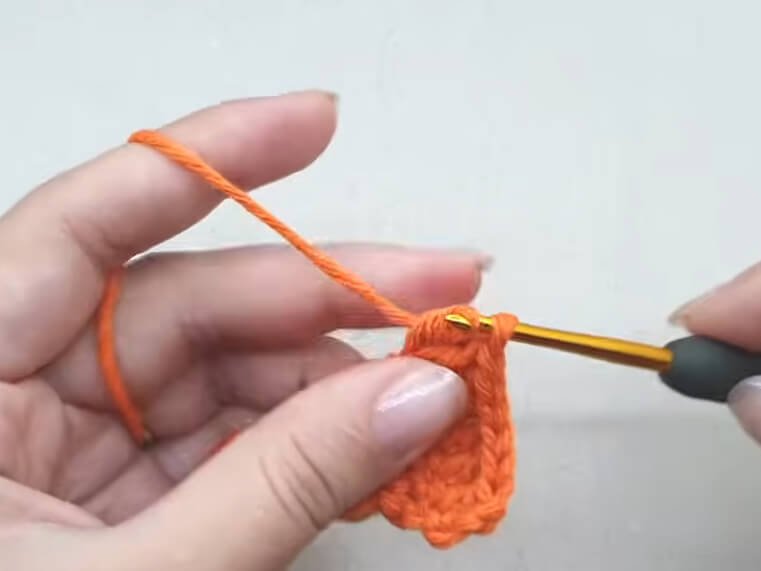
- Row 1: In 1st ch from slip knot, make 2 dc (3 sts counting initial turning ch).
- Row 2: Ch 2, turn, in same st make 1 dc, 2 dc in next st (4 dc).
- Row 3: Ch 2, turn, in same st make 1 dc, 2 dc across next 2 sts, 2 dc in last st (6 dc).
- Row 4: Ch 2, turn, in same st make 1 dc, 4 dc, 2 dc in last st (8 dc).
- Row 5: Ch 2, turn, in same st make 1 dc, 6 dc, 2 dc in last st (10 dc).
- Row 6 (Hat Brim): Ch 3, turn, in same st make 2 dc; in next st make 3 dc; rep (in next st make 2 dc) 6 times; in next st make 3 dc; in last st make 2 dc, ch 3, sl st into same st.
- Fasten off yarn. You can use this piece as a standalone applique or continue below to build your granny square.
Part 2: Hat Band Accent
Worked using Black yarn:
- Make a slip knot with black yarn.
- Working from the front side, insert your hook between Row 5 and Row 6 of the hat.
- Execute 9 surface sl sts horizontally across the stitches between dc rows, ch 1.
- Cut yarn and use a yarn needle to pull both ends to the back side and weave them in neatly.
Part 3: Granny Square Frame
Part 3.1: Foundation Frame
Join Purple yarn to the back loop of the hat brim at the back:
- Row 1:
- Working in BLO: in same st work 2 hdc, ch 2.
- Skip 3 sts, sl st, ch 2.
- In next st work: 1 dc, ch 4, 1 dc, ch 2.
- In next st work: 1 hdc, ch 2, 1 dc, ch 4.
- In next st work: 1 dc, ch 2, 1 hdc, ch 2.
- Sl st, ch 2, skip 3 sts, in same st work 2 hdc.
- In first st work 1 hdc, ch 1.
- Row 2:
- Working into ch-sps: In first hdc-sp, (1 sc, ch 1) counting as 1 dc, 2 dc, ch 1.
- Rep (3 dc, ch 1) 2 times.
- Corner 1: In corner sp work (3 dc, ch 2, 3 dc); when making the first dc, catch a stitch from the side brim of the hat to anchor it, then ch 1.
- Rep (3 dc, ch 1) 2 times.
- Corner 2: In corner sp work 3 dc; on the 3rd dc, catch a stitch from the top peak of the hat to secure it, ch 2, 3 dc, ch 1.
- Rep (3 dc, ch 1) 2 times.
- In remaining hdc-sp work 3 dc.
- In first st work 1 hdc, ch 1.
- Row 3:
- In hdc-sp work (1 sc, ch 1) counting as dc, 2 dc, ch 1.
- Rep (3 dc, ch 1) 3 times, then work 3 dc, ch 2.
- Rep [in same ch2-sp work (3 dc, ch 1); rep (3 dc, ch 1) 3 times; 3 dc, ch 2] 3 times around.
- Sl st to join, fasten off, and weave in all loose ends on the back.
Detailed Pattern Breakdown
1. Shaping the Triangular Hat Body and Curved Brim
Building a perfectly proportioned witch hat requires precise row-by-row expansion:
- Rows 1–5: You begin at the tip with a small foundation loop and steadily increase by adding extra double crochet stitches at the beginning and end of each row. This gradual widening creates a crisp, symmetrical triangle for the hat’s crown.
- Row 6: The sudden shift to multiple double crochet clusters (2 dc and 3 dc per stitch) creates a sweeping fan outward. This sudden surge of stitches gives the brim its distinctive curved shape.
2. Surface Stitching for the Contrast Band
The black hat band adds instant contrast and dimension:
- Surface slip stitching allows you to crochet directly onto the surface of an already completed piece. By working between Rows 5 and 6, you create a sharp line that visually separates the pointy crown from the flared brim. Drawing the yarn tails to the back ensures the front remains clean and pristine.
3. Transforming a 2D Motif into a Flat Granny Square
Encasing a non-standard shape inside a square frame relies on strategic stitch heights:
- Row 1 Anchor Chain: Working into the back loops along the back of the hat creates a hidden structural ledge. Varying the stitch heights between half double crochets, double crochets, and long chain spaces compensates for the irregular shape of the hat.
- Rows 2–3 Integration: Anchoring key points of the hat directly into corner double crochet stitches holds the motif securely in place. The outer rows then default to classic granny clusters (3 dc, ch 1), transforming your witch hat into a neat, joinable square perfect for larger projects.
Pattern Question:
Question: How do I keep the witch hat motif from sagging or bulging forward when joining it to the granny square frame?
Answer: The key to keeping the hat flat inside the square is accurate anchor points during Row 2. When working the corner double crochet stitches, make sure to catch just a small strand from the peak and side brim of the hat as instructed. Do not pull too tightly on these joining stitches, as tight tension will cause the fabric to pucker; keeping your hand relaxed will allow the hat to sit flush within its purple border.