
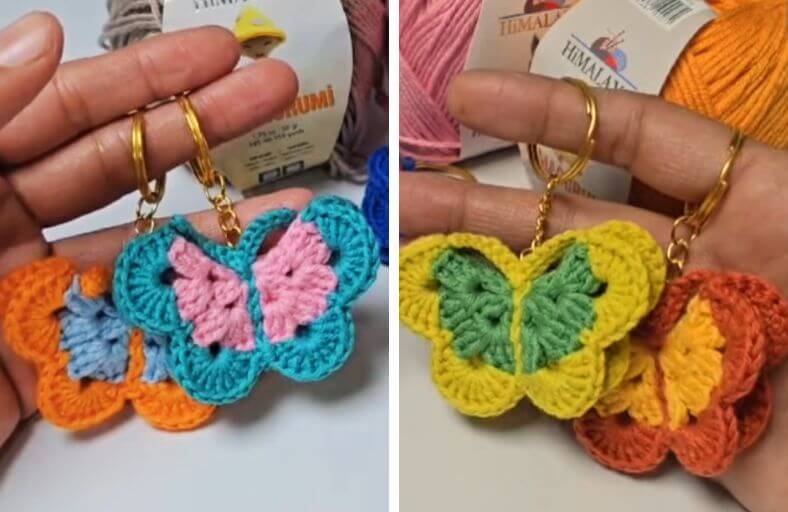
Ever looked at your plain set of keys and thought, “This really needs a dramatic, fluttery upgrade”?
Or maybe you are scrambling for a last-minute, ridiculously cute gift that does not take three business days to finish! Enter the Easy Crochet Butterfly Keychain.
By combining clever geometric flower rounds with a quick 3D fold-and-cinch technique, you will transform two simple yarn colors into a bright, fluttering charm in no time.
Grab your favorite yarn scraps and let’s bring this beauty to life!
Materials and Preparation
Materials:
- Yarn : Himalaya Himagurumi cotton yarn (or any Sport / DK weight cotton yarn). You will need two contrasting colors:
- Color A (e.g., Pink): For the inner wings / core flower.
- Color B (e.g., Teal / Turquoise): For the outer wing petals, body edging, and antennae.
- Keychain Hardware: Keyring with jump rings or swivel snap clasp.
Tools:
- Crochet Hook: 2.5 mm size (a slightly smaller hook size helps keep the stitches neat and structured).
- Yarn Needle: Tapestry needle for weaving in ends and securing hardware.
- Scissors: For trimming yarn.
- Stitch Marker: Optional, useful for tracking rounds.
Preparation Notes:
- Master basic US terms like chain (
ch), double crochet (dc), single crochet (sc), and slip stitch (sl st) before beginning. - Tension consistency is key! Keep your stitches even so that when you fold the motif in half, the wings match up symmetrically.
Abbreviations and Notes
Abbreviations:
- MR: Magic Ring
- ch: Chain
- sl st: Slip Stitch
- sc: Single Crochet
- dc: Double Crochet
- ch-sp: Chain space
Pattern Notes:
- The motif starts as a flat 8-petal flower worked in joined rounds.
- The flower is then folded in half (right side facing out) and stitched vertically down the center to transform it into a 3D butterfly shape.
- Antennae are worked directly on top of the central seam using chain and slip stitch passes.
Gauge, Approximate Size, and Pattern Notes
Gauge:
Gauge is not critical for this project. Maintaining firm, uniform tension ensures crisp wing definition and prevents loose loops.
Finished Size:
Approximately 2.5 to 3.0 inches (6.35 cm to 7.62 cm) in width, perfect for keychains, bag charms, or zipper pulls.
Special Techniques:
- Flower-to-Butterfly Folding: Transforming an 8-cluster flat circle into symmetrical dual-layered wings by folding in half.
- Vertical Seaming & Antennae Creation: Working vertical slip stitches down the fold line to cinch the body, followed by chain extensions to form delicate, standing antennae.
Step-by-Step Pattern
Part 1: Main Wing Base (Inner Flower Core)
Worked in Color A (Pink) in joined rounds:
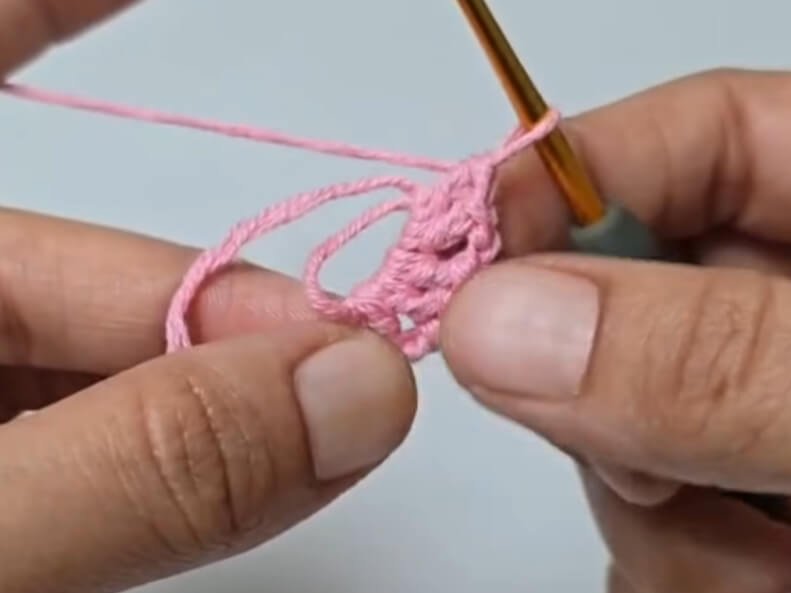
- R1: In a Magic Ring, ch 3 (counts as 1 dc), 2 dc into the ring. *Ch 2, 3 dc into the ring; repeat from * 6 more times. Ch 2. Sl st into the top of the starting ch-3 and sl st into the first ch-2 sp (Total: 8 groups of 3 dc separated by ch-2 spaces).
- R2: Ch 3 (counts as 1 dc), (2 dc, ch 3, 3 dc) into the same ch-2 sp. *(3 dc, ch 3, 3 dc) into the next ch-2 sp; repeat from * around. Sl st into the top of the starting ch-3 to join. Ch 1, fasten off Color A, and tighten the magic ring.
Part 2: Outer Wing Shell
Attach Color B (Teal/Turquoise) to any ch-3 space:
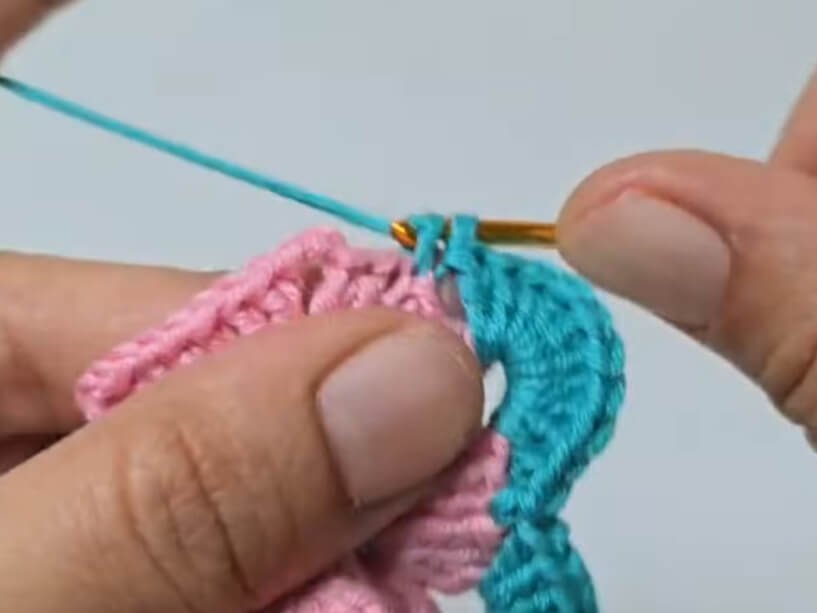
- R3: Ch 3 (counts as 1 dc), 9 dc into the same ch-3 sp (Total 10 dc in shell). *1 sc into the space between the next 2 dc groups, 10 dc into the next ch-3 sp; repeat from * around. 1 sc into the space between the final 2 dc groups. Sl st into top of starting ch-3 to join. (Total: 8 scalloped shells of 10 dc each).
Part 3: Body Seam & Antennae
Head & Body (Center Cinch & Antennae):
- Folding: Do not cut yarn. Fold the flower motif exactly in half with the right sides facing out, aligning 2 shell groups on the right and 2 shell groups on the left (forming top and bottom wings).
- Central Seam: Working through the fold vertically toward the center magic ring, work 5 sl st evenly along the body line until reaching the magic ring center space.
- First Antenna: Ch 8. Starting in the 2nd ch from hook, work 1 sl st in each of the next 7 chains. Sl st back into the top of the 5th body sl st to secure.
- Second Antenna: Turn the piece slightly, ch 8. Starting in the 2nd ch from hook, work 1 sl st in each of the next 7 chains. Sl st back into the top of the 5th body sl st on the front side.
- Ch 1, fasten off Color B leaving a long yarn tail for hardware attachment.
Part 4: Edging, Assembly & Finishing
- Finishing: Weave in all loose ends inside the folded wing layers using your yarn needle.
- Hardware Attachment: Thread the long yarn tail left from the antennae through your tapestry needle. Pass the needle through the top connection loop/ring of your metal keychain. Secure with a few firm stitches at the top center of the butterfly head between the two antennae, knot securely inside, and weave in remaining end.
Detailed Pattern Breakdown
1. Inner Core & Shell Expansion (Rounds 1–3):
- Round 1 Foundation: Starting with a Magic Ring, we build an 8-spoke foundation consisting of 3-dc groups separated by ch-2 spaces. This establishes the 8-fold radial symmetry needed to form 4 distinct wings on each side when folded later.
- Round 2 Shell Framing: By working (3 dc, ch 3, 3 dc) directly into each ch-2 corner space, we double the stitch volume and create sharp peaked corners.
- Round 3 Scallop Edging: Switching to Color B, each ch-3 corner space receives a heavy fill of 10 dc, while single crochets pull down the valleys between clusters. This converts the angular polygon into rich, rounded butterfly wing petals.
2. 3D Structural Folding & Central Seam:
- Spatial Alignment: Folding the flat round motif in half aligns 4 wing petals on top of 4 wing petals, instantly creating a dual-layered, dimensional butterfly.
- Vertical Cinch: Working 5 sl st vertically through the center layers pulls the middle tight, mimicking a butterfly’s thorax and forcing the outer wing shells to fan outward naturally.
3. Integrated Antennae Construction:
- Seamless Extension: Rather than making separate pieces to sew on later, the antennae are created directly from the central seam.
- Ribbed Stiffness: A chain of 8 followed by 7 returning slip stitches provides enough structural stiffness for the antennae to stand perkily above the head without requiring wire inserts.
Pattern Question:
Question: Why does my crochet butterfly look flat or misaligned after folding, and how do I attach the keychain so it doesn’t tilt forward?
Answer: If your butterfly appears lopsided when folded, verify that your Round 3 stitch count is exact with 8 equal shells of 10 dc.
Align the shells so that exactly 2 scalloped petals sit on the left fold and 2 sit on the right fold before stitching the central seam.
To prevent the finished keychain from tilting forward when hanging, sew the jump ring firmly through both the front and back center stitches right at the base of the antennae rather than attaching it to just a single front thread.