
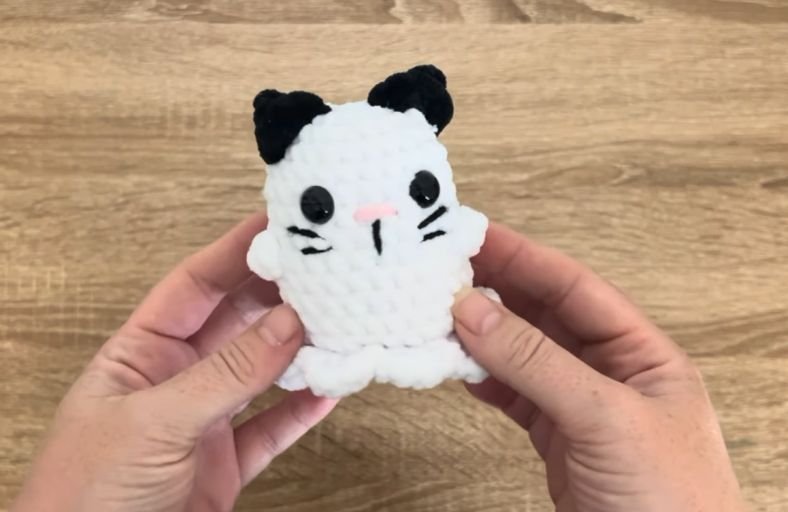
What happens when a curious feline decides to put on a bedsheet for Halloween? You get the most adorable spectral companion ever!
If you have been looking for a spooktacularly sweet project that combines the charm of a black cat with the floaty magic of a ghost, this Cute Ghost Cat amigurumi is here to steal your heart.
Best of all, it features a clever no-sew body design where the wavy ghost skirt and cute ears are crocheted directly onto the main piece!
Materials and Preparation
Materials:
- Yarn:
- Chunky/Super Bulky white yarn (Size 6 recommended) for the ghost body.
- Black yarn for the ears and face details.
- Pink yarn (or embroidery thread) for the tiny nose.
- Safety Eyes: 1 pair of 12 mm black safety eyes.
- Stuffing: Premium polyester fiberfill stuffing.
Tools:
- Crochet Hook: 5.0 mm crochet hook.
- Yarn Needle: Tapestry needle for weaving ends and embroidering facial details.
- Stitch Marker: To keep track of continuous rounds.
- Scissors: For trimming yarn.
Preparation Notes:
- Work in continuous spirals without joining at the end of each round unless instructed otherwise.
- Use a stitch marker in the first stitch of every round to avoid losing your count.
- Maintain a firm, tight tension so the fiberfill stuffing does not peek through your stitches.
Abbreviations and Notes
Abbreviations:
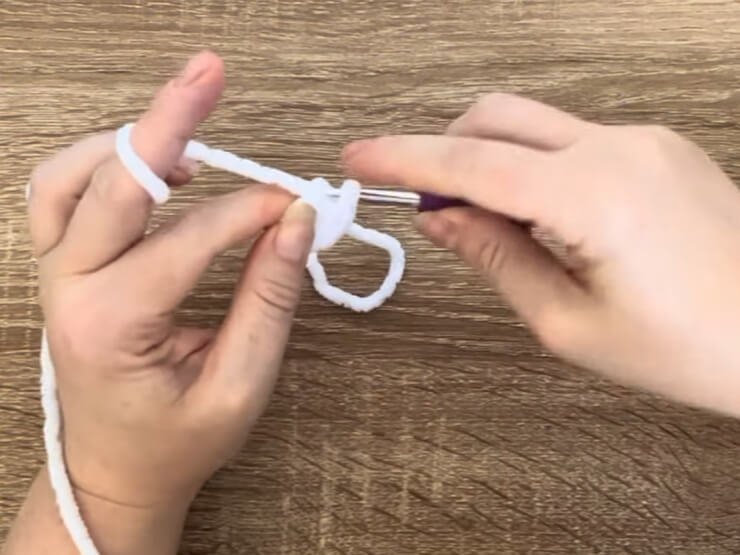
- MR: Magic Ring
- ch: Chain stitch
- sc: Single crochet
- inc: Single crochet increase (2 sc in the same stitch)
- dec: Single crochet decrease (sc2tog)
- dc: Double crochet
- tr: Triple (treble) crochet
- sl st: Slip stitch
- Bo: Bobble stitch (4-partial-dc bobble)
- FLO: Front Loop Only
- BLO: Back Loop Only
Pattern Notes:
- Bobble Stitch (Bo): Yarn over, insert hook into stitch, yarn over and pull up a loop, yarn over and pull through 2 loops (2 loops on hook). Repeat 3 more times in the same stitch until you have 5 loops on your hook. Yarn over and pull through all 5 loops. Push the bobble outward to form the cat’s tiny front paws.
- No-Sew Assembly: The lower wavy skirt is worked into the front loops of Round 14, while the base continues into the back loops. The ears are joined directly onto the head between Rounds 2 and 4.
Gauge, Approximate Size, and Pattern Notes
Gauge:
Gauge is not critical for this plushie, but your stitches should be snug enough to hold the fiberfill securely.
Finished Size:
Approximately 4.5 to 5 inches (11.5 cm to 12.7 cm) in height when using Size 6 plush yarn with a 5.0 mm hook.
Special Techniques:
- Front Loop Skirt Wave: Alternating sets of 4 double crochets in one stitch with slip stitches and skipped stitches to create a scalloped ghost hemline.
- Direct Ear Construction: Joining yarn directly to the surface of the head to form a smooth, seamless ear structure.
Step-by-Step Pattern
Part 1: Main Ghost Cat Body
Worked from the top of the head down using White yarn:
- R1: MR 8 sc (8)
- R2: 8 inc (16)
- R3: (sc, inc)*8 (24)
- R4–R8: 24 sc (24) (5 rounds total)
- R9: sc, Bo (paw 1), 10 sc, Bo (paw 2), 11 sc (24)
- R10–R13: 24 sc (24) (4 rounds total)
Insert 12 mm safety eyes between Rounds 6 and 7, spacing them about 4 to 5 stitches apart.
- R14: Working in FLO only: (4 dc in next st, sl st in next st, skip 1 st)*8 (32 sts total in wave pattern)Fasten off and weave in the end of R14.
- R15: Attach white yarn to the unworked BLO loops left behind from Round 14: (2 sc, dec)*6 (18)Stuff the upper body firmly, shaping the sides rounded rather than pointed at the top.
- R16: (sc, dec)*6 (12)Add final bits of stuffing.
- R17: 6 dec (6)Fasten off, weave the tail through the front loops of the final 6 stitches, pull tight to close the bottom, and weave in the thread.
Part 2: Ghost Cat Ears
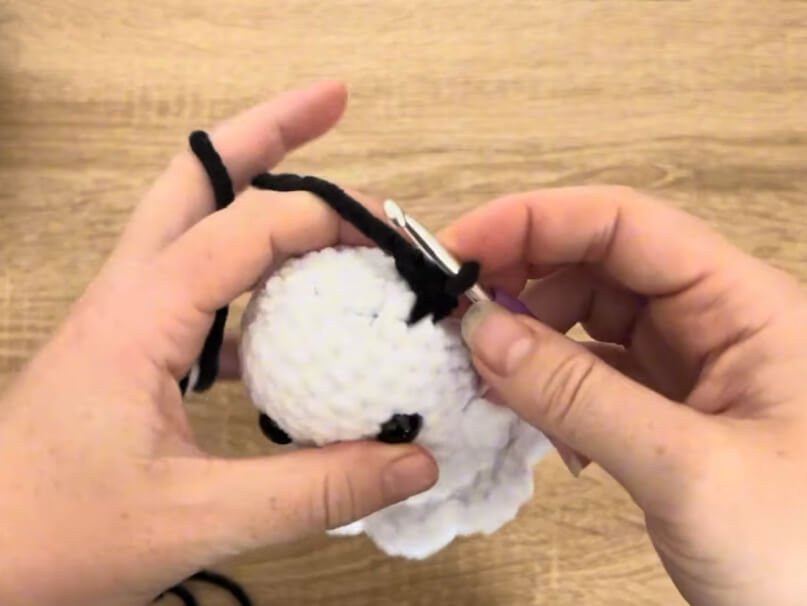
Crocheted directly onto the top of the head using Black yarn:
Left Ear:
- Attach black yarn with a slip knot between Rounds 2 and 4 on the top left side of the head.
- Stitch sequence: 1 sc in the starting st, then in the next st across work (1 dc, 1 tr, 1 dc) all into the same st, followed by 1 sc in the next st.
- Fasten off leaving a tail, use a yarn needle to anchor the ear base flush against the head, and weave the tail through the body to the bottom.
Right Ear:
- Attach black yarn between Rounds 2 and 4 on the top right side of the head (starting from Round 2 down to Round 4).
- Stitch sequence: 1 sc in the starting st, then in the next st across work (1 dc, 1 tr, 1 dc) all into the same st, followed by 1 sc in the next st.
- Fasten off leaving a tail, anchor securely with your yarn needle, and pull the thread through to the bottom.
Part 3: Facial Embroidery & Finishing
- Pink Nose:
- Thread pink yarn onto a tapestry needle.
- Enter from the side of the body and make 3 horizontal stitches across 2 stitches right between the safety eyes.
- Tie the ends securely at the side entry point and pull the knot inside the body.
- Mouth Line:
- Thread black yarn onto a tapestry needle.
- Make a single vertical line extending downward from directly under the pink nose (about 2 rounds long).
- Whiskers:
- Using the same black yarn, embroider two whiskers on each cheek below the eyes.
- Top whisker: Slightly angled diagonal line across 2 to 3 stitches.
- Bottom whisker: Straight horizontal line across 2 to 3 stitches directly below the top one.
- Knot the thread ends, pull them through the plush body, and trim clean.
Detailed Pattern Breakdown
1. Main Body & Paw Creation Breakdown:
- Spherical Expansion (R1–R3): The ghost begins with a standard Amigurumi dome. Expanding from a 8-sc magic ring to 16 and then 24 stitches gives the head a soft, rounded shape.
- Body Elevation (R4–R8): Five straight rounds establish the height of the cat’s face before placing the paws.
- 3D Paw Placement (R9): The two bobble stitches (Bo) placed at stitch 2 and stitch 13 pop outward automatically, creating adorable little front paws resting right under the chin without needing separate arm pieces.
- Floating Skirt Effect (R14–R15): By splitting Round 14 into Front Loops and Back Loops, the wavy scalloped bottom flares out on the FLO while the main structural body continues seamlessly on the BLO to seal the stuffed base.
2. Direct Ear Construction Breakdown:
- No-Sew Ear Technique: Instead of making separate triangles and painstakingly sewing them on, stitches are worked directly into the surface canvas of Rounds 2 through 4.
- Gradient Stitch Height: Combining a single crochet, a cluster of (dc, tr, dc), and a final single crochet creates a natural triangular cat-ear arch in a single row.
3. Facial Feature Balance Breakdown:
- Safety Eye Placement: Placing 12 mm eyes between Rounds 6 and 7 creates a cute, low-center facial proportion typical of kawaii plushies.
- Layered Line Work: Embroidering the pink nose first allows the vertical mouth line to sit cleanly beneath it without overlapping awkwardly, while dual cheek whiskers frame the face to emphasize the cat personality beneath the ghost sheet.
Pattern Questions
Question: How do I ensure my bobble stitch paws pop outward instead of sinking into the body?
Answer: When completing the bobble stitch on Round 9, push the bobble cluster outward with your fingertip from the inside of the fabric before making the next single crochet. Working the following single crochet with firm tension will trap the bobble in its popped-out position.
Question: Why is my ghost skirt curling up instead of laying in a wavy ruffle?
Answer: Check your stitch counts in Round 14! Ensure you place all 4 double crochets into a single front loop, followed immediately by a slip stitch in the next loop and skipping the following loop. Skipping a loop provides the necessary space for the 4-dc shell to fan out smoothly around the body.
Question: What is the best way to attach the safety eyes when working with thick plush yarn?
Answer: Plush yarn can be dense, so use your crochet hook or a tapestry needle to gently widen the gap between stitches at Rounds 6 and 7 before pushing the post of the safety eye through. Make sure the washer snaps on tightly against the inner fiber layer so the eyes remain secure over time.