
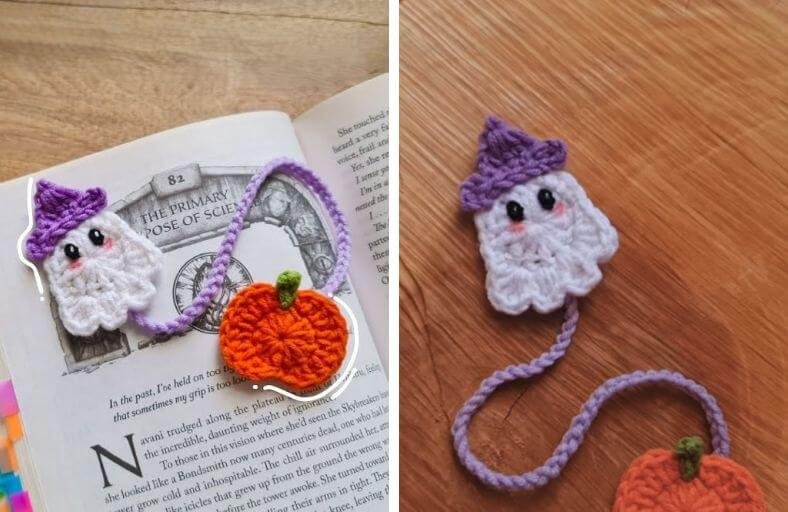
Looking for a spooky little companion to guard your page while you dive into your favorite autumn reads?
This ghostly friend and cute little pumpkin connected by a cozy chain cord will make sure you never lose your place again.
Perfect for Halloween vibes, bookworms, or last-minute handmade gifts, this beginner-friendly project comes together quickly and adds a delightful pop of handmade magic to any bookshelf.
Materials and Preparation
Materials:
- Yarn:
- White yarn (for the ghost body)
- Purple yarn (for the witch hat & chain cord)
- Orange yarn (for the pumpkin body)
- Green yarn (for the pumpkin stem)
- Small amount of black and pink yarn or safety eyes/embroidery thread (for facial details)
- Stuffing: None required (this is a flat 2D appliqué bookmark project).
Tools:
- Crochet Hook: 2.5 mm – 3.0 mm (or suitable size matching your yarn weight).
- Yarn Needle: Tapestry needle to weave in ends and embroider details.
- Stitch Marker: To mark starting/key stitches during round construction.
- Scissors: For trimming yarn ends.
Preparation Notes:
- Familiarize yourself with standard crochet stitches like single crochet, half double crochet, double crochet, and triple crochet.
- Maintain a smooth, moderate tension so the ghost and pumpkin lay completely flat inside your book.
Abbreviations and Notes
Abbreviations:
- MR: Magic Ring
- ch: Chain stitch
- sl st: Slip stitch
- sc: Single crochet
- hdc: Half double crochet
- dc: Double crochet
- tr: Triple (Treble) crochet
- st(s): Stitch(es)
Pattern Notes:
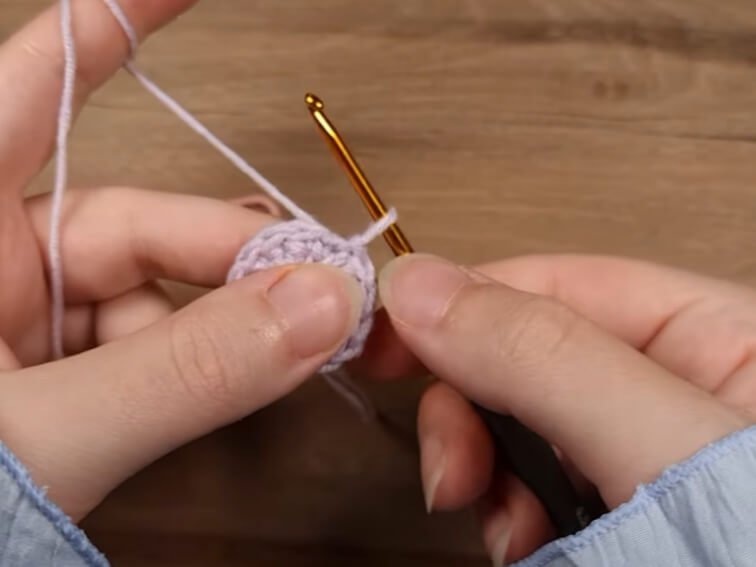
- The ghost body and pumpkin are constructed in joining rounds starting from a central magic ring.
- The witch hat is crocheted and directly attached onto the ghost head during construction.
- The connecting cord is made of a simple chain strand joined at the back of both motifs.
Gauge, Approximate Size, and Pattern Notes
Gauge:
Gauge is not strictly critical for this project. Keep stitches neat and uniform so the motifs maintain clean shapes.
Finished Size:
- Ghost: Approximately 2.5 in x 2.5 in (6.3 cm x 6.3 cm)
- Pumpkin: Approximately 2.0 in x 2.0 in (5.0 cm x 5.0 cm)
- Chain Cord: Adjustable length, approximately 8–10 in (20–25 cm) to fit standard paperbacks and hardcovers.
Special Techniques:
- Stacked SC for Turning/Standing DC: Replacing traditional ch-3 starting chains with stacked single crochets for a cleaner, seamless edge.
- Direct Joining: Joining the witch hat directly onto the ghost’s head using slip stitches through corresponding stitches.
Step-by-Step Pattern
Part 1: Ghost Body
Worked in white yarn starting with a Magic Ring:
- R1: In MR, work 1 sc (work another sc into the second loop of the first sc to count as standing dc), then work 5 dc and 8 tr into the ring. Tighten MR. Join with a sl st to the marked top loop of the initial standing dc (14 sts total).
- R2: 1 hdc in first st, 1 sc in next st, sl st in next 2 sts, 1 sc in next st (mark this st), 1 hdc in next st, ch 1, 1 sc in each of next 2 sts.
- In next st: (1 dc, 2 tr, 1 hdc)
- In next st: (1 hdc, 2 tr, 1 hdc)
- In next st: (1 hdc, 2 tr, 1 hdc)
- In next st: (1 hdc, 2 tr, 1 dc)
- 1 sc in next 2 sts. Skip the joining sl st from R1, sl st into the marked hdc at the start of R2.
- Fasten off yarn and weave in ends.
Part 2: Witch Hat
Worked in purple yarn and attached directly onto the top of the ghost:
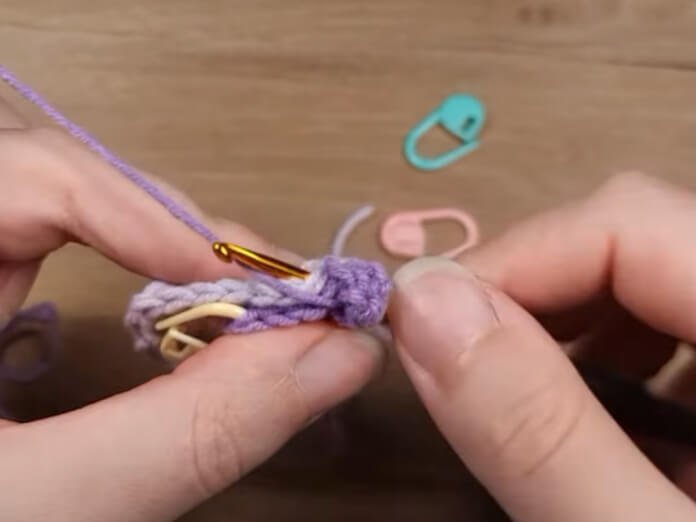
- R1: In MR, work 1 sc, close ring, mark st. Turn work.
- R2: Ch 3 (mark 3rd ch), work 3 dc into that same marked space. Turn work (4 sts).
- R3: Ch 2, 1 dc in first st, ch 2.
- Assembly to Ghost Head: Align the 4 sts on top of the witch hat to the top 4 sts of the ghost head:
- Insert hook into current hat st and corresponding ghost st; work 1 sl st.
- Repeat sl st joining across the remaining 3 sts.
- Hat Brim: Ch 2, 1 dc in same st, ch 1, sl st in same st. Fasten off and weave ends to the back.
Part 3: Pumpkin & Stem
Body: Pumpkin Motif
Worked in orange yarn starting with a Magic Ring:
- R1: In MR, work 1 sc + stacked sc (counts as 1st dc), then work 11 dc into ring (12 dc total). Pull tight, sl st into first dc to join.
- R2: Skip first st, in second st work (1 hdc, 1 dc).
- Work 2 dc in each of next 3 sts.
- In next st work (1 dc, 1 hdc).
- Sl st in next st.
- In next st work (1 hdc, 1 dc).
- Work 2 dc in each of next 3 sts.
- In last st work (1 dc, 1 hdc).
- Sl st into next st. Fasten off orange yarn.
Head: Pumpkin Stem
Worked in green yarn at the top central space of the pumpkin:
- Join green yarn at the top central space, ch 2.
- In 2nd ch from hook, work 1 hdc.
- Ch 1, sl st back into the base space where chain started. Fasten off and knot securely.
Part 4: Assembly & Finishing
- Connecting Cord:
- Attach purple yarn into any loop on the back of the ghost motif.
- Chain desired number of stitches (approx. 50–70 chains depending on book size).
- Join to any loop on the back of the pumpkin motif with a sl st.
- Facial Details:
- Embroider two vertical black eyes on the ghost face using black yarn or thread.
- Add tiny pink blush lines beneath the eyes.
- Finishing: Weave in all remaining yarn tails neatly along the back side of each motif.
Detailed Pattern Breakdown
1. Ghost Body & Ruffle Bottom Breakdown:
- Foundational Shaping: The ghost begins with a magic ring containing a combination of double crochets and triple crochets. This uneven distribution creates the rounded head shape on top and a wider base below.
- Wavy Hemline (R2): The bottom ruffle edge uses repeating clusters of
(1 hdc, 2 tr, 1 hdc)and(1 hdc, 2 tr, 1 dc). The sudden transition from short half double crochets to tall triple crochets pushes the fabric outward, forming waves that mimic a floating ghost sheet.
2. Witch Hat Joining Breakdown:
- Direct Attachment Technique: Instead of crocheting the hat separately and sewing it on with a needle, the hat brim is directly worked into the ghost’s top head stitches using slip stitches.
- Brim Sculpting: The addition of
ch 2, 1 dc, ch 1, sl stat the corner creates a sharp outward point, defining the classic conical shape of a witch hat.
3. Pumpkin Contouring & Cord Connection Breakdown:
- Lobular Pumpkin Edges: The pumpkin relies on symmetry. Starting with 12 central double crochets, R2 uses a sequence of increasing height
(hdc -> dc -> 2 dc increases -> dc -> hdc)separated by central slip stitches. This creates two rounded lobes with a indented cleft at top and bottom. - Flat Bookmark Functionality: Connecting the two main motifs via a flexible chain cord allows the ghost and pumpkin to hang neatly outside the top and bottom of the book, while the thin chain rests flat between pages without damaging the spine.
Pattern Question:
Question: How can I ensure my ghost and pumpkin motifs lie completely flat inside a book without curling at the edges?
Answer: Edge curling usually happens if your stitch tension is too tight or if the triple crochets are pulled stiffly. To keep your bookmark perfectly flat, maintain an even, relaxed tension during the final round.
Once finished, lightly steam block both motifs: place a thin damp cloth over the ghost and pumpkin and gently press with a warm iron for a few seconds. Allow them to dry completely before inserting them into your favorite book!