
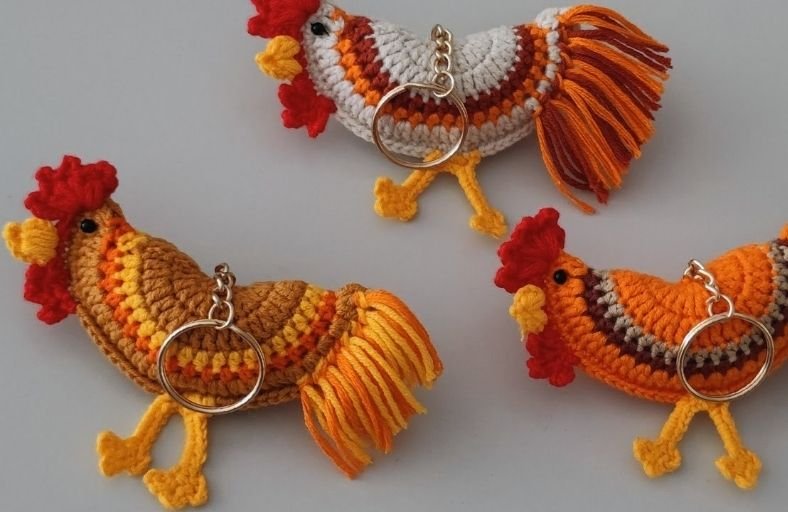
Ever wondered how to turn a few scraps of colorful yarn into the most adorable, eye-catching bag accessory?
This delightful crochet rooster keychain project combines bright autumn tones, clever semi-circular shaping, and a lush fringed tail into one irresistible pocket-sized companion.
Whether you need a quick weekend stash-buster or a charming handmade gift for a friend, this step-by-step pattern will guide you through every stitch with complete ease!
Materials and Preparation
Materials:
- Yarn: Cotton blend yarn (such as Alize Cotton Gold) in your favorite palette. You will need:
- Main Body / Base Color: Cream, Tan, or Off-White.
- Accent Colors: Orange, Brown, Warm Yellow, and Bright Red.
- Stuffing: Polyfill fiberfill (concentrated mainly in the tail section to give the rooster its signature plump silhouette).
- Hardware: 1 Keyring clip with chain attachment.
- Safety Eyes / Beads: 2 small black beads or safety eyes (approx. 4 mm).
Tools:
- Crochet Hook: 2.5 mm crochet hook (kept snug to ensure stitches stay tight and neat).
- Yarn Needle: Tapestry needle for weaving in ends and securing components.
- Stitch Marker: To keep track of your rounds and joins.
- Scissors: Sharp craft scissors.
Preparation Notes:
- Before jumping in, make sure you are comfortable with basic stitches like double crochet (
dc), half double crochet (hdc), single crochet (sc), and working puff stitches. - Leave a generous tail of yarn (approx. 10–12 inches) at the very start of your Magic Ring, as this will be used later to attach your metal keychain clip directly through the center of the body.
Abbreviations and Notes
Abbreviations:
- MR: Magic Ring
- ch: Chain stitch
- sc: Single crochet
- hdc: Half double crochet
- dc: Double crochet
- sl st: Slip stitch
- st(s): Stitch(es)
- inc: Increase (2 sc in the same stitch)
- puff: Puff stitch
Pattern Notes:
- The body starts as a flat circular motif worked in joined rounds. Color changes are made at the end of rounds during the slip stitch join.
- The circle is folded in half and joined along the outer edge using single crochet stitches to create a 3D crescent body.
- Stitches are worked strictly using standard US Crochet Terms.
Gauge, Approximate Size, and Pattern Notes
Gauge:
Gauge is not critical for this small accessory. Keep your tension firm and consistent so the polyfill stuffing remains completely hidden inside the body.
Finished Size:
- Length: Approx. 4.5 inches (11.5 cm) from beak to tail tassel.
- Height: Approx. 3.0 inches (7.6 cm) from comb to feet.
Special Techniques:
- Puff Stitch Comb: A sequence of puff stitches and chain loops worked directly into the top of the head space to form the rooster’s signature red crest.
- Fringe Tassels: Strands of yarn looped into the outer double crochet round to form a thick, feathery tail.
Step-by-Step Pattern
Part 1: Main Circular Body (Worked Flat in Joined Rounds)
Leave a long tail before making your initial loop for attaching the keychain hardware later.
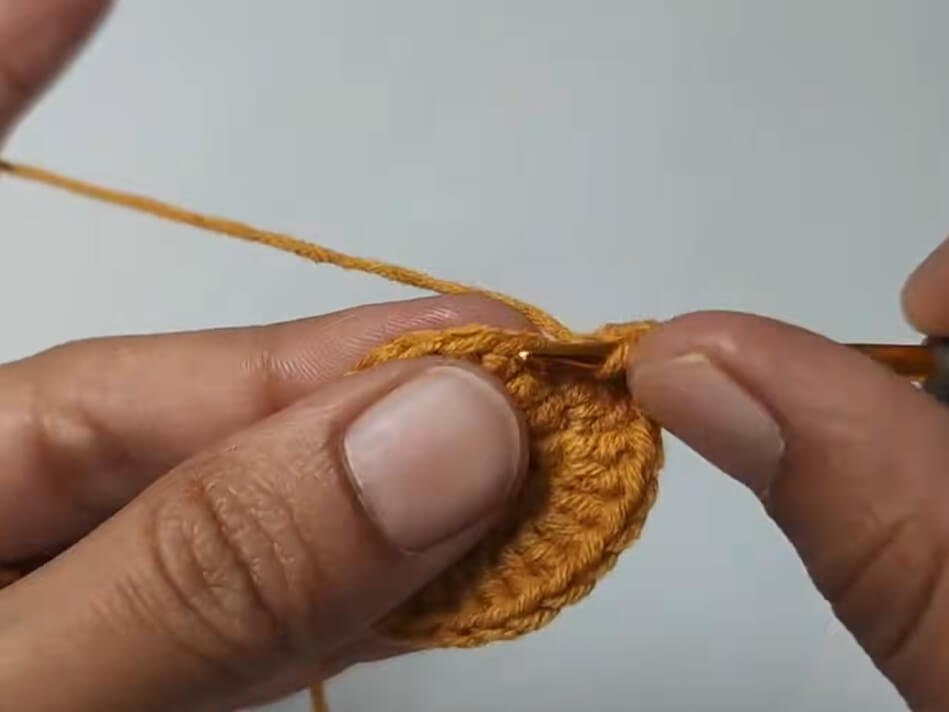
- R1: Using Main Base Color, MR, ch 3 (counts as 1 dc), 14 dc into MR. Sl st to top of ch-3 to join. (15 dc)
- R2: Ch 3, 1 dc in same st, 2 dc in each st around. Sl st to top of ch-3 to join. (30 dc)
- R3: Ch 3, 1 dc in same st, [1 dc in next st, 2 dc in next st] repeat around. Sl st to top of ch-3 to join, switching to Second Accent Color (Orange) on the final pull-through. (45 dc)
- R4: Ch 2, starting in next st, 1 hdc in each st around (45 hdc). Sl st to top of ch-2 to join, switching to Third Accent Color (Brown) on the final pull-through. (45 hdc)
- R5: Ch 2, starting in next st, 1 hdc in each st around (45 hdc). Sl st to top of ch-2 to join, switching back to Main Base Color on the final pull-through. (45 hdc)
- R6: Ch 3, 2 dc in each st around (90 dc). Sl st to top of ch-3 to join. Fasten off.
Part 2: Folding, Keychain Attachment & Body Assembly
- Attaching Keyring: Thread the initial long yarn tail from the MR through your keyring chain, securing it firmly at the top center of what will be the spine.
- Folding Body: Fold the circular motif in half so the right side faces outward.
- Joining the Spine: Beginning at the head end, join the two layers together by working sc across the outer edges.
- Stuffing: Pause joining when you reach the back portion. Add polyfill fiberfill generous enough to make the tail area plump and round, keeping the center section relatively slim.
- Closing: Continue working sc through both layers across to close the opening completely. Ch 1, cut yarn, and weave in ends.
Part 3: Facial Details, Comb, Wattle, and Feet
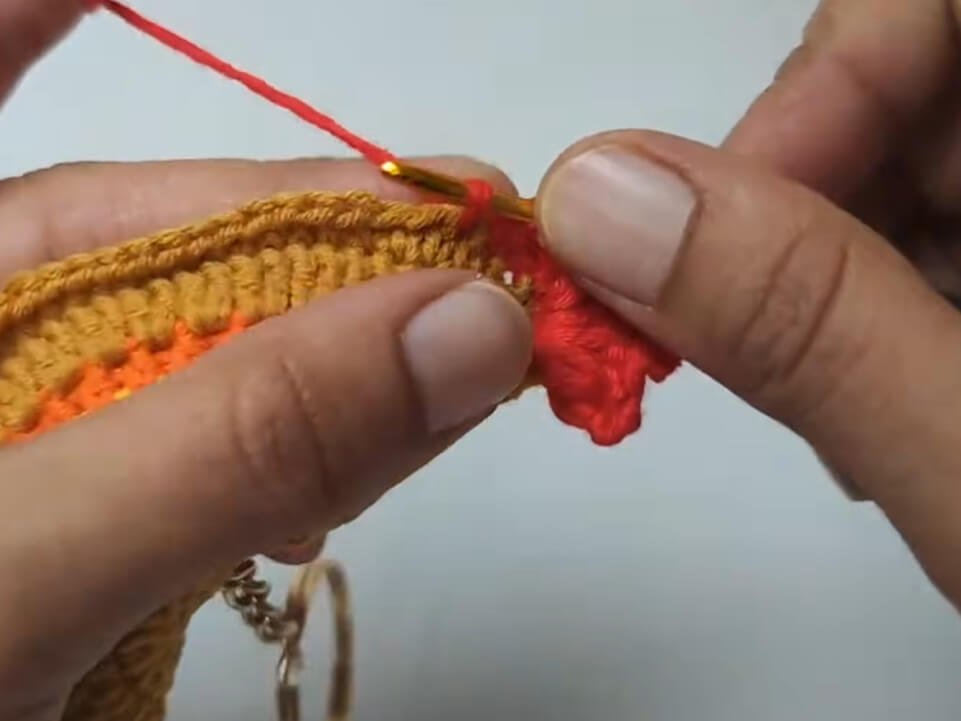
Comb (Red Crest)
Attach Red yarn at the top front corner of the head area:
- Ch 3, work a 2-yarn-over puff st in the same space. Ch 4, sc into the top of the puff st.
- Repeat the puff st sequence 4 times in the exact same starting space to create a multi-lobed comb.
- Ch 3, sl st into the same space.
- Skip 1 st, work 6 sc side-by-side down the front edge of the head.
- Ch 6, sc into the same space (repeat 3 times to create small textured head loops). Sl st to next st, ch 1, cut yarn, and weave in ends.
Wattle & Beak (Yellow Accent)
Attach Yellow yarn with a sl st to the 3rd sc of the 6 sc made on the head:
- Ch 3, pull up a loop twice in the same st.
- Pull up a loop twice in the next st.
- Yarn over, pull through all loops on hook to join the two puff cluster points together.
- Ch 4, sc into the top of the puff, ch 3, sl st into the base of the last yellow st. Ch 1, cut yarn, and fasten off.
Feet & Legs (Yellow Accent)
Attach Yellow yarn to the bottom edge of the body, directly aligned under the keychain placement:
- Leg 1: Ch 10. Sc in 5th ch from hook. [Ch 4, sc in same ch] repeat twice (3 toes formed). Sc in each remaining ch back down to the body. Sl st into base.
- Spacing: Sc in next 2 sts along the body bottom edge.
- Leg 2: Ch 10. Repeat toe sequence: sc in 5th ch, [ch 4, sc in same ch] twice, sc in remaining chs back to body. Sl st to body, ch 1, cut yarn, and fasten off.
Part 4: Fringe Tail & Finishing
- Tassel Preparation: Cut 18 to 24 strands of yarn (approx. 4 inches / 10 cm in length) using your accent colors (Orange, Brown, Yellow).
- Attachment: Along the rear 9 sts of the body’s outer double crochet edge, fold yarn strands in half, insert your hook through a stitch, pull the folded loop through, then pass the tail ends through the loop and pull snug (lark’s head knot).
- Trimming: Trim the fringe at a slight angle to create a neat, swept-back tail feather appearance.
- Eyes: Sew 2 small black beads or attach 4 mm safety eyes onto either side of the head just above the yellow beak.
Detailed Pattern Breakdown
1. Main Crescent Body Construction:
- Radial Expansion: The foundation relies on standard flat circle math where R1 (15 dc) doubles to R2 (30 dc), then increases by 15 sts in R3 (45 dc). This precise rate of expansion creates a completely flat disk without cupping or waving.
- Color Transitioning: Switching to half double crochet (
hdc) in R4 and R5 compresses the vertical stitch height slightly, creating two distinct, tightly woven color bands that mimic layered wing feathers. - Outer Shell Expansion: R6 doubles every stitch (from 45 to 90 dc), creating a ruffle edge that, once folded in half, provides deep dimension and natural volume for the outer silhouette.
2. Anatomical Detailing Techniques:
- Head & Crest Shaping: The comb uses clustered puff stitches with picot-like chain loops (
ch 4, sc) anchored directly to the crown. The wattle joins two adjacent loop-pulls across 2 base stitches, drawing the chin tight and projecting a pointed 3D beak forward. - Balanced Leg Placement: Positioning the legs directly underneath the top keychain attachment point ensures the rooster hangs horizontally in a balanced, natural stance when suspended from a bag or set of keys.
Pattern Question:
Question: How can I make sure the rooster hangs straight when attached to my keys, and how do I prevent the tail fringe from unraveling over time?
Answer: To ensure perfect hanging balance, always align your top keyring attachment point with the exact center of the folded Crescent spine.
When attaching the feet underneath, make sure they are placed symmetrically directly below this top center point.
For the tail fringe, use a high-ply cotton blend yarn and pull the lark’s head knot loops very tight against the outer double crochet stitches. You can also lightly steam the tassel ends with an iron (held an inch away) to set the yarn fibers smoothly into place!