
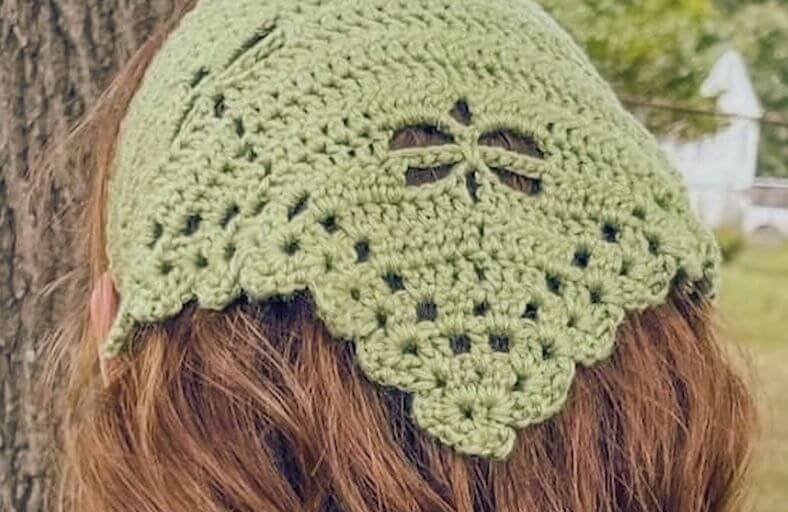
Looking for that dreamy cottagecore accessory to elevate your summer wardrobe or keep your hair styled on breezy days?
This Dragonfly Kerchief Bandana features a charming lace pattern created using delicate chain spaces and double crochet stitches, giving the illusion of dragonflies fluttering across a classic triangular headscarf.
Finished with a scallop shell border and sturdy tie straps, this project brings together elegance and practical bohemian flair.
Materials and Preparation
Materials:
- Yarn: Medium-thick cotton yarn (approx. 42 grams / 1.5 oz), soft DK or Sport weight cotton works beautifully for crisp stitch definition.
- Color Suggestions: Cream white or soft dusty pink for a timeless boho look.
Tools:
- Crochet Hook: 3.0 mm – 3.5 mm hook (or size needed to achieve nice drape).
- Yarn Needle: Tapestry/yarn needle for weaving in ends.
- Scissors: Craft scissors.
- Stitch Marker: Optional (to mark the middle chain space if desired).
Preparation Notes:
- Before beginning, make sure you are comfortable with basic stitches like chain, single crochet, double crochet, and working clusters/shells.
- The size is easily customizable: follow the main 6-row repeat until you reach your desired bandana depth (around 10 inches or 26 cm) or keep repeating to turn it into a full-sized triangular shawl.
Abbreviations and Notes
Abbreviations:
- ch: Chain
- sl st: Slip Stitch
- sc: Single Crochet
- dc: Double Crochet
- dc2tog cluster: Double crochet 2 together cluster (worked over specified stitches)
- Shell: Shell stitch (2 dc, ch 2, 2 dc inside the same space)
- ch-sp: Chain Space
Pattern Notes:
- Every row begins with a ch 4 (counts as 1 dc + ch 1) followed by a Shell in the edge ch-sp.
- Every row ends with a Shell, ch 1, and 1 dc into the last space to maintain symmetrical growing edges.
- The main dragonfly motif is created across a 6-row pattern repeat.
- All measurements and instructions follow Standard US Crochet Terms.
- Original design and pattern credit belongs to Crochet Princess.
Gauge, Approximate Size, and Pattern Notes
Gauge:
Gauge is not critical for this bandana, but consistent tension ensures a smooth lace drape.
Finished Size:
- Bandana Width: Approx. 19.5 inches (50 cm) without straps; straps add approx. 10 inches (25 cm) on each side.
- Bandana Depth (Point to Top): Approx. 10.2 inches (26 cm).
Special Techniques:
- Dragonfly Lace Wings: Created using extended chain bridges (
ch 11andch 6) combined with single crochet anchors in lower rows to form openwork wings. - dc2tog Cluster: Yarn over, insert hook in st, yarn over, pull up a loop, yarn over, draw through 2 loops (2 loops on hook). Yarn over, insert hook in next st, yarn over, pull up a loop, yarn over, draw through 2 loops (3 loops on hook). Yarn over, draw through all 3 loops.
Step-by-Step Pattern
Part 1: Foundation and Setup Rows
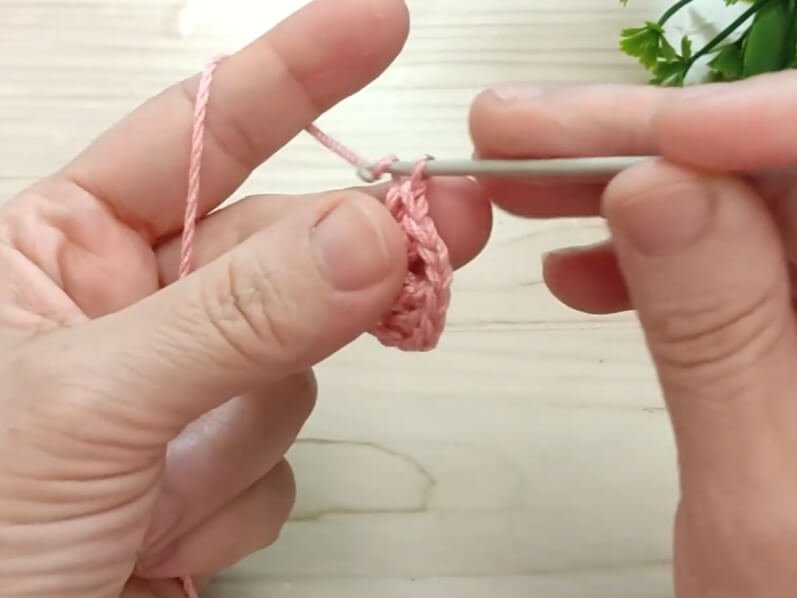
- Foundation Ring: Start with a slip knot, ch 4, sl st in 1st ch to form a ring.
- Row 1: Ch 3 (counts as 1 dc), inside the ring work 1 dc, ch 2, 2 dc, ch 2, 1 dc. Turn.
- Row 2: Ch 4, Shell (2 dc, ch 2, 2 dc) in first ch-2 sp, ch 1, Shell in second ch-2 sp, ch 1, 1 dc in turning space. Turn.
- Row 3: Ch 4, Shell in ch-2 sp of first Shell, ch 2, 1 dc in ch-1 sp, ch 2, Shell in ch-2 sp of next Shell, ch 1, 1 dc in last space. Turn.
Part 2: First Dragonfly Motif (Rows 4–9)
- Row 4 (Motif Row 1): Ch 4, Shell in Shell, ch 2, 2 dc in ch-sp, ch 1, 2 dc in next ch-sp, ch 2, Shell in Shell, ch 1, 1 dc in end sp. Turn.
- Row 5 (Motif Row 2): Ch 4, Shell in Shell, ch 2, 2 dc in ch-sp, 1 dc in each of next 2 dc (4 dc total), ch 1, 1 dc in each of next 2 dc, 2 dc in ch-sp (4 dc total), ch 2, Shell in Shell, ch 1, 1 dc in end sp. Turn.
- Row 6 (Motif Row 3): Ch 4, Shell in Shell, ch 2, 2 dc in ch-sp, 1 dc in each of next 4 dc (6 dc total), ch 1, 1 dc in each of next 4 dc, 2 dc in ch-sp (6 dc total), ch 2, Shell in Shell, ch 1, 1 dc in end sp. Turn.
- Row 7 (Motif Row 4): Ch 4, Shell in Shell, ch 2, 2 dc in ch-sp, 1 dc in each of next 6 dc (8 dc total), ch 3, 1 dc in each of next 6 dc, 2 dc in ch-sp (8 dc total), ch 2, Shell in Shell, ch 1, 1 dc in end sp. Turn.
- Row 8 (Motif Row 5): Ch 4, Shell in Shell, ch 2, 2 dc in ch-sp, 1 dc in next dc, dc2tog cluster over next 2 dc, ch 11 (skip 4 dc, ch 3, 4 dc), dc2tog cluster over next 2 dc, 1 dc in next dc, 2 dc in ch-sp, ch 2, Shell in Shell, ch 1, 1 dc in end sp. Turn.
- Row 9 (Motif Row 6): Ch 4, Shell in Shell, ch 2, 2 dc in ch-sp, 1 dc in each st/cluster across first block (5 sts), ch 6, 1 sc catch-all anchoring around both ch-3 (Row 7) and ch-11 (Row 8) spaces below, ch 6, 1 dc in each st/cluster across second block (5 sts), 2 dc in ch-sp (7 dc total per side), ch 2, Shell in Shell, ch 1, 1 dc in end sp. Turn.
Part 3: Main Body Motif Repeats
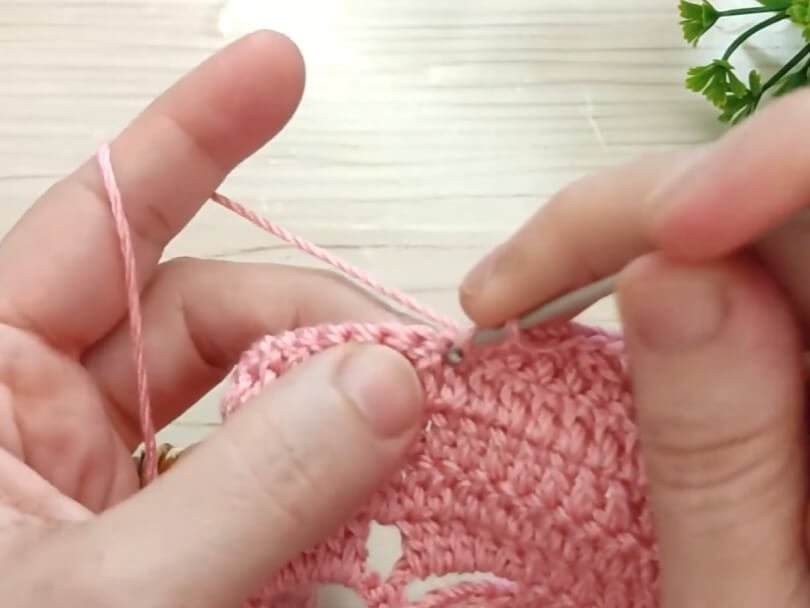
Repeat the 6-row motif cycle (Motif Rows 1 to 6) to expand the triangle. Each full 6-row repeat adds one additional dragonfly across the width:
First Repeat Expansion (Rows 10–15):
- Row 10 (Repeat Row 1): Ch 4, Shell in Shell, ch 2, 2 dc in ch-sp (Start of new outer motif), 1 dc in next 6 dc, 5 dc in ch-6 sp, ch 1, 5 dc in next ch-6 sp, 1 dc in next 6 dc, 2 dc in ch-sp (Start of outer motif), ch 2, Shell in Shell, ch 1, 1 dc in end sp. Turn.
- Row 11 (Repeat Row 2): Ch 4, Shell in Shell, ch 2, 2 dc in ch-sp, 1 dc in next 2 dc (4 dc), ch 1, 1 dc in each of the 23 center dc sts, ch 1, 1 dc in next 2 dc, 2 dc in ch-sp (4 dc), ch 2, Shell in Shell, ch 1, 1 dc in end sp. Turn.
- Row 12 (Repeat Row 3): Ch 4, Shell in Shell, ch 2, 2 dc in ch-sp, 1 dc in next 4 dc (6 dc), ch 1, 1 dc in each of 23 center dc sts, ch 1, 1 dc in next 4 dc, 2 dc in ch-sp (6 dc), ch 2, Shell in Shell, ch 1, 1 dc in end sp. Turn.
- Row 13 (Repeat Row 4): Ch 4, Shell in Shell, ch 2, 2 dc in ch-sp, 1 dc in next 6 dc (8 dc), ch 3, 1 dc in each of 23 center dc sts, ch 3, 1 dc in next 6 dc, 2 dc in ch-sp (8 dc), ch 2, Shell in Shell, ch 1, 1 dc in end sp. Turn.
- Row 14 (Repeat Row 5): Ch 4, Shell in Shell, ch 2, 2 dc in ch-sp, 1 dc, dc2tog cluster, ch 11, dc2tog cluster, 11 dc across center, dc2tog cluster, ch 11, dc2tog cluster, 1 dc, 2 dc in ch-sp, ch 2, Shell in Shell, ch 1, 1 dc in end sp. Turn.
- Row 15 (Repeat Row 6): Ch 4, Shell in Shell, ch 2, 2 dc in ch-sp, 5 dc on sts, ch 6, 1 sc catch-all, ch 6, 13 dc across center dragonfly body, ch 6, 1 sc catch-all, ch 6, 5 dc on sts, 2 dc in ch-sp, ch 2, Shell in Shell, ch 1, 1 dc in end sp. Turn.
(Continue repeating this 6-row cycle until you complete 4 full dragonfly tiers or reach approx. 24 cm / 9.5 inches in height before top edging).
Part 4: Straight Top Edge & Tie Straps Finishing
Top Solidifying Row:
- Row 1 (Fill-in Row): Ch 4, Shell in Shell, 2 dc in ch-sp, 1 dc in each dc across the row (working 5 dc inside each ch-6 sp and skipping center wing chains to form a smooth straight top edge), 2 dc in last ch-sp, Shell in Shell, ch 1, 1 dc in end sp. Turn.
- Row 2 (Flat Top Edge): Sl st into 2nd st, sl st into ch-2 sp of Shell. Ch 3 (counts as 1 dc), 2 dc in ch-2 sp, 1 dc in every st across entire top edge, 3 dc in final ch-2 sp. Do not turn.
Integrated Tie Straps:
- First Strap: Ch 45 (or desired length for tie), turn, sc in 2nd ch from hook and in each ch back toward the main bandana body.
- Anchor First Strap: Sl st into the corner post of the bandana to secure.
- Second Strap: Fasten off yarn and join with a sl st at the opposite top corner of the bandana. Ch 45, turn, sc in 2nd ch from hook and in each ch back to corner.
- Fasten Off: Sl st to secure, cut yarn, and weave in all loose ends neatly on the wrong side.
Detailed Pattern Breakdown
1. Structural Triangle Growth and Shell Edges
- The bandana is constructed from the bottom point upwards using a classic growing triangular geometry.
- The foundation uses a small chain ring from which symmetrical sides branch out.
- Every row maintains fixed side borders:
ch 4 + Shellon the left andShell + ch 1 + 1 dcon the right. These side shells form an automatic scalloped lace edge along the two diagonal sides of the bandana.
2. Dragonfly Motif Geometry
- Body & Wing Base (Rows 4–6): Increments of double crochets (
2 dcadded into edge spaces) widen the fabric, while chain spaces (ch 1,ch 3) separate solid dc blocks to define the dragonfly silhouette. - Wingspan Formation (Row 8): A large
ch 11bridge is created across skipped stitches.dc2tog clusterson either side pull the base stitches inwards, creating a tapered wing angle. - Wing Cinch & Tail (Row 9): A central
screaches down over the chain bridges of Rows 7 and 8, pulling them down in the center to shape upper and lower wings. - Motif Staggering (Rows 10–15): The central solid dc column forms the dragonfly’s tail (11 to 13 dc), while new dragonfly motifs bloom on the expanding outer left and right sections.
3. Edge Stabilization and Straps
- The final two rows convert the jagged lace top into a smooth, structured straight band that rests comfortably across the forehead or hairline.
- The tie straps are worked directly into the top corners using sturdy single crochet chains, providing durability for daily wear and tying without stretching out of shape.
Pattern Questions
Question: My dragonfly wings look a bit loose and floppy. How can I fix this?
Answer: When working Row 9, make sure your central sc goes under both the ch 3 from Row 7 and the ch 11 from Row 8 simultaneously. Pull this single crochet stich snug before completing it; this cinches the long chain bridges together into neat, defined wings.
Question: How can I make this bandana larger into a full neck shawl?
Answer: Simply continue repeating the 6-row motif cycle (Repeat Rows 1 to 6). Each 6-row repeat adds another dragonfly tier to the width and increases the depth by about 2 inches (5 cm). Continue until you reach your preferred wingspan, then proceed to the Top Edge and Tie Straps instructions.
Question: What type of yarn works best for this lace pattern?
Answer: A 100% cotton or cotton-acrylic blend in Sport or Light DK weight (worked with a 3.0 mm – 3.5 mm hook) gives the best results. Cotton holds stitch definition crisply so the dragonfly lace cutouts remain open and clear after washing and blocking.