
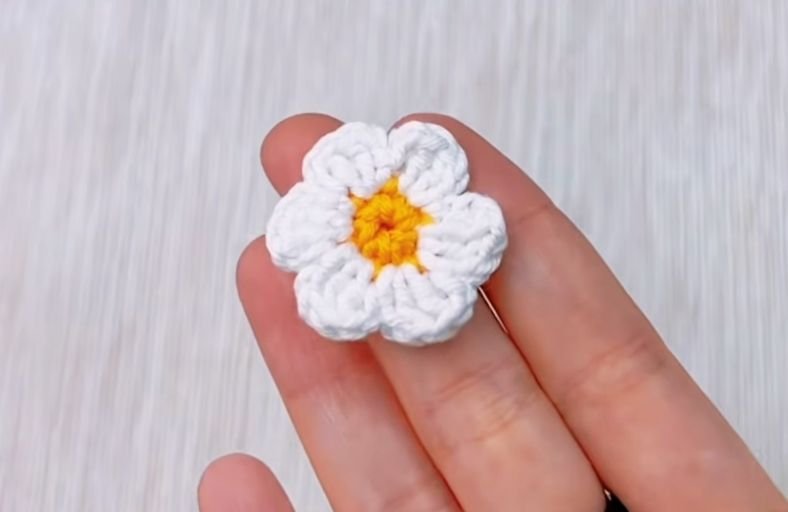
Looking for a quick floral fix that will instantly brighten up your wardrobe, bags, or home decor?
Whether you want to jazz up a plain cardigan, add a cheerful touch to a hair clip, or craft a sweet tie accessory for a project, this adorable crochet daisy is your ultimate shortcut to instant crafting happiness!
Fast, fun, and completely beginner-friendly, this project takes just minutes to bring to life using fundamental stitches.
Materials and Preparation
Materials:
- Yarn (Flower Center): Yellow yarn (sport or worsted weight recommended).
- Yarn (Flower Petals): White yarn (sport or worsted weight recommended).
- Yarn (Ties/Decoration – Optional): Fine yarn for thin ties or DK/Worsted weight yarn for wider ties.
Tools:
- Crochet Hook:
- 2.5 mm – 3.5 mm hook for the main daisy (adjust based on your yarn weight).
- 1.0 mm hook for thin ties (if using fine yarn).
- 2.0 mm hook for wider ties (if using thicker yarn).
- Yarn Needle: Tapestry needle for weaving in ends.
- Scissors: Sharp craft scissors.
- Stitch Marker: Optional, useful for tracking the start of rounds.
Preparation Notes:
- Brush up on basic stitches: single crochet (
sc), double crochet (dc), half double crochet (hdc), treble crochet (tr), and slip stitch (sl st). - Pay attention to color changes: the last single crochet of Round 1 requires pulling the new petal color through the final two loops to ensure a seamless color transition.
Abbreviations and Notes
Abbreviations:
- MR: Magic Ring
- ch: Chain
- sc: Single Crochet
- hdc: Half Double Crochet
- dc: Double Crochet
- tr: Treble Crochet
- sl st: Slip Stitch
Pattern Notes:
- The flower center is worked in a continuous circle starting with a Magic Ring.
- The petals are worked directly into the center stitches in a single round using height-building chain loops and double crochets.
- The ties are worked in a single chain foundation row with symmetric stitch height scaling on both ends.
Gauge, Approximate Size, and Pattern Notes
Gauge:
Gauge is not critical for this project. Maintain even tension so the center ring stays tight and the petal stitches pop cleanly.
Finished Size:
- Daisy Flower: Approximately 2.0–2.5 inches (5.0–6.5 cm) in diameter.
- Decorative Ties: Approximately 12–15 inches (30–38 cm) total length depending on yarn weight and hook size used.
Special Techniques:
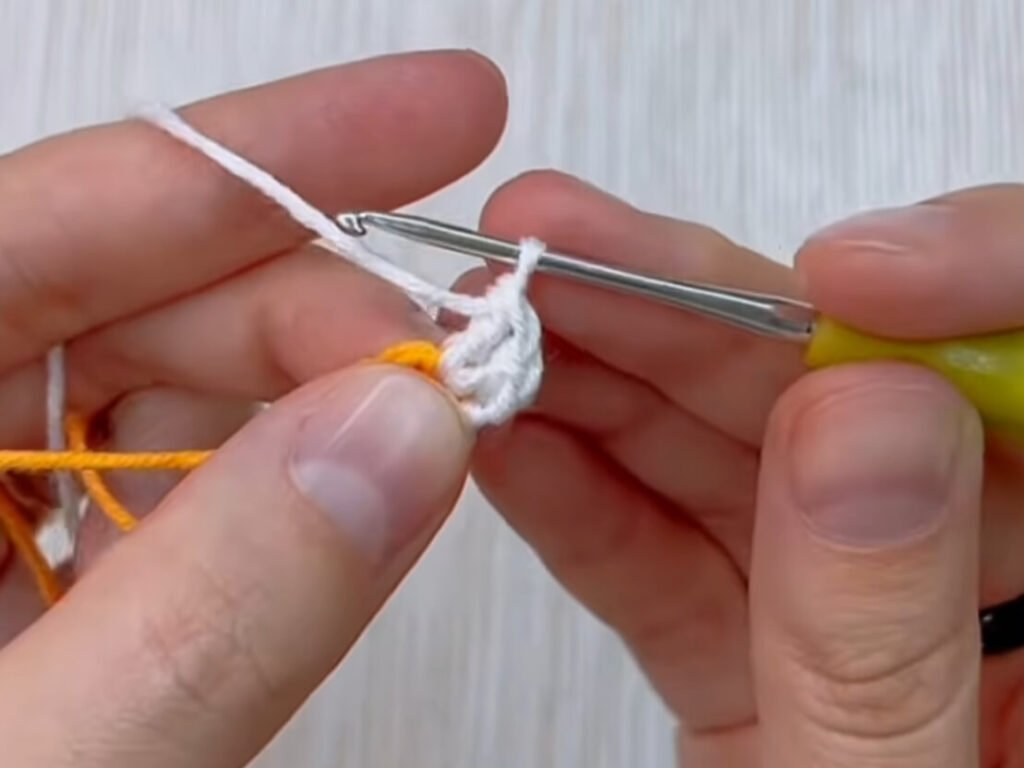
- Seamless Color Change: When finishing the last
scof the flower center, stop before the final pull-through, yarn over with the white petal yarn, and pull through both loops to switch colors cleanly. - Petal Cluster Formation: Each petal combines height-building chains and
dcstitches anchored into the same stitch to form a rounded petal leaf shape.
Step-by-Step Pattern
Part 1: Daisy Flower Center
Work with Yellow Yarn:
- R1: Make a MR, work 6 sc into the ring (6). (On the 6th sc, do not complete the final pull-through with yellow yarn. Switch to white yarn on the final pull-through, then make 1 sl st into the first sc of R1 to join).
Part 2: Daisy Petals
Work with White Yarn directly into R1 stitches:
- Petal Sequence (Repeat 6 times total around the 6 center stitches):
- Petal 1: Into the current stitch: ch 2, 2 dc into the same stitch, ch 2. Into the next stitch: sl st.
- Petals 2–6: Repeat the exact same sequence: (ch 2, 2 dc into the current stitch, ch 2, sl st into the next stitch).
- Ending: Make a final sl st into the very first sl st made at the start of Round 2.
- Fasten off yarn and weave in all loose ends securely.
Part 3: Optional Decorative Accent & Ties
Details: Decorative Strap/Tie (Thin or Wide option)
Choose your preferred yarn and hook combination (e.g., fine yarn with 1.0 mm hook for thin ties, or thicker yarn with 2.0 mm hook for wider ties):
- Foundation: Ch 66.
- Row 1: Working starting from the 2nd chain from the hook:
- 1 sl st into the 2nd ch from hook
- 1 sc into the next ch
- 1 hdc into the next ch
- 1 dc into each of the next 2 chs
- 1 tr into each of the next 2 chs
- 1 dc into the next ch
- 1 hdc into the next ch
- 1 sc into the next ch
- 1 sl st into each of the next 45 chs (creates the center narrow strap portion)
- 1 sc into the next ch
- 1 hdc into the next ch
- 1 dc into the next ch
- 1 tr into each of the next 2 chs
- 1 dc into each of the next 2 chs
- 1 hdc into the next ch
- 1 sc into the next ch
- 1 sl st into the last ch
- Fasten off and hide yarn tails using a tapestry needle.
Part 4: Assembly & Finishing
- Trim away any excess yarn tails after weaving them firmly through the back of the yellow center and white petals.
- Attach your completed daisy onto cardigans, hats, hair clips, tote bags, or attach it to the center of your newly crafted tie accent.
Detailed Pattern Breakdown
1. Flower Center Mechanics:
- The base of the daisy relies on a tight 6-stitch Magic Ring (
MR 6 sc). - Keeping this base small and even ensures that each of the 6 petals has exactly 1 anchor stitch to build from, producing a balanced, symmetrical flower.
- The seamless color join on the 6th stitch prevents an unsightly yellow loop from bleeding into the white petals.
2. Petal Geometry:
- Each petal uses stitch height progression to achieve a rounded, plump petal shape.
- The
ch 2lifts the working yarn to the necessary height, twodcstitches add fullness inside the same anchor stitch, and the returningch 2drops the height back down before anchoring into the next stitch with asl st. - Repeating this across all 6 base stitches creates a perfectly proportioned 6-petal daisy.
3. Decorative Tie Mechanics:
- The tie uses a clever wave-stitch gradient to create leaf-like or tapered ends connected by a simple chain spine.
- Moving from
sl sttosctohdctodcand up totrgradually increases the width. - Reversing the sequence (
trtodctohdctosctosl st) tapers the shape back down, leaving 45 flat slip stitches in the center for a clean strap section.
Pattern Question:
Question: How can I ensure my daisy petals don’t curl forward, and how do I change colors without a noticeable bump?
Answer: If your petals curl forward, your tension might be a bit too tight, or your hook size may be too small for the yarn weight. Try relaxing your grip on the ch 2 and dc stitches to let the petals lay completely flat.
For the seamless color change, never complete the 6th single crochet in Round 1 with the yellow yarn. Leave the last 2 loops of yellow on your hook, drop the yellow yarn, place the white yarn over your hook, and pull the white loop through both yellow loops. This establishes your new color directly on the stitch crown before you slip stitch to join Round 1!