
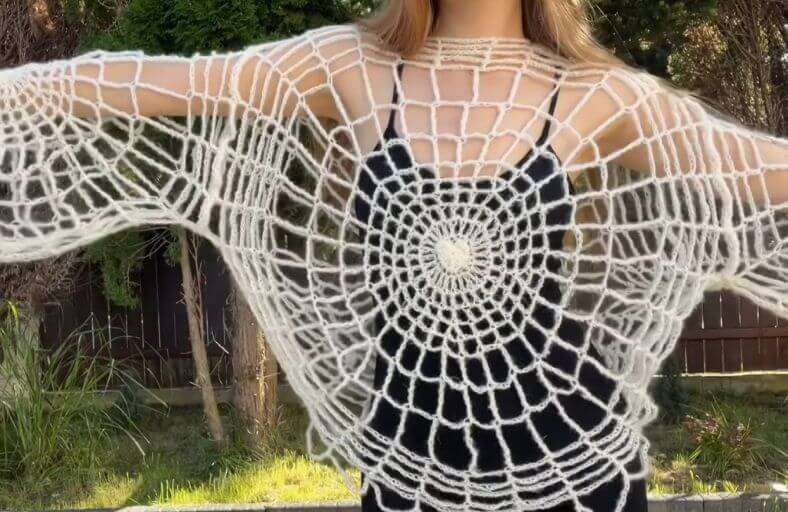
Ready to spin some serious fiber magic? The Crochet Spider Web Top is the ultimate blend of edgy street style, gothic romanticism, and playful DIY charm!
Featuring a sweet heart motif right at the center of the web, flared bohemian sleeves, and dramatic dripping arches, this sheer layering piece is bound to turn heads whether you are dressing up for a Halloween party or layering it over a sleek cami for an everyday outfit.
Materials and Preparation
Materials:
- Yarn: Approximately 130 g to 150 g of fine or lace weight yarn (Mohair yarn with ~570 m / 150 g creates a dreamy, halo-like cobweb texture; however, cotton or fine acrylic yarn works wonderfully if you prefer a crisp stitch definition).
- Accent Yarn: Small scrap of contrasting fine yarn for the center heart (if desired).
Tools:
- Crochet Hooks: 5.0 mm (H-8) main hook for the spider web top; 4.0 mm (G-6) hook for the sweet center heart.
- Yarn Needle: Tapestry needle for seaming and hiding ends.
- Stitch Markers: 4 or more locking stitch markers to plan the neckline, underarms, and sleeve placement.
- Scissors: Sharp craft scissors.
Preparation Notes:
- Fiber Choice: Mohair gives an authentic, wispy cobweb look, but if you are an absolute beginner, smooth cotton or soft acrylic will make it much easier to see your stitches and undo any mistakes.
- Drape & Tension: Maintain a loose, relaxed tension. The open mesh mesh structure expands effortlessly, so keep your chains light and airy.
Abbreviations and Notes
Abbreviations:
- ch: Chain stitch
- sl st: Slip stitch
- sc: Single crochet
- dc: Double crochet
- tr: Treble crochet (Yarn over twice)
- dtr: Double treble crochet (Yarn over 3 times)
- trtr: Triple treble crochet (Yarn over 4 times)
- sextuple tr: Sextuple treble crochet (Yarn over 6 times)
- MR: Magic Ring (Magic Circle)
- inc: Increase (2 dc, ch 1, 2 dc or specified pattern in the same stitch)
- st(s): Stitch(es)
Pattern Notes:
- The front and back panels are worked in the round starting from a central circle, gradually opening up into wide web spokes with increasing chain spaces and taller stitches.
- The 14th round creates asymmetry and dripping spiderweb strands at the hem through custom long chain loops.
- Sleeves are worked similarly for 12 rounds (or fewer if you prefer a shorter wrist length).
- All stitch counts and chain extensions use standard US Crochet Terms.
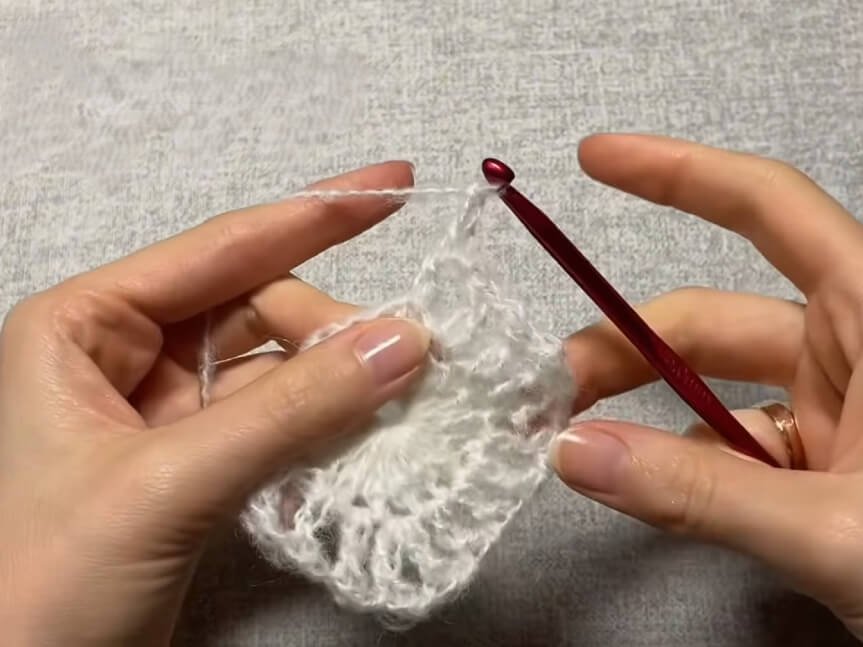
Gauge, Approximate Size, and Pattern Notes
Gauge:
Gauge is flexible due to the open spiderweb mesh construction. A 5.0 mm hook with fine yarn allows the web spokes to stretch easily to your desired body circumference.
Finished Size:
- Fit: Oversized, adjustable mesh top. Fits sizes XS to XL effortlessly by adjusting chain lengths or round counts.
- Model Dimensions for Reference: Height 5 ft 4.5 in (164 cm). Sleeves are designed long and flared.
Special Techniques:
- Tall Stitch Spacing: Utilizing extra yarn-overs (dtr, trtr, and sextuple tr) to create ultra-tall radial pillars that mimic authentic spiderweb geometry.
- Dripping Hem Chains: Custom chain extensions placed between specific markers along the bottom edge to simulate dangling web strands.
- Seaming with Single Crochet: Joining structural arches face-to-face using single crochet chains to create clean, sturdy shoulder and side joins.
Step-by-Step Pattern
Part 1: Front Panel (Main Spider Web Motif)
Worked in continuous expanding rounds starting from the center ring using a 5.0 mm hook:
- R1: Start with MR. Ch 3 (counts as 1st dc), work 19 dc into the ring. Join with sl st to the 3rd ch of the initial ch-3. Tighten the ring. (20 dc)
- R2: Ch 4 (counts as dc + ch 1). [1 dc in next st, ch 1] 3 times. In 5th st, work increase: (1 dc, ch 1, 1 dc) in same st. Repeat [1 dc in next st, ch 1] 4 times, then increase in next st around. End with ch 1, sl st into 3rd ch of initial ch-4.
- R3: Ch 4 (counts as dc + ch 1). Work 1 dc in each dc around with ch 1 between each dc (no increases). Join with sl st to 3rd ch of initial ch-4.
- R4: Ch 5 (counts as dc + ch 2). [1 dc in next st, ch 2] 4 times. Increase in 6th st: (1 dc, ch 2, 1 dc) in same st. Repeat pattern around, increasing in every 6th spoke. Join with sl st to 3rd ch of initial ch-5.
- R5: Ch 5 (counts as dc + ch 2). Work 1 dc in each spoke around with ch 2 between each. Join with sl st to 3rd ch of initial ch-5.
- R6: Ch 6 (counts as dc + ch 3). Work 1 dc in each spoke with ch 3 between them, making an increase (1 dc, ch 3, 1 dc) in every 7th spoke. Join with sl st to 3rd ch of initial ch-6.
- R7: Ch 10 (counts as 1 dtr + ch 5). Yarn over 3 times (dtr). Work [1 dtr in next spoke, ch 5] across every spoke around. Join with sl st into 5th ch of initial ch-10.
- R8: Ch 11 (counts as 1 trtr + ch 5). Yarn over 4 times (trtr). Work [1 trtr in next spoke, ch 5] across every spoke around. Join with sl st into 6th ch of initial ch-11.
- R9: Ch 14 (counts as 1 sextuple tr + ch 6). Yarn over 6 times. Work [1 sextuple tr in next spoke, ch 6] across every spoke around. Join with sl st into 8th ch of initial ch-14.
- R10: Ch 11 (counts as 1 dc + ch 8). Work [1 dc in next spoke, ch 8] across every spoke around. Join with sl st into 3rd ch of initial ch-11.
- R11: Ch 11 (counts as 1 dc + ch 8). Work [1 dc in next spoke, ch 8] across every spoke around. Join with sl st into 3rd ch of initial ch-11.
- R12: Ch 12 (counts as 1 dc + ch 9). Work [1 dc in next spoke, ch 9] across every spoke around. Join with sl st into 3rd ch of initial ch-12.
- R13: Ch 12 (counts as 1 dc + ch 9). Repeat R12. Join with sl st into 3rd ch of initial ch-12.
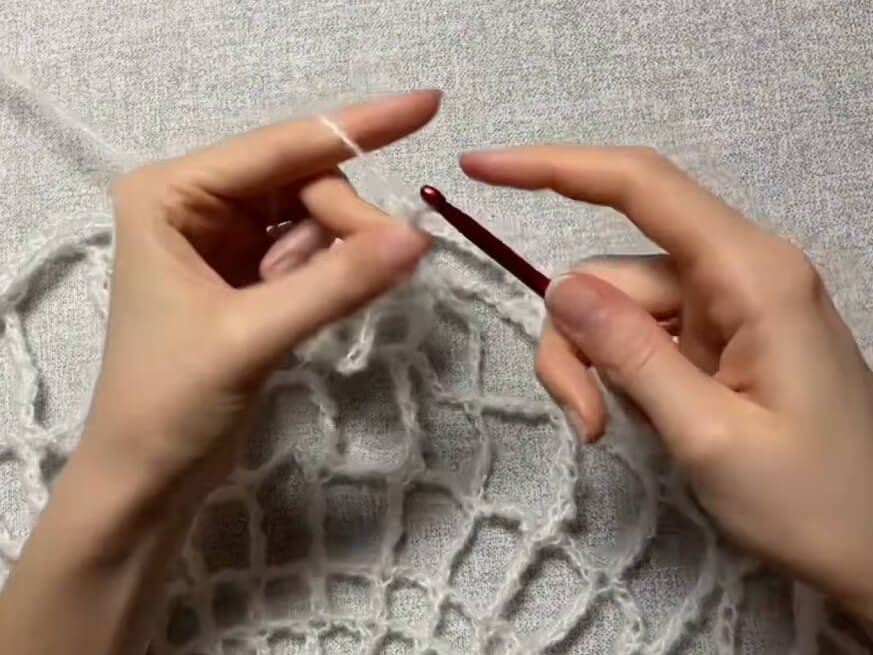
R14: Hemline & Dripping Arch Setup
Mark arches before beginning: Place Marker A on the 1st arch. Count 5 arches; place Marker B on the 6th arch (5 arches for Neckline).
Count 9 arches on the side; place Marker C on 10th arch (Side 1). Count 5 arches along bottom; place Marker D (Bottom). The remaining 9 arches form Side 2.
- R14: Ch 13. Turn work. Work [1 dc, ch 10] across spokes until reaching the bottom markers. Between bottom markers, create dripping web arches by chaining extended chains (e.g., ch 18, ch 20, ch 25) into consecutive spokes. Continue with [1 dc, ch 10] along remaining side spokes up to the marker. Ch 1, fasten off.
Part 2: Back Panel & Sleeves
- Back Panel: Crochet identical to Part 1 (R1 through R14).
- Sleeves (Make 2): Crochet identical to Part 1 from R1 through R12 (for dramatic long flared sleeves). For a shorter wrist fit, stop at R9 or R10. Fasten off leaving yarn tails for assembly.
Part 3: Center Heart Accent & Details
Center Heart Motif:
Using a 4.0 mm hook and contrasting or matching yarn:
- R1: Start with MR. Ch 3, work into the ring: 3 tr, 3 dc, ch 1, 1 tr, ch 1, 3 dc, 3 tr. Ch 2, sl st into the center of the ring.
- Tighten MR firmly, cut yarn leaving a long tail, and pull through. Sew neatly onto the center circle of the front spiderweb panel using a tapestry needle.
Part 4: Assembly and Finishing
- Shoulder Seams:
- Lay Front and Back panels face-to-face (inside out).
- Align the 5 neckline arches. Use 3 arches on each side for the shoulders.
- Attach yarn at the outer spoke. Work 10 sc across each arch space and 1 sc into each dc spoke join to connect the shoulder line seamlessly. Fasten off.
- Attaching Sleeves:
- Align the center arch of the sleeve (5th arch of 9) directly with the shoulder seam.
- Work 9 sc across each sleeve arch space and 1 sc into each spoke join along the armhole to connect the sleeve to the body panels.
- Side Seams & Underarms:
- Align Front and Back side panels from the sleeve cuffs down to the bottom hem.
- Work 10 sc per arch along body sides and 9 sc per arch along sleeve seams. Under armpits, work 2 sc on each side of the join seam.
- Ch 1, fasten off, and weave in all yarn ends securely.
Detailed Pattern Breakdown
1. Central Radial Foundation & Geometric Increases
The top initiates with a dense 20-dc foundation ring. By introducing controlled increases every 5th spoke on R2, 6th spoke on R4, and 7th spoke on R6, the circle expands into a stable, flat plane. The alternating non-increase rounds (R3 and R5) allow the mesh to settle smoothly without cupping or waviness.
2. Vertical Web Expansion via Super-Tall Stitches
To transition from a tight center wheel into dramatic, sprawling cobweb rays, the pattern introduces progressively taller stitch structures:
- R7: Uses double treble crochet (dtr) with ch-5 loops.
- R8: Elevates to triple treble crochet (trtr) with ch-5 loops.
- R9: Maxes out height using sextuple treble crochet (6 yarn-overs) with ch-6 loops. These massive vertical posts push the web outwards exponentially while keeping the fabric lightweight and airy.
3. Asymmetrical Hem Strands & Structural Joining
The 14th round transforms a symmetrical circle into a wearable garment shape. By substituting standard ch-10 bridges with elongated chains (ch 18, 20, 25) along the bottom hem, the web creates an organic “dripping” effect. During assembly, working single crochet bridges across matching arch spans joins the open web structures securely without losing the delicate aesthetic.
Pattern Question
Question 1: Can I make this top longer or adjust it for a larger bust size?
Answer: Absolutely! Because the design stems from an expanding wheel, you can add extra mesh rounds (repeating ch-9 or ch-10 dc rounds) before completing R14. Alternatively, using a slightly larger hook (such as a 6.0 mm hook) will instantly scale up the entire garment.
Question 2: Is mohair yarn mandatory, and how do I prevent it from tangling while crocheting wide chains?
Answer: Mohair is optional; soft cotton, bamboo, or fine acrylic yarns create gorgeous stitch definition. If working with mohair, keep your stitch loops relaxed and pull your yarn over smoothly. Avoid pulling chains tightly, as delicate fibers prefer an open, gentle tension.
Question 3: How do I ensure the dripping web arches on the hem do not drag or stretch out over time?
Answer: Wet blocking your finished top allows all long chains to settle uniformly. When washing, gently hand wash in cool water, press out excess moisture between towels, and lay flat to dry so the arch strands retain their intended drape.