
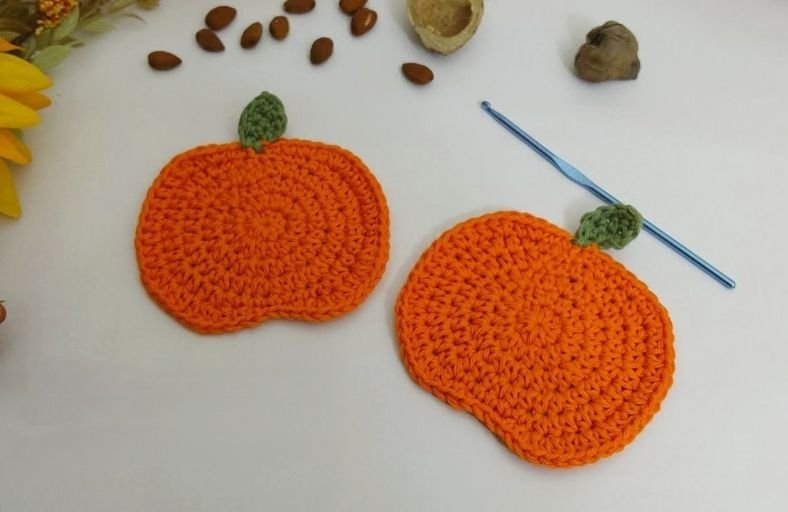
Is your coffee mug feeling a bit chilly as autumn rolls around?
Give your favorite fall drinks a cozy place to rest with these adorable crochet pumpkin coasters!
Shaped with soft curves, a cute green stem, and flat stitchwork, these mug rugs bring instant cozy vibes to any coffee table or autumn desk setup.
Grab your favorite cotton yarn, settle into your favorite crafting chair, and let’s work up a orchard-full of these sweet seasonal accessories!
Materials and Preparation
Materials:
- Base Yarn (Orange): Crafter’s Secret Cotton in Orange (or any worsted weight / category 4 cotton yarn).
- Stem Yarn (Green): Peaches and Cream Cotton in Rosemary (or any worsted weight green/brown cotton yarn).
Tools:
- Crochet Hook: 4.0 mm (US G/6) crochet hook.
- Yarn Needle & Tapestry Needle: For weaving in loose ends cleanly.
- Scissors: Sharp craft scissors.
- Smaller Crochet Hook (Optional): For weaving in yarn tails quickly.
Preparation Notes:
- Using 100% cotton yarn is highly recommended for coasters because it absorbs heat and condensation efficiently without melting or warping.
- Keep your stitch tension consistent so your coaster lays flat and smooth.
Abbreviations and Notes
Abbreviations:
- MR: Magic Ring
- ch: Chain
- sl st: Slip Stitch
- sc: Single Crochet
- hdc: Half Double Crochet
- inc (hdc inc): Half Double Crochet Increase (2 hdc in the same stitch)
- sc2tog: Single Crochet 2 Together / Decrease
- sl st2tog: Slip Stitch 2 Together
Pattern Notes:
- The coaster base is worked in joined rounds. Each round begins with a
ch 1(does not count as a stitch) and ends with asl stinto the first stitch of that round. - Rows 5 and 6 break the standard circular symmetry by placing strategic increases and mixed stitch heights (
scandhdc) to form the characteristic dips and rounded lobes of a pumpkin shape. - The leaf-like stem is attached at the top using green yarn, worked in short turned rows.
Gauge, Approximate Size, and Pattern Notes
Gauge:
Gauge is not critical for this coaster, but keeping your stitches uniform ensures your finished work lays perfectly flat without buckling.
Finished Size:
Approximately 4.5 inches (11.4 cm) in width, and about 5 inches (12.7 cm) tall including the stem.
Special Techniques:
- Strategic Shaping: Alternating between
scandhdcstitches creates distinct bottom indentations and full cheek curves. - Sl st2tog (Slip Stitch 2 Together): A neat joining technique used at the bottom crease of Row 5 to keep the base smooth and seamless.
Step-by-Step Pattern
Part 1: Circular Base (Rounds 1–4)
Start with Orange Cotton Yarn:
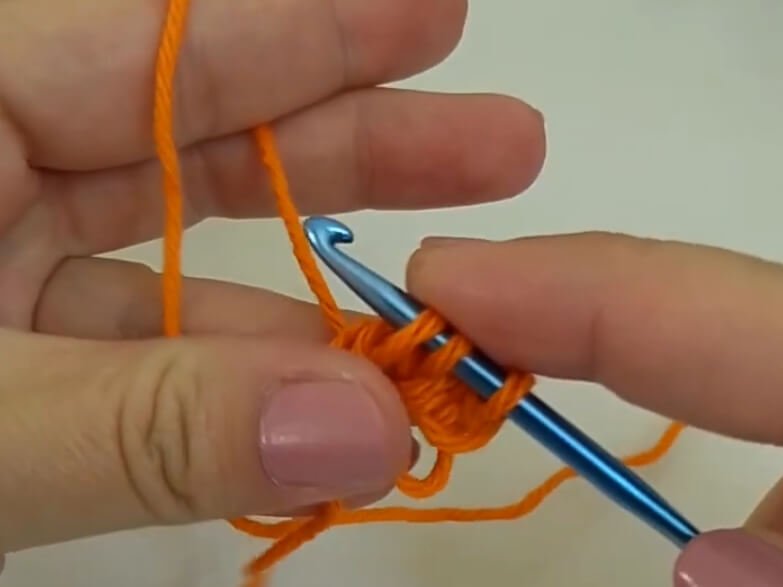
- R1: Make a MR, ch 1, work 9 hdc into the ring. Pull tail to close tightly. Sl st to first hdc to join (9 hdc).
- R2: Ch 1, 2 hdc in each st around. Sl st to first hdc to join (18 hdc).
- R3: Ch 1, (2 hdc in next st, 1 hdc in next st)*9. Sl st to first hdc to join (27 hdc).
- R4: Ch 1, (2 hdc in next st, 1 hdc in each of next 2 sts)*9. Sl st to first hdc to join (36 hdc).
Part 2: Pumpkin Body & Curves (Rounds 5–6)
- R5: Ch 1, 1 sc in same st, 1 sc in each of next 2 sts,
- 1 hdc in next st, 2 hdc in next st,
- 1 hdc in each of next 2 sts, 2 hdc in next st,
- 1 hdc in each of next 2 sts, 2 hdc in next st,
- 1 hdc in next st, 2 hdc in next st,
- 1 sc in each of next 6 sts, 2 hdc in next st,
- 1 hdc in each of next 2 sts, 2 hdc in next st,
- 1 hdc in each of next 2 sts, 2 hdc in next st,
- 1 hdc in each of next 2 sts, 2 hdc in next st,
- 1 hdc in next st, 1 hdc in next st,
- 1 sc in each of next 3 sts.
- Insert hook into last st, yarn over and pull through, insert hook into first sc of round, yarn over and pull through all loops to complete sl st2tog join
- R6: Ch 1, 1 sc in same st, 1 sc in next st, 2 sc in next st,
- 1 hdc in next st, 2 hdc in next st,
- 1 hdc in each of next 8 sts,
- 2 hdc in next st, 2 hdc in next st,
- 1 hdc in next st, 2 hdc in next st,
- 2 hdc in next st, 1 sc in each of next 2 sts,
- 1 sl st in each of next 2 sts, 1 sc in each of next 2 sts,
- 2 hdc in next st, 2 hdc in next st,
- 1 hdc in next st, 2 hdc in next st,
- 2 hdc in next st,
- 1 hdc in each of next 8 sts,
- 2 hdc in next st, 1 hdc in next st,
- 2 sc in next st, 1 sc in each of next 3 sts,
- sl st into top space to finish base. Fasten off orange yarn.
Part 3: Stem & Leaf Top
Head: Pumpkin Stem (Green Yarn)
Join Green Yarn at the top slip stitch center of R6:
- Row 1: Join green yarn, ch 3. In 2nd ch from hook work 2 sc, in next ch work 2 sc. Sc back into the same sl st space on the coaster body. Ch 1, turn.
- Row 2: 1 sc in same st, 1 sc in each of next 3 sts, 1 sc in last ch space (5 sc). Ch 1, turn.
- Row 3: 1 sc in each st across (5 sc). Sl st down into the slip stitch join at the main body base to secure. Fasten off and leave a tail for weaving.
Part 4: Edging, Assembly & Finishing
- Finishing Steps:
- Pull both green and orange yarn tails firmly to tighten the join between the stem and body.
- Thread yarn tails onto a tapestry needle (or use a small crochet hook) and weave into the back side of the coaster stitches.
- Weave the orange center tail around the original magic ring loops to prevent it from loosening.
- Lightly steam press or block the coaster if needed so it lies flat on your table.
Detailed Pattern Breakdown
1. Circle Base Development (Rounds 1–4)
The base begins like a classic flat crochet circle, utilizing hdc stitches to build vertical structure quickly. Round 1 establishes a tight center with 9 hdc sts in a magic ring. Round 2 doubles the count to 18 hdc using simple increases. Rounds 3 and 4 expand the circle predictably following standard increase rules (2 hdc, 1 hdc in R3; 2 hdc, 1 hdc, 1 hdc in R4), producing a sturdy flat disc of 36 stitches.
2. Contouring the Pumpkin Body (Rounds 5–6)
To shift the shape from a round disc into a recognizable pumpkin silhouette, Row 5 introduces height variance. Shorter sc stitches are worked across the top and bottom indentations, while taller hdc stitches and strategic increases (2 hdc) expand outwards to create two plump sides. Round 6 reinforces this silhouette by placing sl st across the bottom center to create a subtle heart-like indentation, while clustered increases (2 hdc in next 2 sts) give the pumpkin full, rounded cheeks.
3. Integrated Stem Construction
Instead of crocheting a separate piece and sewing it on, the stem is worked directly onto the top edge of the pumpkin base. Joining green yarn at the central slip stitch, a short ch 3 foundation is created.
Increases worked along the chain build a gentle curve, and two quick turned rows of sc create a sturdy, leaf-like stem that sits securely on top of the coaster.
Pattern Question:
Question: My pumpkin coaster is curling up around the edges instead of laying flat. How can I fix this?
Answer: Edge curling usually happens if your tension is too tight during Rounds 5 and 6, or if an increase was missed. First, double-check your stitch count to make sure all hdc increases were worked into the exact designated stitches.
If your stitch count is correct, try switching to a slightly larger hook (such as a 4.5 mm) for the final round, or steam-block your finished cotton coaster by pinning it flat and gently hovering a warm steam iron over it.