
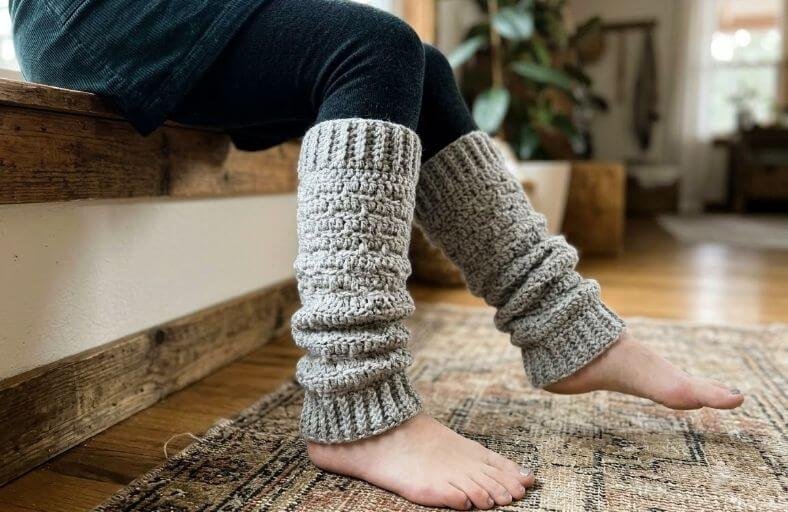
Are your legs shivering at the mere thought of winter weather, or are you just looking to bring back that iconic, cozy retro aesthetic?
Either way, you have landed in the exact right spot! These textured crochet leg warmers are designed to keep you super warm while looking effortlessly stylish over leggings or peeking out of your favorite winter boots.
Best of all, this fan-favorite pattern features a clever brick-like texture and a ribbed cuff system that prevents them from sliding down your calves.
Grab your hook, settle into your favorite crafting chair, and let us stitch up a pair of cozy leg warmers together!
Materials and Preparation
Materials:
- Yarn:
- Medium weight (Category 4 / Worsted weight) yarn, 100% Wool recommended for maximum warmth (e.g., Paintbox Yarns 100% Wool Worsted or Lion Brand Fisherman’s Wool).
- Quantity: Approx. 1 to 2 skeins depending on length and brand used (Lion Brand Fisherman’s Wool can complete a full pair with 1 skein).
- Option: Acrylic or wool-blend yarn of worsted weight can be substituted if wool causes sensitivity.
Tools:
- Crochet Hook: 5.0 mm (US H/8) crochet hook.
- Tapestry / Yarn Needle: For sewing the foundation gap closed and weaving in loose ends.
- Stitch Markers: 1 to 2 markers (highly recommended for identifying the first stitch of each round).
- Scissors: Standard yarn scissors.
- Tape Measure: Essential for checking calf measurements when resizing.
Preparation Notes:
- Master the basics of working in the round, back-loop-only stitches, and front/back post double crochet stitches.
- Pay close attention to your foundation chain fit: the upper ribbed cuff must fit snugly around the calf so that the completed leg warmer stays put during movement.
Abbreviations and Notes
Abbreviations:
- ch: Chain stitch
- st(s): Stitch(es)
- sl st: Slip stitch
- sc: Single crochet
- dc: Double crochet
- FPdc: Front Post Double Crochet (Yarn over, insert hook around the post of the specified stitch from front to back to front, yarn over, pull up a loop, complete dc as normal)
- BPdc: Back Post Double Crochet (Yarn over, insert hook around the post of the specified stitch from back to front to back, yarn over, pull up a loop, complete dc as normal)
- BLO: Back Loop Only (Working only into the back loop of the V-stitch)
- FLO: Front Loop Only (Working only into the unworked front loop from a previous round)
Pattern Notes:
- This pattern uses standard US Crochet Terms.
- The initial chain-3 at the beginning of double crochet rounds counts as 1 double crochet stitch throughout the pattern.
- The starting chain-1 at the beginning of single crochet rounds does NOT count as a stitch.
- The top cuff and body are worked in joined rounds. After joining R1 into a ring, ensure your stitches are not twisted.
- When working FLO double crochets into the skipped front loops of earlier rounds, always leave the corresponding single crochet behind it unworked to maintain an exact stitch count of 45 sts per round.
- Original design and pattern credit belongs to Sigoni Macaroni.
Gauge, Approximate Size, and Pattern Notes
Gauge:
- Gauge is not strictly critical, but maintaining a snug stitch tension is key so the ribbed cuffs grip the leg securely.
- For custom sizing, calculate foundation chains using the resizing formula below.
Finished Size:
- Length: Approx. 15–18 inches (38–46 cm) long (customizable from short boot cuffs to over-the-knee warmers).
- Width / Circumference: Fits standard adult calf measurement of 13.5–15 inches (34–38 cm).
Resizing Instructions:
- Measure around the widest part of your calf using a tape measure.
- Subtract 3.5 inches (9 cm) from your measurement to ensure a snug fit.
- Create a foundation chain equal to that reduced measurement using a multiple of 4 + 1 + 2 chains (Example: 40 + 1 + 2 = 43, or default pattern size of 44 + 1 + 2 = 47 chains).
Special Techniques:
- Post Stitch Ribbing: Alternating FPdc and BPdc creates an elastic, stretchy cuff that holds its shape.
- Textured Brick / Drop Stitch: Alternating rounds of BLO single crochet with FLO double crochet into the unworked front loops two rounds below creates a raised, offset brick pattern.
Step-by-Step Pattern
Part 1: Top Ribbed Cuff
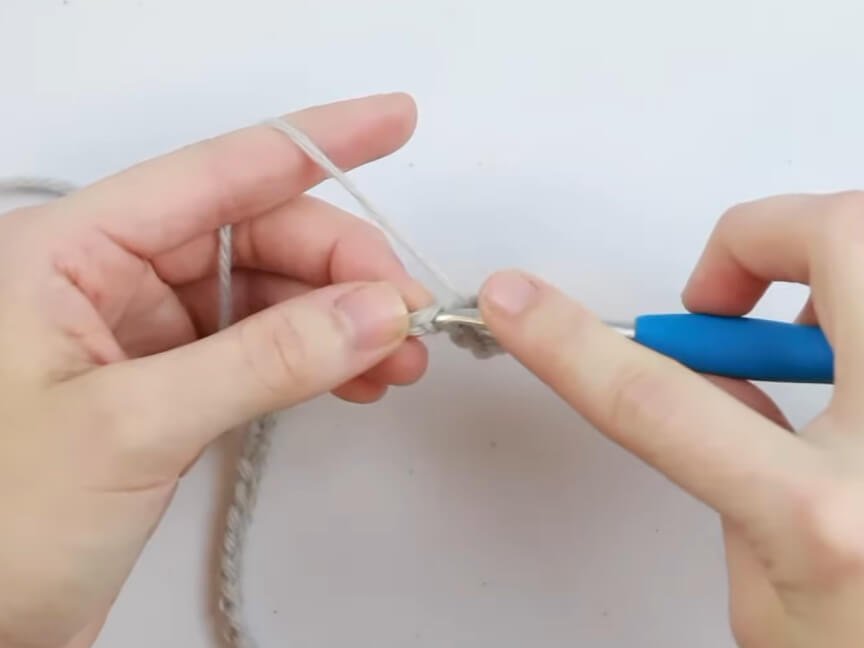
- Foundation Chain: Ch 47 (or your custom multiple of 4 + 3).
- Row 1: Dc in the 4th ch from hook (the 3 skipped chains count as 1 dc) and in each ch across. Turn. (45 sts)
- Joining: Fold work in half, keeping the front side facing outward. Sl st to the top of the initial ch-3 to form a loop, taking care not to twist the work. (Note: A small gap remains at the bottom base, which will be sewn closed during finishing).
Working in joined rounds from this point forward:
- Round 2: Ch 3 (counts as 1 dc), FPdc around the post of the next st, BPdc around the post of the next st. *FPdc around next st, BPdc around next st; repeat from * around until 1 st remains. BPdc around the last st post. Sl st to the top of the starting ch-3. (45 sts)
- Rounds 3–5: Repeat Round 2. (45 sts)
Part 2: Main Textured Body
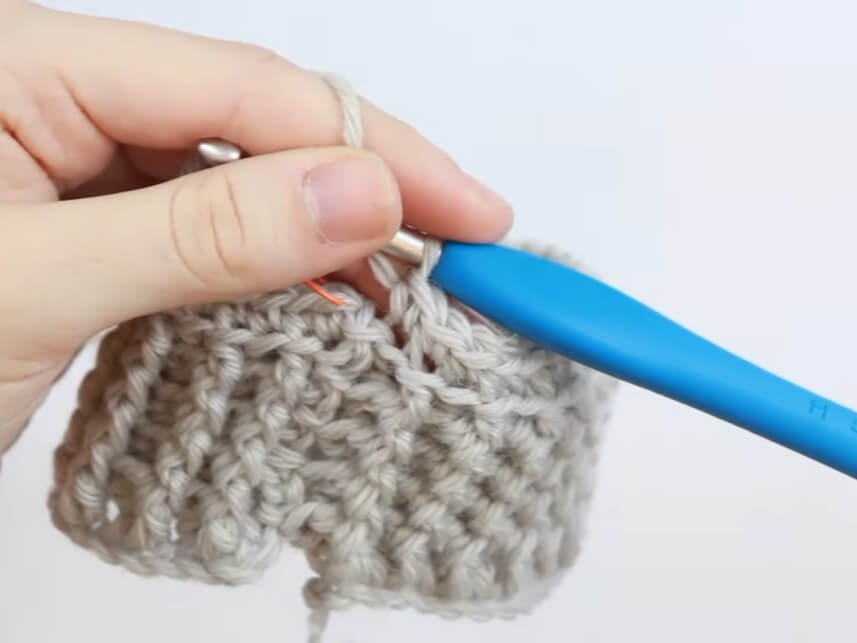
- Round 6: Ch 1 (does not count as st), sc BLO in the very first st (top of starting ch-3 from previous round), sc BLO in each st around. Sl st to the first sc of the round. (45 sts)
- Round 7: Ch 3 (counts as 1 dc), skip the first sc at the base of ch-3. Dc into the skipped front loop of the dc two rounds below the second sc. *Dc in back loops of each of the next 3 sc, dc into the front loop of the dc two rounds below the next sc; repeat from * around until 3 sts remain. Dc in each of the last 3 sc. Sl st to top of starting ch-3. (45 sts)
- Round 8: Ch 1, sc BLO in the first st and in each st around. Sl st to the first sc. (45 sts)
- Round 9: Ch 3 (counts as 1 dc), skip the first sc, dc in each of the next 2 sc. *Dc into the skipped front loop of the row below the next st, dc in each of the next 3 sc; repeat from * around until 2 sts remain. Dc into the skipped front loop below next st, dc in the last sc. Sl st to top of starting ch-3. (45 sts)
- Rounds 10–51: Repeat Rounds 6 through 9 eleven (11) more times, or until reaching your desired leg warmer length ending on a Round 8 repeat. (45 sts per round)
Part 3: Transition & Bottom Ribbed Cuff
- Round 52: Ch 1, standard sc (through both loops) in the first st and in each st around. Sl st to the first sc. (45 sts)
- Round 53: Ch 3 (counts as 1 dc), skip the first sc, standard dc (through both loops) in each st around. Sl st to top of starting ch-3. (45 sts)
- Round 54: Ch 3 (counts as 1 dc), *FPdc around next st, BPdc around next st; repeat from * around until 1 st remains. BPdc around the last st post. Sl st to top of starting ch-3. (45 sts)
- Rounds 55–57: Repeat Round 54. (45 sts)
Fasten off leaving a tail for weaving.
Part 4: Assembly & Finishing
- Thread the initial tail from your foundation chain onto a tapestry needle.
- Sew closed the small gap at the top corner of Row 1 where the foundation row was joined into a ring.
- Weave in all loose yarn ends securely on the inside of the leg warmer.
- Repeat Parts 1 through 4 to complete the second leg warmer to make a matching pair.
Detailed Pattern Breakdown
1. Top & Bottom Ribbed Cuff Construction
- Ribbing Mechanics: The top (R2–R5) and bottom (R54–R57) cuffs use alternating FPdc and BPdc worked directly around the posts of the previous round’s double crochets.
- Elasticity & Fit: By pulling the hook around the front and back of the vertical stitch posts, the fabric compresses horizontally. This mimics a knitted 1×1 ribbing, providing maximum elasticity to hold the leg warmer securely against the calf without needing elastic bands.
2. Textured Brick Pattern Geometry
- Alternating Base (BLO Single Crochet): Rounds 6 and 8 establish a foundation of 45 sc BLO stitches. Working into the back loop leaves the front loop of the stitch exposed on the exterior of the work.
- Surface Drop Stitches (FLO Double Crochet): In Rounds 7 and 9, long double crochets are anchored into those exposed front loops from two rounds below.
- Stitch Staggering: By offsetting the location of the drop stitch every two rounds (working 3 standard stitches between drop stitches), the long stitches form a staggered brick alignment. This creates a thick, insulated waffle-like fabric with enhanced heat retention.
3. Transitioning and Seam Line Alignment
- Smooth Transitions: Round 52 bridges the textured body to the bottom cuff by switching back from back-loop-only stitches to standard both-loop sc, stabilizing the fabric edge.
- Vertical Seam: Joining each round with a sl st into the starting ch-3 creates a neat, straight vertical seam along the back of the leg warmer that remains invisible when worn.
Pattern Question:
Question 1: Why is my stitch count off after working the textured drop-stitch rounds (Round 7 or Round 9)?
Answer: A common mistake on Round 7 and Round 9 is accidentally crocheting into the single crochet located directly behind the dropped front-loop double crochet. Whenever you work a double crochet down into the front loop of the row below, you must skip the corresponding single crochet in the current round behind it. If you crochet into both, your stitch count will increase beyond 45 stitches.
Question 2: How do I keep my leg warmers from slipping down when wearing them without leggings?
Answer: The secret lies in making the top foundation chain 3.5 inches (9 cm) smaller than the widest part of your calf. Because ribbing made of FPdc and BPdc stretches significantly, starting with a smaller measurement ensures the ribbed cuff grips your leg firmly. If your yarn has high stretch (like 100% wool), do not be afraid to pull the cuff snug during your fitting check after Round 5.
Question 3: Can I modify this pattern to make short boot cuffs or over-the-knee leg warmers?
Answer: Yes! To make short boot cuffs, simply stop repeating the body sequence around Round 10 to 12, then immediately jump to Round 52 for the bottom cuff transition. For over-the-knee warmers, continue repeating Rounds 6 through 9 until the piece reaches your mid-thigh. When making thigh-high warmers, remember to recalculate your initial foundation chain using your thigh measurement (minus 3.5 inches / 9 cm) so the top cuff remains snug on your upper leg.