

Are you looking to add a touch of cozy holiday cheer to your winter wardrobe, or perhaps seeking the ultimate handmade present that will leave your loved ones smiling from ear to ear?
These adorable Snowman Slippers feature festive striped hat cuffs, bright carrot noses, cute embroidered smiles, and playful red pom-poms on the sides.
Built over a sturdy double-layered sole for maximum comfort, this pattern is designed to bring joy to every step you take.
Materials and Preparation
Materials:
- Yarn (Medium weight / Worsted weight yarn):
- White yarn: For the soles, main upper shoe body, and face details.
- Dark Green yarn: For the lower outer sole and striped hat cuff.
- Red yarn: For the striped hat cuff and side pom-poms.
- Orange yarn: For the carrot nose.
- Black / Dark Brown yarn: For the eyes and embroidered smile.
- Decorative Trim: Gold metallic cord trim (optional, for bordering the hat cuff).
- Adhesive: Hot glue or liquid craft glue (optional for positioning features before sewing).
Tools:
- Crochet Hook: 3.0 mm crochet hook.
- Yarn Needle: Tapestry/yarn needle for joining soles, embroidering, and assembling facial features.
- Pom-Pom Maker or Fork: For crafting small side accent pom-poms.
- Scissors: Craft scissors for trimming ends.
Preparation Notes:
- Custom Sizing: The base pattern fits US Women Size 5–6 (EU 35–36 / approx. 9 inches foot length). To scale up or down, adjust the initial chain length by adding or subtracting chain stitches (approx. 2–3 chains per shoe size increment) while adjusting side counts proportionally to fit your foot profile or a shoe template.
- Double Sole Assembly: Each slipper uses two sole layers (one White inner layer and one Dark Green outer layer) joined together using single crochet around the edges to build structure and durability.
Abbreviations and Notes
Abbreviations:
- ch: Chain
- sl st: Slip stitch
- sc: Single crochet
- hdc: Half double crochet
- hdc inc: Half double crochet increase (2 hdc in the same stitch)
- hdc dec: Half double crochet decrease (hdc2tog)
- dc: Double crochet
- dc inc: Double crochet increase (3 dc in the same stitch used for sole curves)
- MR: Magic Ring
- BLO: Back Loop Only
Pattern Notes:
- Sole Layers: Mapped out in flat rows turning into full continuous rounds; you will craft two identical oval soles per slipper (one White, one Green).
- Upper Shoe Construction: Begins with the festive Green and Red ribbed cuff worked in short rows, followed by working White hdc stitches along the edge, progressing into shaped toe decreases.
- Color Changes: Carry unused yarn colors neatly along the back during cuff construction to avoid unnecessary knotting.
- Original design and pattern credit belongs to tallermanualperu.
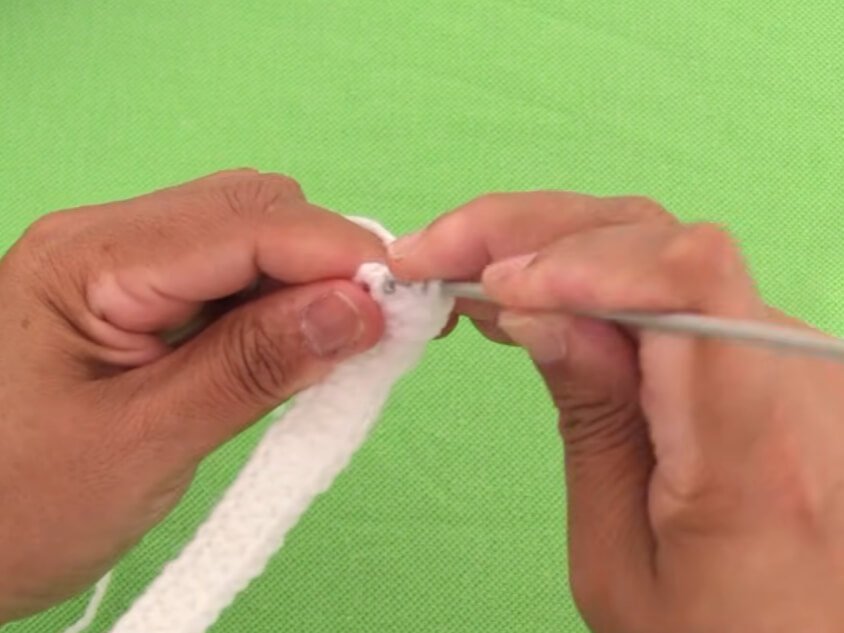
Gauge, Approximate Size, and Pattern Notes
Gauge:
18 hdc x 14 rows = 4 inches x 4 inches (10 cm x 10 cm) using a 3.0 mm hook. Maintain consistent tension to ensure both inner and outer soles match evenly.
Finished Size:
- Length: Approx. 9.0 in (23.0 cm)
- Width at Ball of Foot: Approx. 3.75 in (9.5 cm)
Special Techniques:
- Double-Sole Joining: Sandwiching two sole layers together by alignment and single-crocheting along the outer perimeter.
- Hdc Toe Decreasing: Double-end decreases (hdc2tog at beginning and end of toe section) to form a rounded front foot box.
Step-by-Step Pattern
Part 1: Double-Layer Soles (Make 2 White, Make 2 Green)
Craft 2 soles in White (inner top sole) and 2 soles in Dark Green (outer bottom sole):
- Foundation: Ch 21.
- R1: Ch 2 (counts as first hdc), 12 hdc, 8 dc. In the last ch, work 6 dc in the same stitch to turn the corner. Working along the opposite side of the chain: 8 dc, 12 hdc. Work 3 hdc in the end chain space. Sl st to top of starting ch-2.
- R2: Ch 3 (counts as dc), dc across to the toe curve increase area. Work [3 dc in same st, 1 dc] 4 times around the curve (4 set increases). Dc across straight side to heel curve. Work [3 dc in same st, 1 dc] 3 times around heel curve. Sl st to join.
- R3: Ch 3 (counts as dc), dc across to toe curve increases. Work [3 dc in same st, 1 dc] 6 times around the toe curve (6 set increases). Dc across straight side to heel curve. Work [3 dc in same st, 1 dc] 4 times around heel curve. Sl st to join.
- R4: Ch 2 (counts as hdc), hdc across to toe curve increases. Work [2 hdc in same st, 1 hdc] 11 times around toe curve (11 set increases). Hdc across straight side. Work [2 hdc in same st, 1 hdc] 7 times around heel curve. Sl st to join. Fasten off.
- Assembly of Sole: Stack one White sole over one Green sole with wrong sides facing. Join White yarn at heel and sc around through both loops of both sole pieces to join them firmly into a single thick sole. Fasten off and weave in ends.

Part 2: Striped Hat Cuff & Main Upper Body
Striped Hat Cuff (Worked in turning rows):
- Foundation: With Green yarn, ch 9.
- Row 1: Starting in 3rd ch from hook, 7 hdc (7). Turn.
- Row 2: Ch 2, 7 hdc across (7). Switch to Red yarn on last step of last st.
- Rows 3–4: With Red yarn, ch 2, 7 hdc across (7). Switch to Green yarn.
- Rows 5–14: Alternate 2 rows Green yarn and 2 rows Red yarn until you have 7 color block stripes total. Fasten off red yarn; keep white yarn ready to attach along the edge.
Main White Upper Body:
- Row 1: Join White yarn along the long side edge of the striped cuff. Work 3 hdc across the end of each color stripe group (21 hdc total). Turn.
- Rows 2–7: Ch 2, 21 hdc across (21). Turn.
- Row 8 (Toe Decrease 1): Ch 1, 1 hdc dec across first 2 sts, 1 hdc dec across next 2 sts, 13 hdc across, 1 hdc dec across next 2 sts, 1 hdc dec across last 2 sts (17 hdc). Turn.
- Row 9 (Toe Decrease 2): Ch 1, 1 hdc dec across first 2 sts, 1 hdc dec across next 2 sts, 9 hdc across, 1 hdc dec across next 2 sts, 1 hdc dec across last 2 sts (13 hdc). Turn.
- Row 10 (Toe Decrease 3): Ch 1, 1 hdc dec across first 2 sts, 1 hdc dec across next 2 sts, 5 hdc across, 1 hdc dec across next 2 sts, 1 hdc dec across last 2 sts (9 hdc). Turn.
- Row 11 (Toe Decrease 4): Ch 1, 1 hdc dec across first 2 sts, 1 hdc dec across next 2 sts, 1 hdc, 1 hdc dec across next 2 sts, 1 hdc dec across last 2 sts (5 hdc). Fasten off, leaving a tail.
Part 3: Facial Details & Accessories
Eyes (Make 4 – 2 per slipper):
- With Black yarn, ch 2.
- R1: Work 10 hdc into a MR or into 2nd ch from hook (10). Sl st to join. Fasten off leaving a long tail for embroidery. Embroider a small White French knot or stitch on the upper side for light reflections.
Carrot Nose (Make 2 – 1 per slipper):
- With Orange yarn, ch 5.
- R1: Starting in 3rd ch from hook, work 3 dc uncompleted (kept on hook), yarn over and pull through all loops (dc cluster). Sl st in remaining 2 chains to form a pointed carrot tip. Fasten off leaving a tail.
Side Pom-Poms (Make 2 – 1 per slipper):
- Using Red yarn, wrap yarn around a small fork or two fingers 25–30 times. Tie tightly in the middle with a yarn strand, cut loops, and trim evenly into a small 1-inch pom-pom.
Part 4: Assembly & Finishing
- Attach Upper to Sole: Position the completed upper white piece on the toe portion of the assembled double sole. Secure with stitch markers. Using White yarn and a tapestry needle or single crochet, join the edge of the upper body around the front toe perimeter of the sole.
- Attach Eyes and Nose: Position two eyes centered on the white face area below the cuff. Sew or glue securely in place. Place the orange carrot nose angled slightly between the eyes and sew down.
- Embroider Smile: Using Black yarn and tapestry needle, embroider a curved smile with small side cheek accents.
- Attach Cuff Accent: Attach one Red pom-pom to the side of the striped cuff. Optional: Hand-sew gold trim edging along the top edge of the striped cuff for extra shine.
Detailed Pattern Breakdown
1. Dual-Layer Oval Sole Breakdown
The double sole strategy gives structured support so the slippers retain their shape over time:
- Foundation & Transition (R1): Uses dual-height stitches (hdc along narrow middle, dc at toe/heel) to naturally follow foot contour shape.
- Curved Corner Expansion (R2–R4): Employs multi-stitch increases (
3 dc in same stor2 hdc in same st) around corners to ensure flat expanding ovals without cupping. - Perimeter Binding: Joining the two layers with sc binds outer loops into a sturdy base cushion.
2. Striped Cuff & Upper Foot Box Breakdown
The upper body transitions smoothly from vertical ribbing to a curved foot enclosure:
- Modular Striped Cuff: Worked horizontally first to achieve uniform color bands with crisp lines.
- Perimeter Pick-Up: Picking up 3 hdc stitches per color block establishes an exact 21-stitch width.
- Dual-Edge Toe Shaping (Rows 8–11): Symmetrical decreases (
hdc dec) executed on both edges reduce stitch count from 21 down to 5, forming a smooth arch that covers the toes comfortably.
3. Face Detailing Breakdown
- Highlighted Eye Circles: Compact hdc rounds combined with single white French knot highlights add expression.
- 3D Carrot Nose: The combination of dc cluster and sl st creates a tapered 3D cone.
- Embroidered Mouth: Surface embroidery stitches create custom expressions for each slipper.
Pattern Questions
Question: How can I make these slippers fit different shoe sizes without ruining the pattern shape?
Answer: You can adjust the overall length by altering the initial foundation chain of the sole. For every size larger, add 2 to 3 chain stitches to the starting chain (and add 1–2 rows to the white upper body before starting decreases). For smaller sizes or kids, subtract 2 to 3 chains from the foundation chain and decrease 1–2 rows from the white upper section.
Question: What is the best way to attach the facial pieces so they don’t pop off during wear?
Answer: While hot glue or fabric glue can be used for quick positioning, hand-sewing the eyes, nose, and pom-poms with a tapestry needle and matching yarn thread ensures maximum durability through washing and daily use.
Question: How do I stop the slippers from slipping on hardwood or tile floors?
Answer: Once your slippers are fully assembled, apply small dots or lines of non-toxic puffy fabric paint, liquid silicone, or rubber carpet grip spray onto the bottom Green sole. Allow it to dry completely for 24 hours to create a durable anti-slip grip.