
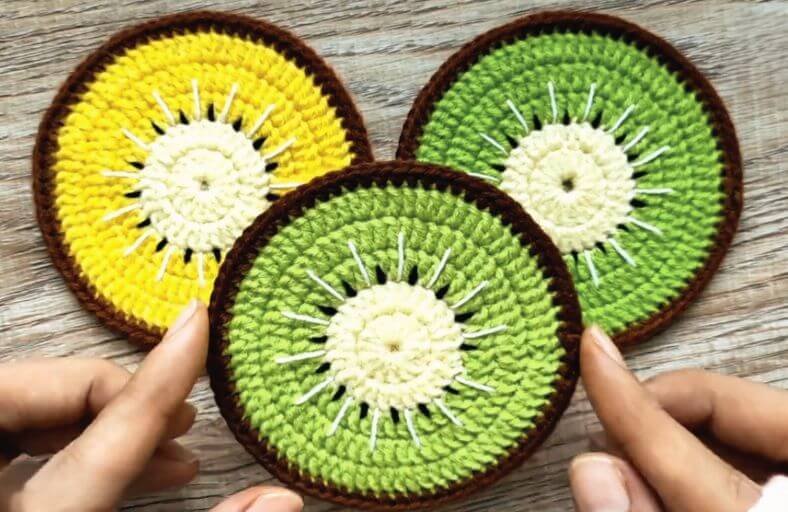
Are you tired of staring at those plain, sticky car cupholders every time you go for a drive?
These adorable kiwi fruit car coasters are here to bring a splash of handmade charm and vibrant color to your vehicle’s interior!
Meticulously designed as a flat circular motif, this project transforms basic cotton yarn into a durable, functional accessory that catches drips and keeps your car looking fresh.
Materials and Preparation
Materials:
- Yarn (Cotton Yarn, DK / Light Worsted Weight):
- White yarn (Center core of the kiwi slice).
- Light Green / Kiwi Green yarn (Flesh of the kiwi).
- Brown yarn (Outer fuzzy kiwi skin and crab stitch border).
- Small amount of Black embroidery thread or black yarn (For embroidering the seeds).
Tools:
- Crochet Hook: Size 3.0 mm (or size appropriate to achieve a flat, firm disk without curling).
- Tapestry / Yarn Needle: For embroidering seeds and weaving in ends neatly.
- Stitch Marker: To keep track of rounds.
- Scissors: For trimming yarn.
Preparation Notes:
- Using 100% cotton yarn is highly recommended for car coasters because of its excellent absorbency, heat resistance, and durability under daily cup condensation.
- Ensure your tension remains uniform to keep the coaster perfectly flat and smooth, preventing drinks from tipping over inside the cupholder.
Abbreviations and Notes
Abbreviations:
- MR: Magic Ring
- ch: Chain
- sl st: Slip Stitch
- sc: Single Crochet
- hdc: Half Double Crochet
- dc: Double Crochet
- inc: Increase (2 stitches worked into the same stitch)
- dc inc: Double Crochet Increase (2 double crochets in the same stitch)
- Reverse sc / Crab Stitch: Reverse single crochet worked backward for a textured border
Pattern Notes:
- Each round starts with a standing chain (
ch 1orch 2) and finishes with a slip stitch (sl st) into the first stitch of the round unless otherwise noted. - Color changes take place at the slip stitch transition to keep color bands clean and seamless.
- Original design and pattern credit belongs to Gonkui Crochet.
Gauge, Approximate Size, and Pattern Notes
Gauge:
4 rounds of double crochet circle measures approximately 2.75 inches in diameter. Gauge is not strictly critical, but the finished piece should fit standard car cupholders.
Finished Size:
Approximately 3.0 to 3.25 inches (7.6 cm to 8.25 cm) in diameter, designed specifically to slide flatly into standard vehicle cupholders.
Special Techniques:
- Seamless Color Changing: Pull the new color yarn through the last loop of the join slip stitch to switch shades cleanly.
- Reverse Single Crochet (Crab Stitch): Worked from left to right (or in reverse direction) around the edge to create a raised, corded border resembling kiwi skin texture.
- Surface Embroidery (Straight Stitching): Black seeds are added after the main circle is complete using quick straight stitches radiates outward from the white center.
Step-by-Step Pattern
Part 1: White Kiwi Center Core
Start with White Yarn:
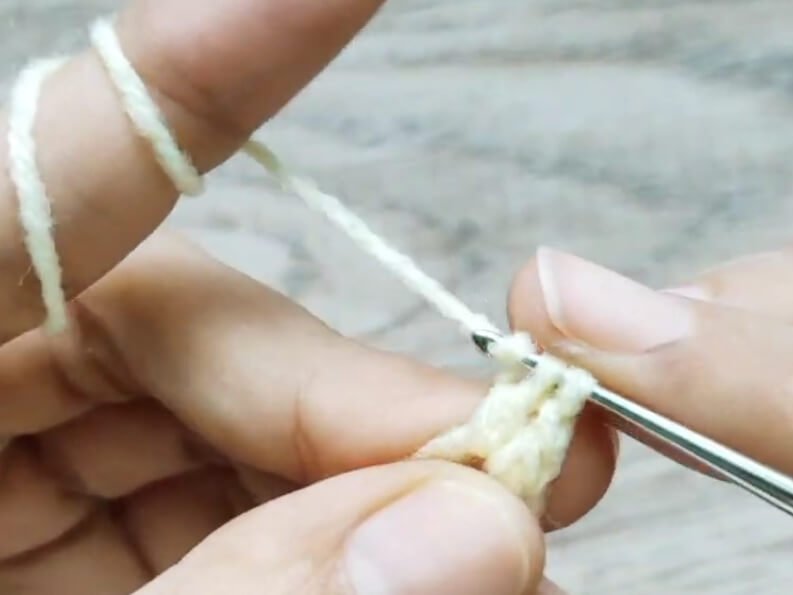
- R1: MR, ch 2 (does not count as st), work 12 dc into the magic ring. Pull ring tight. Sl st to the top of the first dc to join (12 sts).Fasten off white yarn.
Part 2: Green Kiwi Flesh
Join Light Green Yarn in any stitch of R1:
- R2: Ch 2, dc inc in each stitch around (2 dc in each st). Sl st to the top of the first dc to join (24 sts).
- R3: Ch 2, (1 dc, dc inc) * 12 times around. Sl st to the top of the first dc to join (36 sts).
- R4: Ch 2, (2 dc, dc inc) * 12 times around. Sl st to the top of the first dc to join (48 sts).Fasten off green yarn.
Part 3: Brown Skin Border & Finishing
Seed Embroidery:
- Before adding the outer border, thread a tapestry needle with black embroidery floss or thin black yarn.
- Stitch small straight stitches radiating outward from the edge of the white center circle into the green round (R2) to mimic kiwi seeds. Space approximately 10 to 12 seeds evenly around the center. Secure threads on the back.
Outer Skin Edging:
Join Brown Yarn in any stitch of R4:
- R5: Ch 1, work Reverse Single Crochet (Crab Stitch) in each stitch around (48 sts).
- Sl st to the first stitch to join, fasten off, and weave in all loose yarn ends securely underneath the stitches on the back side.
Detailed Pattern Breakdown
1. Central Disk & Increasing Formula (R1 – R4):
- Core Geometry: The coaster relies on the standard mathematical rule of flat circles in double crochet: beginning with 12 dc in R1, doubling to 24 dc in R2 (
dc incin every st), increasing by 12 sts in R3 (36 sts), and expanding to 48 sts in R4. This precise geometric progression keeps the circle perfectly flat without rippling or cupping. - Color Mapping: The white center core (R1) represents the kiwi pith, while the bright green rounds (R2 – R4) build out the sweet fruity flesh.
2. Decorative Details & Texturing (Seeds & R5 Border):
- Kiwi Seeds: Straight stitch embroidery worked directly between R1 and R2 breaks up the solid blocks of color with natural fruit detail.
- Crab Stitch Skin (R5): The brown outer edge uses the reverse single crochet technique (crab stitch). By working backward along the edge, the yarn twists onto itself, mimicking the fuzzy, textured outer peel of a fresh kiwi while giving the coaster a sturdy rim that resists fraying inside your car cupholder.
Pattern Question:
Question: How can I make sure my car coaster stays completely flat and doesn’t curl up at the edges?
Answer: Flatness depends on correct stitch counting and relaxed, uniform tension. Double crochet circles require an increase of 12 stitches every round when starting with 12 dc in the magic ring.
If your coaster begins to bowl or cup inward, your tension may be too tight: try switching to a 3.5 mm hook or loosening your loops slightly. Additionally, blocking your finished coaster by dampening it with water and flattening it under a heavy book overnight will give it a crisp, perfectly flat finish.