
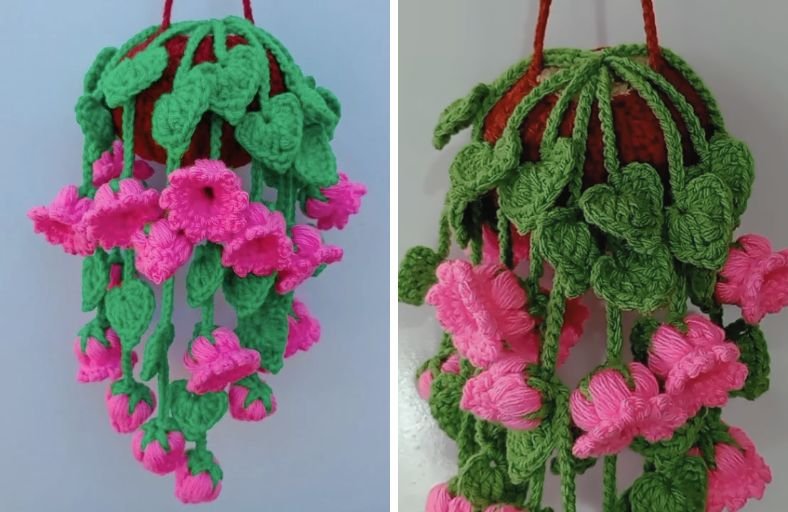
Is your rear-view mirror looking a little lonely, or are you tired of boring car air fresheners that run out of scent after three days?
Bringing a touch of handmade charm and vibrant botanical life to your daily commute is easier than you think!
This delightful hanging lily flower pot project combines rich textures, cascading vine motifs, and sweet bell-like blossoms that swing gently as you drive.
Crafting your own auto accessory lets you customize colors to match your car’s interior while making brilliant use of left-over yarn scraps.
Every detail in this pattern is written using standard US Crochet Terms so you can dive right in without any translation headaches.
Materials and Preparation
Materials:
- Yarn:
- Acrylic yarn, 2 mm thickness (or cotton yarn for a slightly smaller pot).
- Main Pot Color: Terracotta, brown, or light beige.
- Soil Cover Color: Light brown or chocolate.
- Leaf and Vine Color: Bright green.
- Blossom Color: Pink, magenta, or yellow.
- Stuffing: Polyfill stuffing to give the pot a plump, sturdy shape.
Tools:
- Crochet Hook: 3.5 mm hook (or a smaller hook if using thinner yarn).
- Yarn Needle: Tapestry needle for sewing the soil cap and weaving ends.
- Stitch Marker: To keep track of rounds.
- Scissors: Sharp craft scissors.
Preparation Notes:
- Master basic US stitches including half double crochet (
hdc), double crochet (dc), treble crochet (tr), front post double crochet (FPdc), and puff stitches before starting. - Make multiple vine strands at varying lengths (some with 8, 10, or 12 chains between motifs) so the hanging flowers cluster naturally at staggered heights.
Abbreviations and Notes
Abbreviations:
- MR: Magic Ring
- ch: Chain
- sc: Single Crochet
- inc: Single Crochet Increase (2 sc in the same stitch)
- dec: Single Crochet Decrease (sc2tog)
- hdc: Half Double Crochet
- hdc inc: Half Double Crochet Increase (2 hdc in the same stitch)
- dc: Double Crochet
- dc inc: Double Crochet Increase (2 dc in the same stitch)
- tr: Treble Crochet (Double Treble in UK)
- FPdc: Front Post Double Crochet
- sl st: Slip Stitch
- BLO: Back Loop Only
- Puff Stitch: 5-loop bobble/puff pulled together
Pattern Notes:
- The pot base and soil cap are worked in joining rounds using
ch 2at the start of rounds (the startingch 2does not count as a stitch). - The ribbed body uses
FPdcstitches to create raised vertical ridges that mimic ceramic pot grooves. - Vine strands, leaves, and flower buds are worked as continuous chain sequences in green yarn, with flower petals constructed directly onto the green chain bases using pink yarn.
- Original design and pattern credit belongs to Marcela Block Crochet.

Gauge, Approximate Size, and Pattern Notes
Gauge:
Gauge is not critical for this decorative item. Maintain a firm, tight tension on the pot body so polyfill stuffing does not show through the stitches.
Finished Size:
- Pot Height: Approx. 3 inches (7.62 cm)
- Pot Diameter: Approx. 3.5 inches (8.89 cm)
- Hanging Cord Length: Approx. 5.1 inches (13 cm) when folded, total chain length of 60 chains.
Special Techniques:
- Front Post Double Crochet (FPdc): Insert hook from front to back to front around the post of the stitch from the previous round to create vertical ridges.
- Puff Petal Cluster: Pulling up 5 loops in a single chain space to form bulbous 3D flower bases.
- Staggered Strand Construction: Joining multiple individual vine stems at a single central knot inside the pot.
Step-by-Step Pattern
Part 1: Main Pot Body
Crocheted using terracotta/brown yarn, worked in joined rounds:
- R1: MR, ch 2 (does not count as st), 12 hdc into MR. Pull tight, sl st to first hdc. (12)
- R2: ch 2, 12 hdc inc (2 hdc in each st around). Sl st to first hdc. (24)
- R3: ch 2, (1 hdc, 1 hdc inc)*12. Sl st to first hdc. (36)
- R4 (Base Edge): ch 2, working in BLO only, (2 dc, 1 dc inc)*11. To achieve the required 50 sts for the ribbing pattern repeat, execute 2 dc inc in the final 3 sts instead of 1 dc inc. Sl st to first dc. (50)
- R5 (Ribbed Side Round 1): ch 2, 2 dc, 1 FPdc, (4 dc, 1 FPdc)*9, 2 dc. Sl st to first dc. (50)
- R6–R10 (Ribbed Side Rounds 2–6): Repeat R5. (50 sts per round for 5 rounds)
- R11 (First Decrease Round): ch 2, 1 dc2tog, 1 FPdc, (2 dc2tog, 1 FPdc)*9, 1 dc2tog. Sl st to first st. (30)
- R12 (Second Decrease Round): ch 2, 1 dc, 1 FPdc, (1 dc2tog, 1 FPdc)*9. Sl st to first st. (20)
- Hanging Cord: Do not cut yarn. ch 60, skip 10 sts on the rim (halfway across the 20 sts), sl st to opposite rim st to form hanging loop. Fasten off and weave in end.
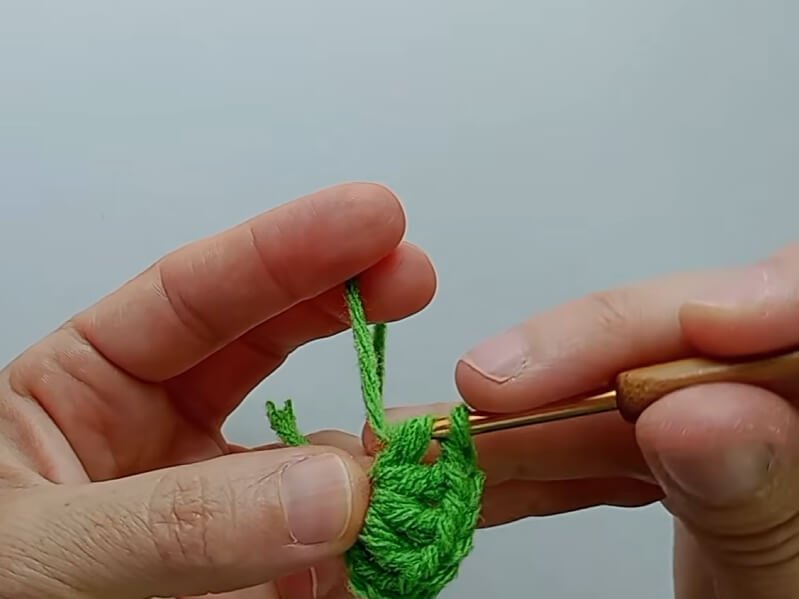
Part 2: Soil Cover Cap
Crocheted with light brown wool, worked in rounds joined:
- R1: MR, ch 2, 10 dc into ring. Do not pull center ring fully shut (leave a small opening for vine stems). Sl st to first dc. (10)
- R2: ch 2, 10 dc inc (2 dc in each st around). Sl st to first dc. (20)
- Fasten off, leaving a long tail (approx. 12 inches / 30 cm) for sewing onto the top rim of the pot body.
Part 3: Vine Strands, Leaves, and Flowers
Vine Strands & Leaves (Green Yarn)
Create 8 to 10 vine strands with varying chain lengths:
- Foundation Stem Base: Start with 5 ch, 1 dc into the first ch, (ch 1, 1 dc into same ch)*3 (creates 4 dc total separated by ch 1 spaces for flower base attachment), ch 4, sl st to base.
- Vine Extension: ch 10 (or 8, 12, 15 for varied lengths).
- Leaf Motif:
- ch 4 (counts as first dc), in 4th ch from hook work 3 dc, 1 tr.
- ch 3, sc in side of tr (creates leaf tip point).
- 1 tr, 3 dc in same base chain, ch 4, sl st into base.
- Stem Continuation: ch 10, repeat flower base motif or leaf motif as desired along the length. Fasten off leaving a 6-inch (15 cm) yarn tail.
Lily Blossoms & Buds (Pink Yarn)
Small Flower Bud:
- Step 1 (Base Bulbs): Attach pink yarn to one of the ch-1 spaces on the green flower base. Pull up a loop, ch 1, pull loop up to 1 cm height. Work 5 puff pulls into space (yo, insert hook, pull up loop 5 times), yo and pull through all loops, ch 1 to secure. Repeat across all 4 ch-1 spaces on the green base (5 puff petals).
- Step 2 (Bud Closure): Sl st to join round. ch 1, (insert hook into next st, pull up loop, insert hook into following st, pull up loop, yo and pull through all 3 loops)*repeat around to cinch top shut. Fasten off, thread tail inside bud.
Open Lily Flower:
- Step 1 (Base Bulbs): Work 5 puff petals in pink yarn around green base using same steps as Bud. Sl st to join.
- Step 2 (Petal Points):
- In first st: (1 sc, ch 3, 1 sc into same base stitch).
- In next st: 1 sc.
- Repeat (1 sc, ch 3 picot point, 1 sc) in one st, and 1 sc in next st around to create 9 pointed petal edges. Fasten off and hide yarn tail inside flower center.
Part 4: Assembly & Finishing
- Assemble Flowers to Vines: Attach flower motifs and small buds to all designated green chain loop bases on your vine strands.
- Bundle Vine Tails: Gather all top yarn tails from your 8–10 vine strands together. Thread them through the center hole of the Soil Cover Cap from bottom to top.
- Secure Internal Knot: Tie all vine tails into two tight overhand knots inside the underside of the soil cap. Trim excess yarn ends.
- Stuffing the Pot: Fill the terracotta pot body firmly with polyfill stuffing, shaping it into an even round dome.
- Sewing Soil Cap: Whipstitch the 20 sts of the Soil Cover Cap to the inner loops of Round 12 on the main pot body using a tapestry needle.
- Final Adjustments: Fluff out the cascading leaves, arrange the lily blossoms so they drape down gracefully at different levels, and hang your finished creation on your car mirror!
Detailed Pattern Breakdown
1. Main Pot Architecture (Parts 1 & 2):
- Base Construction (R1–R4): Starts with a standard flat circle of
hdcstitches expanding from 12 to 36 stitches. R4 switches toBLO(Back Loop Only) usingdcstitches to create a crisp 90-degree ridge that defines the flat bottom edge of the pot. - Ribbed Wall Texture (R5–R10): Converts flat rows into vertical 3D walls using
FPdc(Front Post Double Crochet). Spacing 4 standarddcstitches between eachFPdcpost creates 10 symmetrical ceramic-style grooves running vertically up the pot body. - Top Rim Incline (R11–R12): Utilizes paired
dc2togdecreases on either side of theFPdcposts to taper the opening inward, securing the polyfill stuffing and providing a snug seat for the soil cap.
2. Vine Geometry & Leaf Shaping (Part 3):
- Flower Attachment Bases: Formed by working a cluster of 4
dcstitches separated bych 1spaces off an initial chain loop. This provides a sturdy 3D circular anchor for pink puff petals. - Leaf Contour: Leaves use height scaling (
dcrightarrowtrrightarrowch 3 sc picotrightarrowtrrightarrowdc) to form natural teardrop foliage with sharp pointed tips.
3. Blossom Mechanics (Part 3):
- 3D Puff Petals: 5-iteration puff loops create thick, squishy floral bases.
- Bud vs. Open Flower: Buds use
sc2togdecreases around the top to pull the petal tips inward into an unopened bell shape. Open lily flowers usech 3picot edges to flare the petal tips outward into full bloom.
Pattern Question:
Question: How do I stop the hanging pot from spinning uncontrollably or hitting the windshield while driving?
Answer: To minimize swing and spin while driving, keep the top hanging loop relatively short (around 5 to 5.5 inches / 13 cm) and secure it tightly around the rear-view mirror bracket.
Additionally, make sure to pack the polyfill stuffing firmly inside the main pot body; the added weight creates a lower center of gravity, keeping the pot stabilized and swinging gently rather than bouncing wildly.