
Ever stared at a beautiful skein of cotton yarn and wondered if you could turn it into a breezy, stylish top without spending weeks decoding a complex diagram.
What if you could make a trendy, vertical-striped summer top using just two simple panels: Meet the Easy Summer Crochet Blouse, your next favorite warm-weather project that combines effortless construction with an eye-catching V-stitch texture!
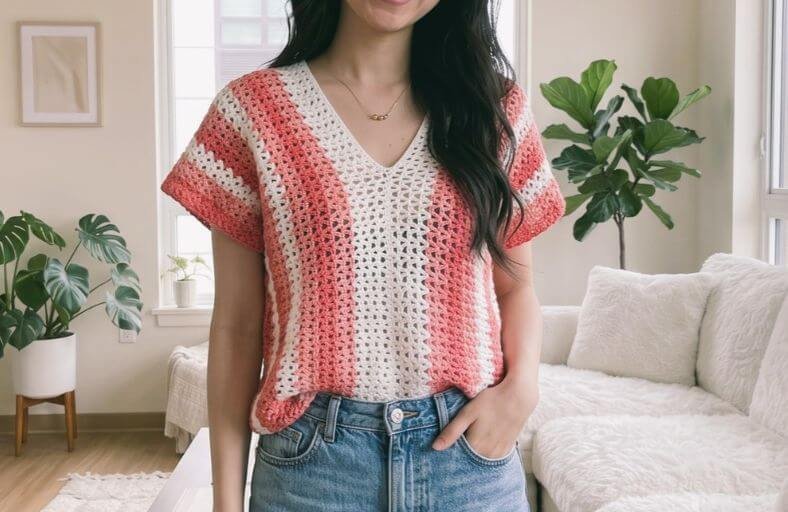
This relaxed-fit summer tee is constructed from two identical crocheted rectangles joined together to form a flattering V-neck in both the front and back.
Featuring crisp vertical color blocks and finished with classic edging accents, it is lightweight, breathable, and wonderfully customizable for any wardrobe.
Materials and Preparation
Materials:
- Yarn: Copito yarn (or lightweight DK / Category 3 cotton-blend yarn) in three coordinating shades:
- Off-White / Cream (Center panel & contrast trim)
- Soft Coral / Light Peach (Secondary stripe color)
- Warm Rose / Dark Coral (Primary contrast stripe color)
- Tapestry Needle: Large-eye yarn needle for seaming panels and weaving in ends.
Tools:
- Crochet Hook: Size 4.0 mm (US G/6) crochet hook.
- Scissors: Craft scissors for yarn color transitions.
- Measuring Tape: Flexible tape measure to check gauge and garment dimensions.
Preparation Notes:
- Sizing Flexibility: This pattern is designed for a relaxed Medium/Large (M/L) fit. Since the garment is constructed from flat rectangles, you can easily alter the width or length by adjusting your initial chain count (in multiples of 3 + 2) or changing the total number of rows.
- Tension & Drape: Maintain a relaxed, even tension throughout so the V-stitches drape comfortably without feeling stiff.
- Color Play: Feel free to customize your stripe pattern! Working in pairs of rows makes yarn changes neat and effortless along the edges.
Abbreviations and Notes
Abbreviations:
- ch: Chain
- sc: Single Crochet
- dc: Double Crochet
- sl st: Slip Stitch
- V-st: V-Stitch ( [1 dc, ch 1, 1 dc] all worked into the same chain space or stitch )
- st(s): Stitch(es)
- sk: Skip
- sp: Space
- rep: Repeat
Pattern Notes:
- The entire garment body is worked in flat rows (
Rows) using the classic V-stitch. - The V-stitch pattern uses a multiple of 3 chains plus 2 extra foundation chains.
- Turning chain 3 (
ch 3) at the beginning of rows counts as the first double crochet (dc). - Color changes are made during the final yarn-over of the last double crochet in a row before chaining 3 to turn.
- Neckline and hem edging utilize single crochet (
sc), while the sleeve cuffs feature the reverse single crochet (Crab Stitch) for a textured finish. - Original design and pattern credit belongs to manos de crochet.
Gauge, Approximate Size, and Pattern Notes
Gauge:
- Approximately 6.5 V-stitch sets and 8 rows = 4 x 4 inches (10 x 10 cm) worked in V-stitch with a 4.0 mm hook.
Finished Size:
- Bust/Hip Circumference: Approx. 41.7 inches (106 cm) total width around the torso.
- Panel Width / Shoulder-to-Hem Length: Approx. 9.45 inches (24 cm) width per panel before joining; finished garment length is customizable based on chain length (approx. 20.8 inches / 53 cm per side folded).
Special Techniques:
- V-Stitch (dc, ch 1, dc): Worked directly into the
ch-1 spof the V-stitch from the previous row to create an open lace texture. - Color Switching on Last Pull-Through: Completing the final double crochet of a row with the new yarn shade guarantees seamless edge transitions.
- Reverse Single Crochet (Crab Stitch): Worked backward from left to right (for right-handed crocheters) along sleeve edges to form a decorative twisted border.
Step-by-Step Pattern
Part 1: First Panel (Rectangle 1)
Worked lengthwise in vertical rows using a 4.0 mm hook:
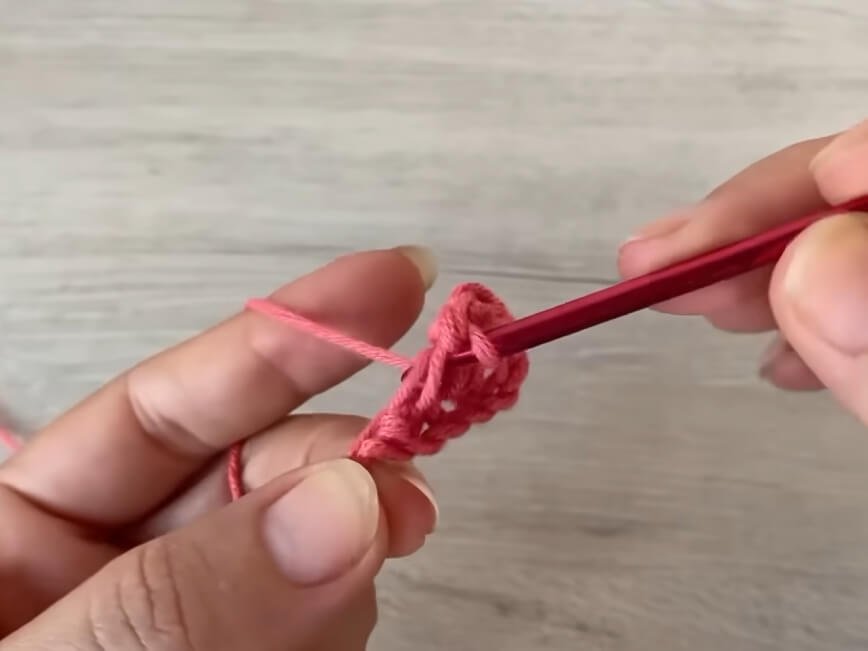
- Foundation Chain: With Dark Coral yarn, start with a slip knot and crochet ch 200 (198 sts for 66 V-stitch sets + 2 extra chains).
- Row 1: 1 dc into the 4th ch from hook (the skipped 3 ch count as 1 dc). Sk 2 ch spaces, work [1 dc, ch 1, 1 dc] into the next ch; rep from * to * across until 2 ch remain. Sk 1 ch, 1 dc into the last ch. Turn. (66 V-stitches + 2 edge dc)
- Row 2: Ch 3 (counts as dc), work [1 dc, ch 1, 1 dc] directly into the ch-1 sp of the next V-st from previous row; rep from * to * across to the last V-st. Work 1 dc into the top of the turning ch-3. Turn.
- Row 3: Rep Row 2, switching to Light Peach yarn on the final pull-through of the last dc.
- Rows 4-5: With Light Peach yarn, rep Row 2. Switch to White yarn at the end of Row 5.
- Rows 6-7: With White yarn, rep Row 2. Switch to Dark Coral yarn at the end of Row 7.
- Rows 8-15: Continue repeating Row 2 in your desired stripe sequence (working 2-row color blocks).
- Rows 16-19: Switch to White yarn for the final 4 center rows, repeating Row 2. Fasten off on the second panel, but leave a long tail on the first panel if desired for seaming.
Part 2: Second Panel (Rectangle 2)
Repeat the exact instructions from Part 1 to create an identical second panel:
- Work Rows 1 through 19 exactly as done for Rectangle 1, keeping color change points and stitch counts identical (200 chains total, producing 66 V-stitches and 2 edging dc per row).
- Fasten off leaving a long yarn tail for seaming.
Part 3: Panel Seaming & Neckline Setup
Panel Orientation:
- Place both completed rectangles flat side-by-side on your work surface so that the 4-row White sections meet in the center. The long edges will run vertically from front hem, over the shoulders, to back hem.
Center Front & Back Seams:
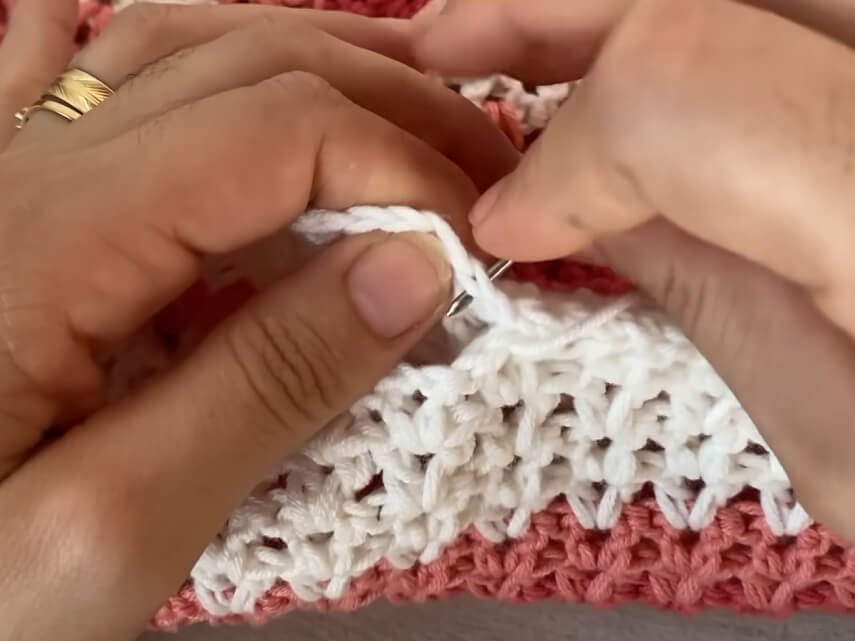
- Front Center Seam: Fold the combined panels over at the shoulder line. Using White yarn and a tapestry needle, join the center front White edges starting from the bottom hem up toward the chest for approx. 12.6 inches (32 cm). Fasten off and weave in end. Leave the top open to form the V-neckline.
- Back Center Seam: Join the center back White edges from the bottom hem upward for approx. 12.6 inches (32 cm) to match the front (or 13.7-14.1 inches / 35-36 cm if a higher back neckline is preferred). Fasten off.
Side Seams:
- Fold the garment at the shoulders. Measure down from the top fold to leave an armhole opening of approx. 7.5-8.5 inches (19-21 cm) on each side.
- Using your tapestry needle and matching yarn, seam the outer edges from the bottom hem up to the base of the armhole opening on both left and right sides. Fasten off.
Part 4: Edging, Assembly & Finishing
Sleeve Edging (Reverse Single Crochet / Crab Stitch):
- Join Dark Coral yarn with a sl st at the underarm seam of one sleeve opening.
- Ch 1. Working backward (from left to right), insert hook into the previous st, yarn over, pull up a loop, yarn over, and pull through both loops to complete 1 Crab Stitch.
- Continue working Crab Stitches evenly around the entire sleeve cuff.
- Join with a sl st into the starting st, ch 1, fasten off, and weave in ends.
- Repeat on the second sleeve cuff.
Neckline Edging:
- Join White yarn with a sl st at the back seam of the neckline.
- Ch 1, then work a neat row of regular single crochet (
sc) stitches evenly around the entire V-neckline perimeter. - Join with a sl st to the first sc, ch 1, fasten off, and weave in ends.
Bottom Hem Edging:
- Join White yarn at one of the side seams along the bottom edge.
- Ch 1, then work 1 sc into each stitch and row-end space around the bottom circumference of the top.
- Sl st to the initial sc, fasten off, and secure all remaining yarn tails.
Detailed Pattern Breakdown
1. Panel Construction & V-Stitch Mechanics:
- Building this garment starts with two identical flat rectangular panels. Instead of traditional bottom-up or top-down construction, these panels are worked sideways in vertical rows.
- The foundation chain calculation (200 chains = 198 st base + 2 turning sts) creates 66 sets of V-stitches. Each V-stitch set
[1 dc, ch 1, 1 dc]provides flexibility and open ventilation perfect for summer wear. - Stacking V-stitches directly into the
ch-1 spof the row below creates clean, vertical columns without complex shaping or increases.
2. Color Block Progression:
- Color transitions occur every two rows to build wide, bold vertical stripes across the torso.
- Switching yarn shades on the final pull-through of the edge
dckeeps color joins hidden along the bottom and shoulder folds. - The final four rows of each rectangle are worked in solid Off-White, creating a central contrast panel where the two rectangles meet down the center front and back.
3. Assembly, Seaming & Custom Fit:
- Center front and center back seams are joined using a tapestry needle in a mattress or whipstitch technique, leaving an unjoined gap in the middle for the V-neck opening.
- Side seams are joined from the hem up to the armpits, leaving adequate armhole clearance for comfortable movement.
- The Crab Stitch edging on the sleeve cuffs adds structural stability to prevent stretching while adding an elegant corded texture.
Pattern Question:
Question: How can I adjust the size of this blouse if I want a smaller or larger fit, and how do I make sure the V-neck doesn’t open too low?
Answer: To modify the overall size, you can adjust two main measurements:
- Length: Change the number of initial foundation chains. Ensure your chain count is a multiple of 3, plus 2 extra chains (for instance, ch 170 + 2 for a shorter crop length, or ch 230 + 2 for a tunic length).
- Width/Bust Size: Add or subtract rows on each panel. Adding two extra rows (one V-stitch row per side) increases the total bust circumference by approximately 1.2 to 1.5 inches (3 to 4 cm).
- V-Neckline Depth: Customize the front seam during assembly by trying on the garment after pinning. If you prefer a higher neckline, simply sew further up toward your neck (e.g., seaming 35 cm instead of 32 cm from the bottom hem).