
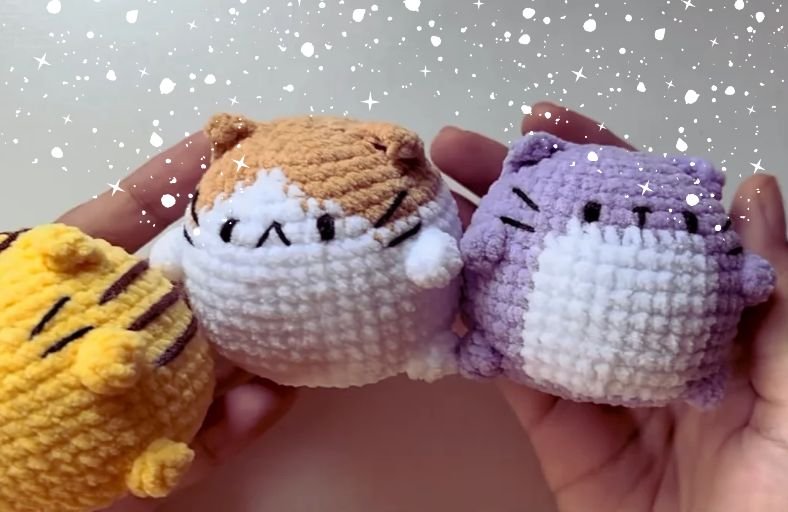
Are you ready to meet the ultimate desk companions that require absolutely zero needle-and-thread assembly?
Say goodbye to endless body-part stitching because these round, squishy, and downright adorable chubby cats pop off your crochet hook completely seamless!
Whether you want to whip up a classic tuxedo style with a crisp white tummy, a cozy calico/bicolour kitty, or a fiery striped tabby, this 3-in-1 pattern has you covered for every feline mood.
Materials and Preparation
Materials:
- Yarn: Chenille / Plush Velvet Yarn (or bulky weight yarn of your choice) in Brown, White, Purple, Yellow, and Dark Brown (for tabby stripes).
- Embroidery Thread: Black yarn or embroidery floss (approx. 10–15 cm) for embroidering the sleeping/curved eyes, nose, and whiskers.
- Stuffing: Polyfill stuffing to give your chubby cats their signature squishy, round shape.
Tools:
- Crochet Hook: 2.5 mm crochet hook (or sized appropriately for your plush yarn to ensure tight stitches).
- Yarn Needle: Tapestry needle for embroidering facial details and weaving in ends.
- Stitch Marker: Essential for keeping track of continuous spiral rounds.
- Scissors: Craft scissors for trimming yarn tails.
Preparation Notes:
- Practice basic US crochet stitches including single crochet (
sc), increases (inc), and invisible decreases (dec). - Keep your tension firm when working with plush chenille yarn so the polyfill stuffing doesn’t poke through the stitches.
Abbreviations and Notes
Abbreviations:
- MR: Magic Ring
- ch: Chain
- sc: Single Crochet
- inc: Single Crochet Increase (2 sc in the same stitch)
- dec: Invisible Single Crochet Decrease (sc2tog using front loops only)
- hdc: Half Double Crochet
- dc: Double Crochet
- sl st: Slip Stitch
- 4-tr cluster: 4 Triple Crochet Cluster (used to form seamlessly bobbled paws)
Pattern Notes:
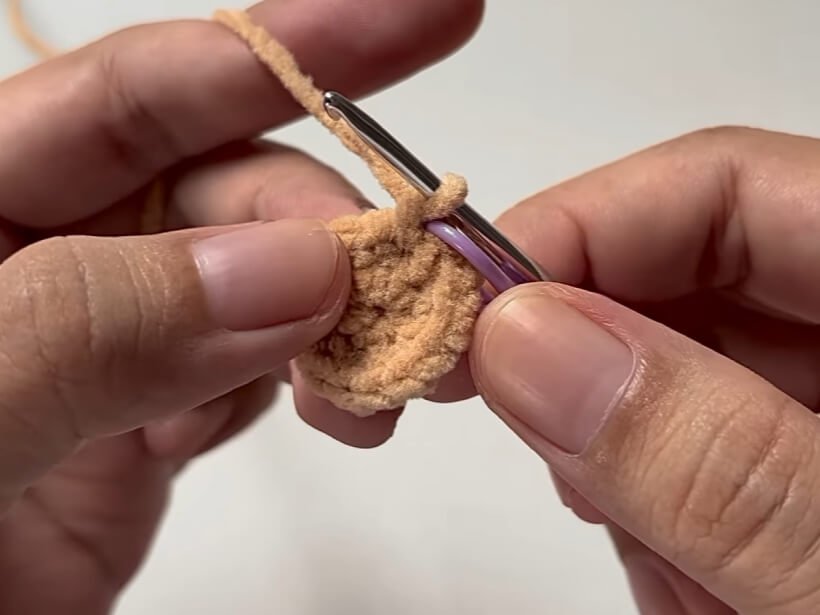
- The body is worked in continuous spiral rounds from top to bottom. Do not join rounds with a slip stitch unless explicitly noted.
- NO-SEW Paws: The little paws are formed directly into the body during Round 11 and Round 17 using 4-tr cluster stitches!
- Color Changes: Color switches are completed on the final yarn-over of the preceding stitch.
Gauge, Approximate Size, and Pattern Notes
Gauge:
Gauge is not critical for this plush amigurumi project. Aim for tight, uniform stitches to keep the stuffing inside.
Finished Size:
Approximately 3.5–4 inches (9–10 cm) in height and width when using recommended plush yarn and a 2.5 mm hook.
Special Techniques:
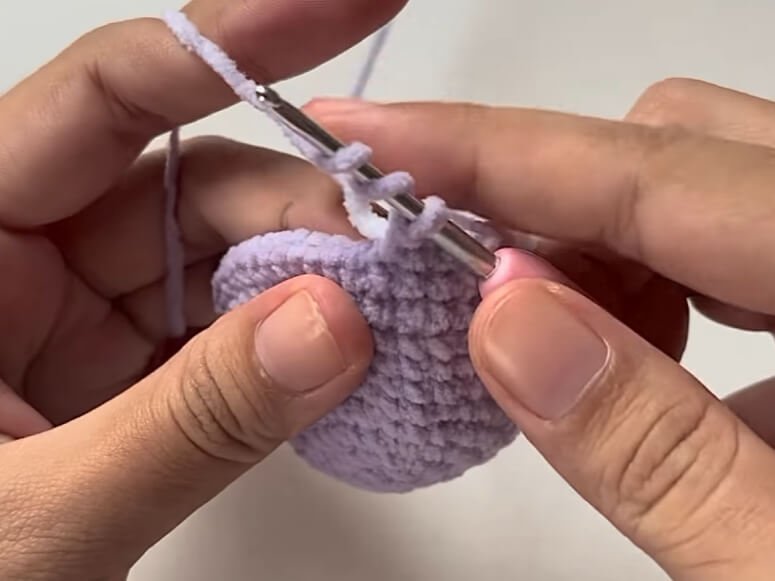
- Seamless Paws (4-tr cluster): Yarn over twice, insert hook into stitch, pull up a loop, yarn over and pull through 2 loops twice (repeat 4 times in the same stitch until 5 loops remain on hook), yarn over and pull through all 5 loops.
- Surface Ear Attachment: Ears are worked directly onto the finished head between Rounds 3 and 7 using surface stitches (
sc,hdc,dc,sl st). - Direct Tail Crochet: The tail is chained and worked directly from 2 stitches at the lower back (Round 17).
Step-by-Step Pattern
Part 1: Main Head & Upper Body (R1–R10)
Start with your base color (Brown for Calico, Purple for Bicolour, or Yellow for Tabby).
- R1: MR 8 sc (8)
- R2: 8 inc (16)
- R3: (sc, inc)*8 (24)
- R4: (2 sc, inc)*8 (32)
Style A: Brown/Calico Cat Colorwork
- R5: 15 sc in Brown, switch to White at 15th st, 2 sc in White, switch to Brown, 15 sc in Brown (32)
- R6: (3 sc, inc)*3 in Brown, 2 sc in Brown (switch to White), 1 sc in White, 1 inc in White, 2 sc in White (switch to Brown), 1 sc in Brown, 1 inc in Brown, (3 sc, inc)*3 in Brown (40)
- R7: 16 sc in Brown (switch to White), 8 sc in White (switch to Brown), 16 sc in Brown (40)
- R8: (4 sc, inc)*3 in Brown (switch to White on last st of 3rd inc), (4 sc, inc)*2 in White (switch to Brown), (4 sc, inc)*3 in Brown (48)
- Note: From Round 9 onward, switch entirely to White yarn for the rest of the body!
- R9–R10: 48 sc in White (48)
Style B: Purple/Tuxedo Bicolour Cat Colorwork
- R5–R8: Work all rounds in Purple:
- R5: 32 sc (32)
- R6: (3 sc, inc)*8 (40)
- R7: 40 sc (40)
- R8: (4 sc, inc)*8 (48)
- R9: 20 sc in Purple, switch to White, 8 sc in White, switch to Purple, 20 sc in Purple (48)
- R10: 19 sc in Purple, switch to White, 10 sc in White, switch to Purple, 19 sc in Purple (48)
Style C: Yellow Tabby Cat
- R5–R10: Continue in solid Yellow without color changes:
- R5: 32 sc (32)
- R6: (3 sc, inc)*8 (40)
- R7: 40 sc (40)
- R8: (4 sc, inc)*8 (48)
- R9–R10: 48 sc (48)
Part 2: Front Paws & Mid-Body (R11–R16)
Style A & C (Brown Calico / Yellow Tabby):
- R11 (Paw Round): 15 sc, 4-tr cluster (Front Paw 1), 16 sc, 4-tr cluster (Front Paw 2), 15 sc (48)
- R12–R16: 48 sc (48)
Style B (Purple Bicolour):
- R11 (Paw Round): 15 sc in Purple, 4-tr cluster in Purple (Front Paw 1), 3 sc in Purple, switch to White, 10 sc in White, switch to Purple, 3 sc in Purple, 4-tr cluster in Purple (Front Paw 2), 15 sc in Purple (48)
- R12–R16: 19 sc in Purple, switch to White, 10 sc in White, switch to Purple, 19 sc in Purple (48)
Part 3: Back Paws & Base Closing (R17–R22)
Style A & C (Brown Calico / Yellow Tabby):
- R17 (Paw Round): 15 sc, 4-tr cluster (Back Paw 1), 16 sc, 4-tr cluster (Back Paw 2), 15 sc (48)
Style B (Purple Bicolour):
- R17 (Paw Round): 15 sc in Purple, 4-tr cluster in Purple (Back Paw 1), 3 sc in Purple, switch to White, 10 sc in White, switch to Purple, 3 sc in Purple, 4-tr cluster in Purple (Back Paw 2), 15 sc in Purple (48)
Bottom Decreases & Closing (All Styles):
- R18: (4 sc, dec)*8 (40)
- R19: (3 sc, dec)*8 (32)
- R20: (2 sc, dec)*8 (24)
- Stuff the body firmly with Polyfill stuffing.
- R21: (1 sc, dec)*8 (16)
- Top off with a little extra stuffing.
- R22: 8 dec (8)Fasten off, leave a short tail, weave through the outer loops of the 8 remaining stitches, pull tight to close, and hide the end.
Part 4: Ears, Tail, Facial Details & Tabby Stripes
1. Surface Crochet Ears (R3 to R7):
- Right Ear: Attach main body yarn at Round 7 on top of the head.
- Work towards Round 3: ch 4, starting from 2nd ch from hook: 1 sc, 1 hdc, 1 dc. sl st to Round 3. Fasten off and tie ends together.
- Left Ear: Attach yarn at Round 3.
- Work towards Round 7: ch 4, starting from 2nd ch from hook: 1 sc, 1 hdc, 1 dc. sl st to Round 7. Fasten off and secure ends.
2. Direct Crochet Tail (Back of Round 17):
- Attach yarn to the middle 2 stitches at the lower back of Round 17.
- ch 7, starting from 2nd ch from hook: 6 sc back along the chain. sl st to the adjacent body stitch. Fasten off and weave in ends.
3. Facial Embroidery (Round 8 to 9):
- Eyes: Embroider curved sleeping/happy eyes on Round 8 (spaced 6 stitches apart). For side-eye style (Yellow Tabby), embroider vertical/curved slants on the sides.
- Nose: Embroider a small inverted “V” nose between the eyes on Round 8 spanning 2 center stitches.
- Whiskers: Embroider 2 whisker lines on Round 9 on each side, starting 3 stitches outward from the eyes.
4. Tabby Stripes (Yellow Cat Only):
- Using Dark Brown yarn, embroider 3 forehead stripes starting 3 rows above the eyes.
- Embroider 3 horizontal side stripes on each side between the whiskers.
Detailed Pattern Breakdown
1. Sphere Expansion & Color Block Foundations (R1–R10):
- 3D Geometry: The body begins with standard 8-way circular math (8 rightarrow 16 rightarrow 24 rightarrow 32 rightarrow 40 rightarrow 48), expanding into a squishy ball shape.
- Tuxedo Patchwork (Bicolour & Calico): By introducing white yarn strategically across the center 8 to 10 stitches starting between Rounds 5 and 9, you create a seamless white chest patch without cutting the primary body yarn.
2. Integrated Bobble Paws (R11 & R17):
- Zero-Sew Mechanism: Instead of crocheting four separate tiny limbs and sewing them on later, the 4-tr cluster stitches are worked directly into the live round. The 4 triple crochets bundled into a single stitch pop outwards, creating perfectly rounded cat paws instantly.
3. Surface Attachment Techniques (Ears & Tail):
- Ears: By anchoring yarn directly into the post of Round 7 and chaining upward, the gradient height of
scrightarrowhdcrightarrowdccreates a natural triangular ear flap that joins back smoothly into Round 3. - Tail: Anchoring directly into Round 17 creates a sturdy, flexible tail sticking out naturally from the spine.
Pattern Questions & Answers
Q: My 4-tr cluster paws are poking inside the body instead of popping out. How do I fix this?
A: When completing the 4-tr cluster stitch, simply use your thumb or hook handle from the inside to pop the bobble node outward before making your next single crochet. Working tight single crochets right after the cluster locks the paw firmly on the outside.
Q: How do I switch yarn colors cleanly without leaving visible gaps or loose threads on the chest?
A: Always perform the final yarn-over of the stitch before the color change using the new color. Carry the unused yarn tail loosely along the back/inside of your stitches (tapestry style) for 3–4 stitches, then float or cut it safely inside the stuffed body.
Q: Can I use standard worsted weight acrylic yarn instead of velvet/chenille yarn?
A: Absolutely! Standard acrylic yarn with a 3.0 mm or 3.5 mm hook works wonderfully. Your chubby cat will be slightly smaller and firmer, but just as adorable!