
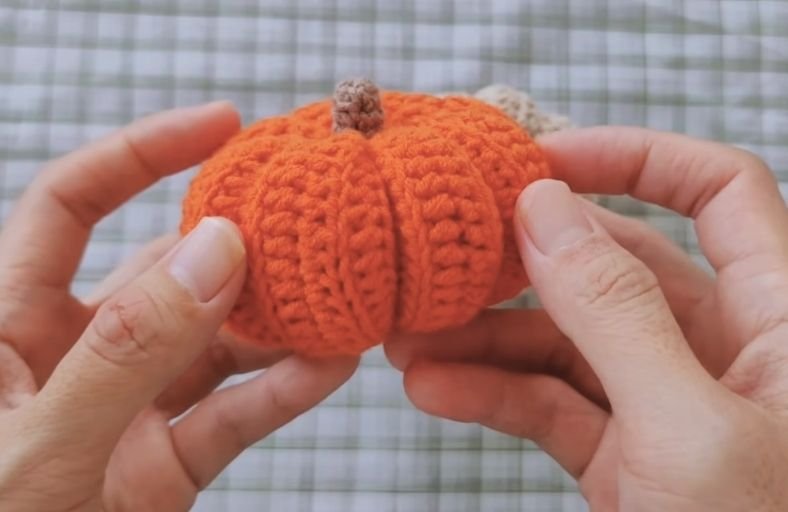
Are your autumn decor senses tingling yet? As soon as the leaves begin to turn and the air gets crisp, there is an irresistible urge to pumpkin-ify every single corner of the house.
This adorable, plush mini pumpkin brings all the cozy fall vibes without any of the messy pumpkin carving or rotting on your front porch!
Materials and Preparation
Materials:
- Yarn: Medium worsted weight yarn in Orange (or Cream/Beige for a neutral autumn look) and Light Brown (for the stem).
- Stuffing: Polyfill fiberfill stuffing.
Tools:
- Crochet Hook: 3.5 mm to 4.0 mm crochet hook.
- Yarn Needle: Long tapestry or yarn needle with a wide eye (essential for cinch shaping the pumpkin segments).
- Stitch Marker: To mark the beginning of rounds on the stem.
- Scissors: Standard craft scissors.
Preparation Notes:
- This project utilizes ribbed row technique for the main body and 3D spiral technique for the stem.
- Maintain a firm, even tension so that your stitches stay neat and keep the polyfill invisible inside.
Abbreviations and Notes
Abbreviations:
- ch: Chain
- sc: Single Crochet
- hdc: Half Double Crochet
- dc: Double Crochet
- sl st: Slip Stitch
- BLO: Back Loop Only
- MR: Magic Ring
Pattern Notes:
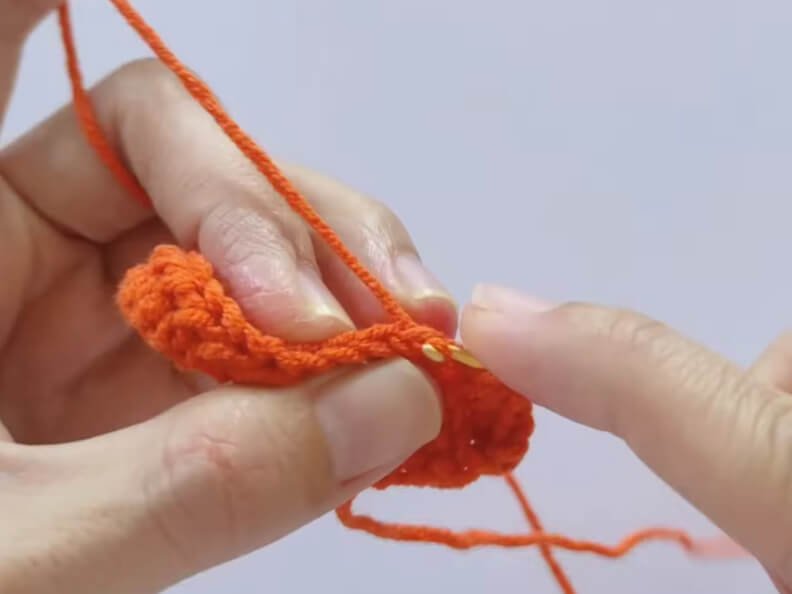
- The main pumpkin body is worked in flat back-and-forth rows using ribbed BLO stitches to create deep, natural ridges.
- The stem is worked separately in continuous spiral rounds.
- After seaming the body into a tube, thread is passed through the center multiple times to pull down and sculpt the iconic plump pumpkin lobes.
Gauge, Approximate Size, and Pattern Notes
Gauge:
Gauge is not critical for this project. Keep your stitches tight enough to prevent stuffing from showing through the gaps.
Finished Size:
Approximately 3.5 in wide by 2.5 in tall (8.9 cm x 6.4 cm including stem).
Special Techniques:
- Ribbed Back Loop Only (BLO): Working stitches into the back loop only creates an elastic, ridged texture that mimics natural pumpkin ribs.
- Deep Center Cinching: Pulling long tail threads through the central core to shape individual pumpkin segments.
Step-by-Step Pattern
Part 1: Main Pumpkin Body
Moc with Orange yarn in flat rows:
- Foundation: Ch 20.
- Row 1: Starting in 2nd ch from hook, 20 hdc, ch 1, turn. (20)
- Row 2–24: BLO 20 hdc, ch 1, turn. (20) Fasten off, leaving a very long tail (at least 20–24 inches) for seaming, cinching, and segment shaping.
Step-by-Step Pattern
Part 2: Pumpkin Stem
Moc with Light Brown yarn in continuous rounds:
- R1: MR 6 sc (6)
- R2: BLO 6 sc (6) Fasten off, leaving a tail for sewing onto the top center.
- R3-R4: 6 sc (6)
Step-by-Step Pattern
Part 3: Accessories & Detailing
Pumpkin Segments & Shaping
- No additional accessories are required for this clean, classic pumpkin layout.
Step-by-Step Pattern
Part 4: Assembly & Finishing
- Seaming the Tube: Fold the ribbed rectangle in half so the short edges meet. Using your yarn needle and long orange tail, slip stitch or mattress stitch the first and last rows together to form a cylinder.
- Closing the Bottom: Weave the yarn tail in and out around the bottom edge stitches of the cylinder. Pull tightly like a drawstring to close the bottom opening completely and knot securely.
- Stuffing: Stuff the cylinder generously with polyfill stuffing, shaping it into a soft round ball.
- Closing the Top: Weave the yarn tail in and out around the top edge stitches and pull tightly to draw the opening closed.
- Creating the Ribbed Segments:
- Take the remaining long tail thread on your yarn needle and insert it straight through the center of the pumpkin from top to bottom.
- Bring the yarn up around the outside of the pumpkin along one of the natural ribbed lines, then re-insert the needle through the center top down to the bottom.
- Pull tightly to create a deep indent and form a plump segment.
- Repeat this around the pumpkin 5 to 6 times along the rib grooves until you have distinct pumpkin sections. Knot securely at the bottom and hide the tail inside.
- Attaching the Stem: Sew the brown stem securely over the top center cinched opening using the brown yarn tail.
Detailed Pattern Breakdown
1. Main Body Ridge Construction:
- Working 15 hdc in BLO across 24 rows creates a flexible rectangular accordion-like panel. The combination of half double crochet and back loop placement provides deep vertical grooves that naturally fold into realistic pumpkin ridges when drawn together at the top and bottom.
2. Segment Sculpting Mechanics:
- By drawing the long tail thread directly through the central core of the pumpkin and wrapping it around the outside perimeter, you apply vertical tension to compress the body. This forces the polyfill outward into soft, defined, bulbous sections that give the pumpkin its signature squishy 3D form.
3. Stem Assembly:
- The stem uses a tight 5 sc magic ring worked upwards in continuous rounds to form a sturdy, narrow stalk. Keeping the stitch count low prevents the stem from flaring, ensuring it sits upright on top of the compressed center cavity.
Pattern Question:
Question: How do I keep my pumpkin segments looking even and prevent the cinching yarn from slipping loose?
Answer: When wrapping your long yarn tail around the pumpkin to create the segments, follow the existing ridge lines created by your BLO rows to guide your placement evenly.
To prevent the thread from slipping while you work on the next segment, make a quick anchoring stitch or tiny knot through the bottom center core after pulling each wrap taut.
This maintains strong tension across all sections without requiring you to hold the thread tight with your fingers while stitching!