

Are your plain curtains looking a little lonely and desperate for a splash of sunshine? Transform your home decor with these charming Crochet Sunflower Curtain Tiebacks!
Featuring a rich, textured 3D center with textured picot details, layered petals, and a sturdy green backing, this delightful project brings warmth and handmade beauty into any room.
Materials and Preparation
Materials:
- Yarn:
- Dark Brown yarn (for the inner flower core center)
- Light Brown / Beige yarn (for the 3D picot seed texture)
- Bright Yellow yarn (for the flower petals and mini accent blooms)
- Green yarn (for the back base piece, leaves, and tie straps)
- Stuffing: Polyfill stuffing to give the center a plush 3D appearance.
- Craft Wire (Optional): Fine floral craft wire if you want shapeable, structured petals.
Tools:
- Crochet Hook: 2.5 mm – 3.0 mm (or suitable size for your yarn weight).
- Yarn Needle: For joining pieces, sewing, and weaving in loose ends.
- Stitch Marker: To mark the beginning of continuous spiral rounds.
- Scissors: For trimming yarn ends.
Preparation Notes:
- Master basic stitches such as single crochet (
sc), half double crochet (hdc), double crochet (dc), slip stitch (sl st), and the picot stitch before starting. - Pay close attention to working in the Back Loops (
BLO) versus Front Loops (FLO), as this pattern uses loop differentiation to build the 3D center overlay and attach the back piece.
Abbreviations and Notes
Abbreviations:
- MR: Magic Ring
- ch: Chain stitch
- sc: Single Crochet
- hdc: Half Double Crochet
- dc: Double Crochet
- inc: Single Crochet Increase (2 sc in the same stitch)
- sl st: Slip Stitch
- BLO: Back Loop Only
- FLO: Front Loop Only
- picot: Picot Stitch (ch 2 or ch 3, sl st into the first chain)
Pattern Notes:
- The brown center core is worked in continuous spiral rounds.
- Rounds 6 through 8 of the center piece are worked in
BLO(Back Loop Only) to leave theFLO(Front Loop Only) available for crocheting the 3D textured picot overlay. - The green backing piece is crocheted flat using standard
scrounds and joined directly to the brown front piece before stuffing.

Gauge, Approximate Size, and Pattern Notes
Gauge:
Gauge is not critical for this home decor piece, but keeping your tension firm and tight ensures the polyfill stuffing will not show through the stitches.
Finished Size:
The finished sunflower head measures approximately 6 to 7 inches (15 to 18 cm) in diameter, perfectly sized to hold standard curtain panels back neatly.
Special Techniques:
- 3D Spiral Picot Texture: Working in the remaining front loops from the center outward in a spiral to form dense, realistic seed clusters.
- Petal Base Spikes: Foundation chain stems constructed around the flower perimeter to anchor each individual leaf and petal.
- Wire Insertion (Optional): Crocheting over thin floral wire during the petal round allows custom shaping and curving of each individual petal.
Step-by-Step Pattern
Part 1: Sunflower Center Core & Backing Base
Brown Center Core (Front Piece)
Crochet using dark brown/light brown yarn:
- R1: MR 6 sc (6)
- R2: 6 inc (12)
- R3: (sc, inc)*6 (18)
- R4: (2 sc, inc)*6 (24)
- R5: (2 sc, inc)*8 (32)
- R6: Working in BLO, (3 sc, inc)*8 (40)
- R7: Working in BLO, (4 sc, inc)*8 (48)
- R8: Working in BLO, (5 sc, inc)*8 (56)
- R9: Working in BLO, 56 sc (56)
- Fasten off and leave remaining front loops (FLO) available for the 3D picot decoration.
Textured 3D Picot Seed Overlay
Attach Light Brown yarn to the innermost FLO left from R6:
- Spiral Overlay Round: Join yarn with sl st in the first unworked front loop near the center. (ch 2 or ch 3, sl st in 1st ch to form a picot, skip 1 loop, sl st in next loop). Repeat this picot sequence continuously in a spiral working outwards across all unworked front loops left from R6 to R8.
- Fasten off and pull yarn ends through to the back side.
Green Backing Base (Rear Piece)
Crochet using green yarn:
- R1: MR 6 sc (6)
- R2: 6 inc (12)
- R3: (sc, inc)*6 (18)
- R4: (2 sc, inc)*6 (24)
- R5: (2 sc, inc)*8 (32)
- R6: (3 sc, inc)*8 (40)
- R7: (4 x, inc)*8 (48)
- R8: (5 sc, inc)*8 (56)
- R9: 56 sc through both loops (56)
- Do not fasten off.
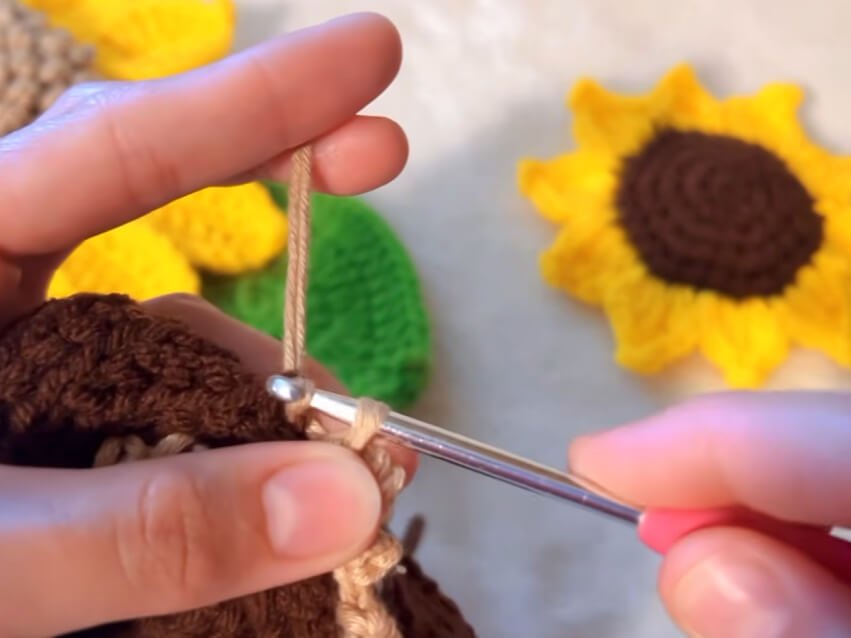
Part 2: Assembly of Flower Core & Petal Bases
Joining Core Pieces
- Place the Brown Front Piece and Green Back Piece together with wrong sides facing each other.
- Align the stitches of both pieces (56 stitches total).
- Working through the back loops of the Brown piece and both loops of the Green piece, sc around the edge to join them together.
- Stuff firmly with polyfill before closing the last few stitches, then sl st to join.
Creating Petal Foundation Spikes
Continue crocheting around the edge with green or yellow yarn:
- Round 1: (ch 9, starting in 2nd ch from hook work 8 sc back down the chain back to the base; skip 1 st on the core, 3 sl st in the next 3 sts)* repeat 14 times total around the perimeter.
- Result: 14 petal base spikes around the flower core.
Part 3: Sunflower Petals & Hanging Accent Details
Crocheting the 14 Flower Petals
Crocheted with bright yellow yarn.(Optionally place craft wire along the edges as you stitch):
- Petal Construction (Repeat for each of the 14 base spikes):
- Attach yellow yarn at the base of a stem spike.
- Work up the first side of the spike: 1 sc, 1 hdc, 4 dc, 1 hdc, 1 sc.
- At the top tip (9th chain loop): (1 sc, ch 2, sl st in 1st ch to make a picot, 1 sc) all in the tip loop.
- Work down the opposite side of the spike (mirroring the first side): 1 sc, 1 hdc, 4 dc, 1 hdc, 1 sc.
- Work 1 sc in the center stitch of the 3 sl st gap between spikes.
- Repeat for all 14 spikes around the flower. Fasten off and weave in ends.
Hanging Straps & Mini Sunflower Accents
- Curtain Tieback Strap:
- Ch 80 (or desired length to wrap around curtains), turn, and work sc in each chain across. Attach securely to the green back base.
- Mini Sunflowers (Make 2 for dangling ends):
- Core: MR 6 sc in dark brown, (inc)*6 (12 sts).
- Petals: Attach yellow yarn, (ch 3, 1 dc, ch 2 picot, 1 dc in same st, ch 3, sl st in next st)* repeat around to form mini petals.
- Attach mini flowers to the ends of the hanging cords.
Part 4: Assembly & Finishing Touch
- Final Shaping: Adjust and gently bend the petals (if wire was used) so they curve naturally outwards.
- Securing Tieback Straps: Ensure the green tieback straps are stitched firmly onto the back of the green base so they can withstand pulling when tied around heavy curtain fabrics.
- Tidy Up: Weave in all loose yarn tails neatly into the interior polyfill area using a yarn needle.
Detailed Pattern Breakdown
1. Brown Center Core Breakdown:
- The flower core begins with standard Amigurumi round expansion from MR 6 sc up to 56 stitches across 8 rounds.
- Switching to Back Loop Only (
BLO) from Round 6 onward is crucial because it leaves a visible spiral trail of Front Loops (FLO) across the surface. - The 3D seed texture is created by anchoring a continuous spiral of picot stitches into these surface loops, producing a lush, raised seed disk.
2. Base Assembly Breakdown:
- The green backing piece mirrors the stitch count of the front piece (56 stitches) but is worked normally in both loops for strength.
- Joining both disks with single crochets traps the polyfill inside, creating a sturdy 3D foundation.
- The petal foundation spikes are created by chaining out 9 stitches and working back down with sc. Skipping 1 stitch and making 3 sl st evenly space 14 equal petal slots around the circle.
3. Petal Shaping Breakdown:
- Each petal uses graduated stitch heights (sc to hdc to dc to hdc to sc) to create a natural tapered leaf shape.
- The tip picot stitch gives the sunflower its signature sharp petal point.
- Incorporating fine floral wire into the final petal edge allows each petal to be bent and shaped for a realistic look.
Pattern Question:
Question: How can I make sure the sunflower tieback stays securely wrapped around heavy or thick curtain fabrics?
Answer: To ensure your curtain tieback holds thick drapery without slipping, you can customize the length of the green foundation chain strap (ch 80 or more) based on your curtain thickness.
For extra security, stitch a small wooden button onto the back of the green base and create a loop at the end of the strap, or incorporate a hidden magnetic snap clasp inside the mini sunflower accents.