
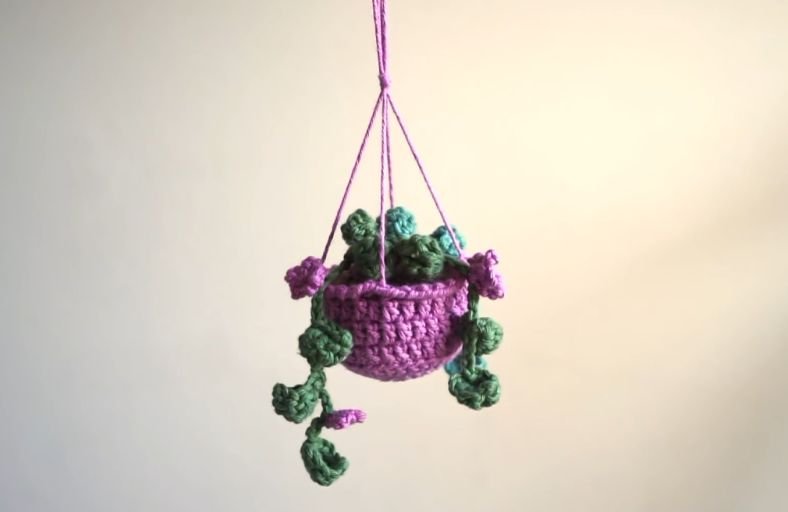
Looking to bring a touch of vibrant, everlasting greenery to your rearview mirror or workspace? This charming mini hanging plant with delicate floral accents is the ultimate weekend project.
Perfect for stash busting and quick crafting, this written guide provides step by step instructions to craft your very own handmade car charm or desk decor.
Materials and Preparation
Materials:
- Yarn: Sport weight or DK weight yarn in three distinct colors:
- Brown/Dark color for soil
- Desired pot color (e.g., terracoata, purple, or beige)
- Green for trailing leaf branches
- Optional fourth accent color for mini flowers
- Stuffing: Polyfill stuffing or yarn scraps to fill the pot
Tools:
- Crochet Hook: 3.5 mm crochet hook
- Tape Measure: For consistent hanging cord length
- Yarn Needle: For assembly and weaving in ends
- Scissors: To trim yarn tails
Preparation Notes:
- You should be familiar with basic stitches including chain, single crochet, double crochet, treble crochet, and slip stitch.
- Maintain a neat, even tension throughout the pot so the stuffing remains fully hidden.
- Feel free to substitute sport/DK weight yarn with light worsted yarn if you prefer a thicker, fuller appearance for your plant vines.
Abbreviations and Notes
Abbreviations:
- MR: Magic Ring
- ch: Chain
- sc: Single Crochet
- inc: Single Crochet Increase (2 sc in the same stitch)
- dc: Double Crochet
- dc inc: Double Crochet Increase (2 dc in the same stitch)
- hdc: Half Double Crochet
- tr: Treble Crochet
- sl st: Slip Stitch
- BLO: Back Loop Only
- Picot: Chain 2, then slip stitch into the first chain
Pattern Notes:
- The pot and soil sections are worked in joined rounds starting with a slip stitch into the first stitch of each round.
- The leaf branches are worked in continuous chain strands, making it easy to customize the length and leaf density of each branch.
Gauge, Approximate Size, and Pattern Notes
Gauge:
Gauge is not critical for this project. Keep stitches snug enough so stuffing does not peek through the pot base.
Finished Size:
The finished mini pot measures approximately 2 inches (5 cm) in diameter and 1.5 inches (3.8 cm) in height. Total hanging length with cords is approximately 8 to 10 inches (20 cm to 25 cm).
Special Techniques:
- Crab Stitch (Reverse Single Crochet): Worked along Round 10 to create a decorative rope like twisted rim around the pot top.
- Picot Leaf Tips: A chain 2 picot is placed at the tip of each leaf strand to form a sharp, realistic leaf point.
- Invisible Join: Used at the end of the pot rim to give a seamless top finish.
Step-by-Step Pattern
Part 1: Main Pot
Using your selected pot color yarn:
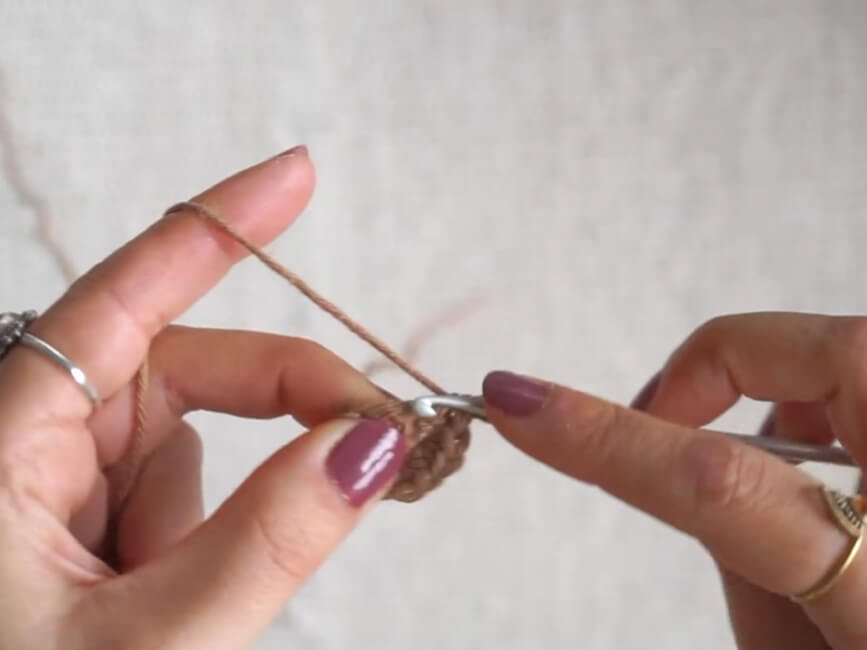
- R1: MR, 6 sc into ring, sl st into first sc to join (6)
- R2: ch 1, 2 sc into every st around (including 2 sc into the joining sl st from R1) (14), sl st to join
- R3: ch 1, (1 sc, inc)*7 (21), sl st to join
- R4: ch 1, (1 sc, inc, 1 sc)*7 (28), sl st to join
- R5: ch 1, (3 sc, inc)*7 (35), sl st to join
- R6: ch 2, BLO 35 dc around (35), sl st to join
- R7–R9: ch 2, 35 dc around (35), sl st to join
- R10: ch 1, work 1 Crab Stitch in every st around (35) Fasten off yarn, leaving a short tail. Thread yarn needle, make an invisible join, and weave in ends inside the pot.

Part 2: Soil Insert
Using brown yarn:
- R1: MR, 6 sc into ring, sl st to join (6)
- R2: ch 2, 2 dc into every st around (12), sl st to join
- R3: ch 2, (1 dc, dc inc)*6 (18), sl st to join
- R4: ch 2, 2 dc in each st around until the final stitch, work 1 dc in the last st (35), sl st to join Fasten off, leaving a 12 inch (30 cm) yarn tail for sewing.
Part 3: Leaves and Flower Accessories
Leaf Vine Branches:
Using green yarn:
- Branch Base: Chain 3.
- Leaf Construction: Into the 3rd ch from hook work: 1 hdc, 1 dc, 1 tr, ch 2, sl st into 1st ch of ch-2 (picot made), 1 tr, 1 dc, 1 hdc, 1 sc, 1 sl st.
- Stem Continuation: Chain desired amount (e.g., 10 chains) to space out the next leaf.
- Repeat Leaf: Into the 3rd ch from hook work: 1 hdc, 1 dc, 1 tr, ch 2, sl st into 1st ch of ch-2 (picot), 1 tr, 1 dc, 1 hdc, 1 sc, 1 sl st.
- Continue repeating stem chains and leaf instructions until branch reaches desired length.
- To Finish Branch: Chain 6, cut yarn leaving an 8 inch (20 cm) tail, and pull through. Repeat to make 3 to 5 branches.
Mini Flowers (Optional Accent):
Using floral accent yarn:
- Attach yarn with a slip knot into any chain space along a leaf branch.
- (ch 4, sc into same chain) 4 times to form 4 petals.
- sl st into the first chain space to close flower.
- Fasten off, weave in both yarn tails securely. Repeat on branches as desired.
Part 4: Assembly and Hanging Straps
- Attaching Vines to Soil: Insert your crochet hook through the center magic ring of the soil piece. Pull all starting yarn tails of the leaf vines through to the underside of the soil. Tie them together in a secure double knot underneath and trim excess tails.
- Attaching Soil to Pot: Thread the 12 inch soil tail onto a needle. Sew the soil piece to the inside of the pot by passing through both loops of every stitch on the soil panel and through corresponding dc stitches of the pot.
- Stuffing: Pause sewing when a small opening remains, fill the pot firmly with polyfill stuffing or yarn scraps, then complete sewing and fasten off.
- Hanging Cords: Cut two 32 inch (81 cm) strands of yarn. Fold both strands in half and tie an overhand knot near the folded top to create a central hanging loop. Divide the dangling ends into 4 individual strands. Thread each strand onto a needle, attach symmetrically around the rim of the pot (5 inches / 12.7 cm down from top knot), knot securely, and pull tail into pot body to hide.
Detailed Pattern Breakdown
1. Pot Base Construction:
The plant pot begins as a standard flat circle created with single crochet increases (R1 to R5). Transitioning to double crochet in Round 6 using Back Loop Only (BLO) forces the fabric to fold upward at a precise 90 degree angle. Rounds 7 through 9 build up vertical wall height effortlessly.
Round 10 finishes with crab stitch, twisting the working direction backwards to create a thick, rope like decorative rim that gives the pot a sturdy ceramic look.
2. Flat Soil Surface:
The soil piece uses double crochet rounds to quickly match the 35 stitch circumference of the pot top. By keeping the surface completely flat, it acts as a neat plug that holds the leaf tails in place from behind while providing a smooth ground layer.
3. Leaf and Flower Strand Mechanics:
Each leaf uses a symmetrical stitch height progression: hdc rightarrow dc rightarrow tr rightarrow picot rightarrow tr rightarrow dc rightarrow hdc rightarrow sc rightarrow sl st.
This smooth scaling builds a natural teardrop silhouette with a crisp picot point at the tip. The mini flowers anchor directly into the chain spaces between leaves, adding pops of vibrant color without requiring complex separate assembly.
Pattern Question:
Question: How can I adjust the size of this hanging plant to fit different spaces like a car mirror versus a large wall?
Answer: To modify the overall size, you can change yarn weight and hook size. Using sport or DK yarn with a 3.5 mm hook yields a compact plant ideal for car rear view mirrors.
Swapping to worsted weight yarn creates a larger, lush display piece suitable for wall hangings or window decor. You can also lengthen or shorten the 32 inch hanging strands to adjust where the pot suspends.