
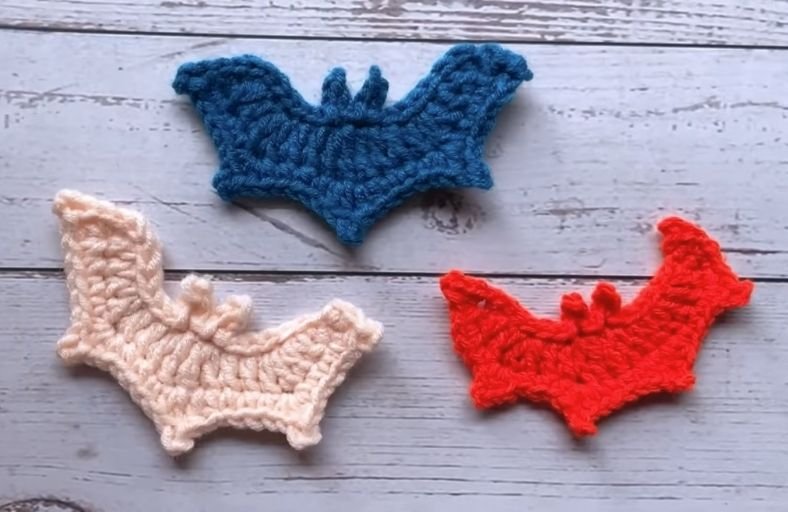
Looking to add a touch of playful spookiness to your Halloween decor without spending hours on a complex project?
Whether you want to embellish your favorite denim jacket, craft a frightfully cute Halloween bunting, or decorate trick-or-treat bags, this quick bat applique is the ultimate weekend craft.
Grab your favorite spooky yarn shades and let’s whip up these charming winged creatures in just a few minutes!
Materials and Preparation
Materials:
- Yarn: Worsted weight yarn in black, royal blue, pastel peach, or any festive Halloween color of your choice.
- Optional Decor: Twine or ribbon if you plan to string multiple bats together for a spooky garland or bunting.
Tools:
- Crochet Hook: 3.5 mm (US E/4) crochet hook (or sized to match your chosen yarn weight).
- Yarn Needle: Tapestry needle for weaving in loose ends smoothly.
- Scissors: Sharp craft scissors.
- Stitch Marker: Optional, useful for marking key symmetry points along the wings.
Preparation Notes:
- Practice your basic stitches like single crochet (
sc), half double crochet (hdc), double crochet (dc), and treble crochet (tr) before getting started. - Keep your tension moderate and consistent so the wing points flare out crisply without curling up at the edges.
Abbreviations and Notes
Abbreviations:
- ch: Chain
- sl st: Slip Stitch
- sc: Single Crochet
- hdc: Half Double Crochet
- dc: Double Crochet
- tr: Treble Crochet
- st / sts: Stitch / Stitches
- sp: Space
Pattern Notes:
- The bat applique is worked in flat rows starting from a central foundation chain that builds the body and inner wing structures, finished with an outer edging that shapes the bat ears, head, and sharp wing points.
- Chains at the start of rows or decorative picot-style points count as shaping loops unless specified otherwise.
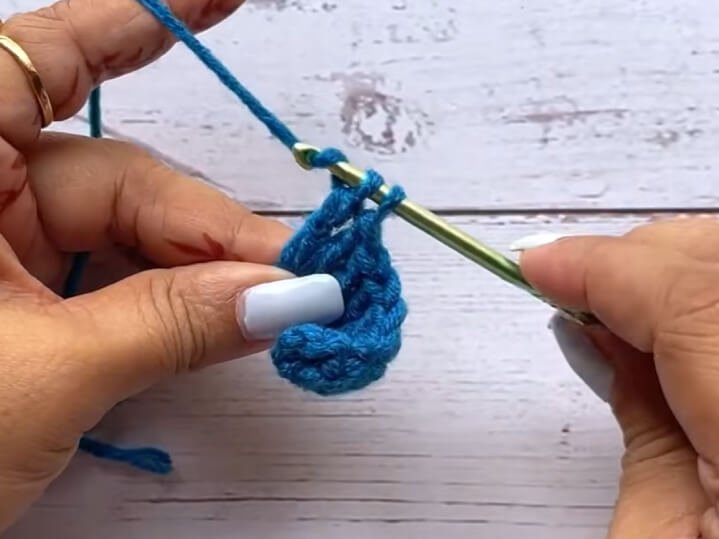
Gauge, Approximate Size, and Pattern Notes
Gauge:
Gauge is not critical for this decorative applique project. Changing hook size or yarn weight will simply scale your bat larger or smaller.
Finished Size:
- Width: Approximately 4.5 inches (11.4 cm) from wingtip to wingtip.
- Height: Approximately 2.5 inches (6.4 cm) from top ears to center tail point.
Special Techniques:
- Wingtip Picot Shaping: Utilizing short chain spaces combined with slip stitches and higher stitches (
dc,tr) to create sharp, bat-like wing scalloping. - Ear Shaping: Working quick chain loops directly on top of the central head base to form upright ears without sewing extra pieces.
Step-by-Step Pattern
Part 1: Main Wing Base & Body
Worked from central foundation outward:
- Foundation: Ch 15.
- Row 1: 1 dc in ch 4, 1 dc in next ch, 1 dc inc, 1 dc + 1 tr in next ch , 1 tr + 1 dc in next ch , 1 dc inc in next ch, 1 dc in next ch , 1 dc inc in last ch, 2 slst on the side.
- Row 2: 5 slst in each st , till the tr st , ch 3 + slst in ch 2, 1 sc in next ch, slst in the next st, ch 3 + slst in ch 2, slst in the base st, 1 slst each in the next 5 st , 1 slst each in the next 3 st on the side.
Part 2: Outer Wing Scallops & Ears
Shaping the scalloped edges, ears, and wing points:
- Row 3 (Left Wing): (1 sc , 1 hdc, ch 2, slst in hdc st , 1 hdc, 1 sc in the same st), 1 sc each in the next 2 st, (1 sc , 1 hdc, ch 2, slst in hdc st , 1 hdc, 1 sc in the same st), 1 sc each in the next 3 st,
- Center Head & Ears: (1 hdc , 1 dc, ch 2, slst in dc st ), (1 dc , 1 hdc in next st),
- Row 3 (Right Wing): 1 sc each in the next 3 st, (1 sc , 1 hdc, ch 2, slst in hdc st , 1 hdc, 1 sc in the same st), 1 sc each in the next 2 st, (1 sc , 1 hdc, ch 2, slst in hdc st , 1 hdc, 1 sc in the same st), 1 sc each in the next 3 st, in next st ( 1 sc, 1 hdc, ch 2, slst), in next st ( 1 hdc, 1 sc)
Part 3: Accessories & Bunting Option
Tail Point & Edging Touch-ups:
- Attach yarn at bottom center base, ch 2, sl st back into base to create a crisp center tail point.
Bunting Stringing:
- If creating a Halloween garland, work a long foundation chain (ch 50-100), attach each bat by sl st through top wingtips spaced 10-15 chains apart, then continue chaining to desired length.
Part 4: Assembly & Finishing
- Block your applique lightly with a steam iron or wet block with pins to ensure wings lay completely flat and wingtips stay pointed.
- Weave in all yarn tails neatly along the back side of the stitches using a yarn needle.
- Sew or glue onto jackets, hats, blankets, or string along twine for instant party decor.
Detailed Pattern Breakdown
1. Central Body Foundation Breakdown:
- The project starts with a symmetrical foundation chain designed to establish the core wingspan width.
- By arranging stitches in increasing height order (
sctohdctodc), the pattern naturally establishes a flared silhouette mimicking natural wing curvature before adding decorative edges.
2. Scallop & Wingtip Sculpting Breakdown:
- Combining tall stitches like treble crochet (
tr) directly next to shorter half double crochets (hdc) creates dramatic height contrast across the top wing border. - Short chain loops (
ch 2combined withsl st) placed at peak heights lock in pointed tips that hold their shape without needing wire supports.
3. Integrated Ear Construction Breakdown:
- Rather than crafting tiny separate ear pieces and sewing them on afterward, the ears are built straight into the central row transitions using mini chain-spurs.
- This no-sew integration ensures clean structural strength and keeps the entire project fast and beginner-friendly.
Pattern Question:
Question: How can I make my bat wingtips stay sharp and keep the entire applique from curling up at the edges?
Answer: To achieve crisp, defined wingtips, make sure to pull your slip stitch tight when closing off peak chain loops (ch 2, sl st).
If your finished bat tends to curl around the wing edges, drop down half a hook size or block the finished piece by lightly spritzing it with water, pinning the wingtips flat onto a blocking board, and letting it dry completely before use.