
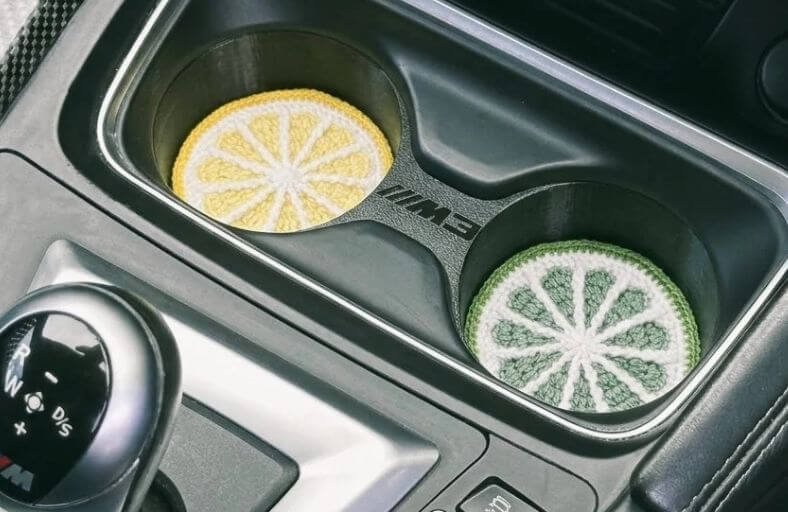
Ever looked at your car cup holder and thought it needed a burst of sunshine?
These vibrant Crochet Lemon Slice Citrus Car Coasters are here to bring instant joy to your daily commute!
Perfect for absorbing stray drips, adding a playful pop of color to your vehicle, or giving as a delightful handmade gift, this project transforms simple yarn into adorable, juicy citrus slices.
Materials and Preparation
Materials:
- Yarn:
- Primary Color (Yellow or Lime Green) for the lemon flesh and outer rind.
- Secondary Color (White) for the pith and raised segment lines.
- Stuffing: None required (this is a flat, double-layered coaster design).
Tools:
- Crochet Hook: Size 3.5 mm (or adjusted size to match yarn weight).
- Yarn Needle: Tapestry needle for weaving in ends.
- Stitch Marker: To keep track of rounds.
- Scissors: Craft scissors for trimming ends.
Preparation Notes:
- You should be comfortable with tapestry crochet or carrying a second color along the back of your work.
- Keeping a consistent yarn tension ensures the coaster lays completely flat inside your cup holder.
Abbreviations and Notes
Abbreviations:
- MR: Magic Ring
- ch: Chain
- sc: Single Crochet
- hdc: Half Double Crochet
- dc: Double Crochet
- fpdc: Front Post Double Crochet
- sl st: Slip Stitch
- BLO: Back Loop Only
Pattern Notes:
- The coaster is worked in joined rounds.
- Color changes occur on the final yarn-over of the preceding stitch to ensure seamless transitions between yellow/green and white.
- Non-working yarn is carried behind stitches throughout the tapestry sections.

Gauge, Approximate Size, and Pattern Notes
Gauge:
Gauge is not critical for this project, but stitches should be tight enough to create a firm, flat coaster surface.
Finished Size:
Approximately 3.25 inches (8.25 cm) in diameter, designed to fit standard car cup holders.
Special Techniques:
- Color Switching: Drop the active color on the final step of a stitch, pull through with the new color to finish the stitch smoothly.
- Front Post Double Crochet (fpdc): Worked around the post of previous rounds to create raised, realistic citrus segment dividers.
- BLO Working (Round 6): Hook it onto the back edge to create a boundary between the flesh and the peel.
Step-by-Step Pattern
Part 1: Main Slice Body (Rounds 1–4)
Worked in joined rounds using Yellow/Green (C1) and White (C2):
- R1: With C1, MR, ch 3 (counts as dc), 10 dc into ring. Join with sl st to top of ch 3. (11 dc)
- R2: Attach C2 (carry non-working yarn), ch 3, 1 dc in same st (do not complete). Switch to C2, 1 fpdc around ch 3 (do not complete), switch to C1. (2 dc in next st, switch to C2, 1 fpdc around same st, switch to C1) repeat around. Join with sl st to top of ch 3. (11 fpdc, 22 dc)
- R3: Ch 3, 2 dc in next st (switch to C2 on last st), 1 fpdc around fpdc st (switch to C1). (1 dc in next st, 2 dc in next st, switch to C2, 1 fpdc around fpdc, switch to C1) repeat around. Join with sl st to top of ch 3. (11 fpdc, 33 dc)
- R4: Ch 3, 1 dc in next st, 2 dc in next st (switch to C2), 1 fpdc around fpdc st (switch to C1). (1 dc in next 2 sts, 2 dc in next st, switch to C2, 1 fpdc around fpdc, switch to C1) repeat around. Join with sl st to top of ch 3. (11 fpdc, 44 dc)
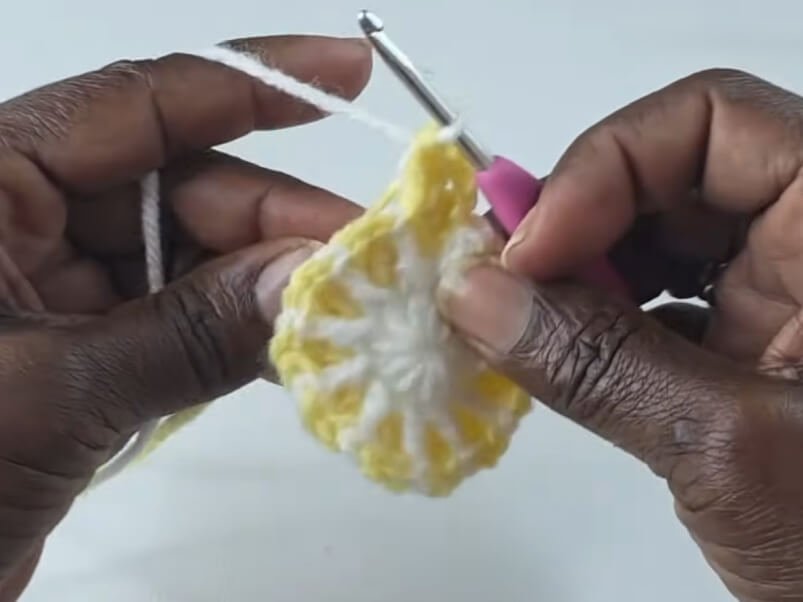
Part 2: Inner Rind & Pith Transition (Round 5)
- R5: Ch 1, 1 sc in same st, 1 hdc + 1 dc in next st, 1 dc + 1 hdc in next st, 1 sc in next st (switch to C2). 1 fpdc around fpdc (switch to C1). (1 sc in next st, 1 hdc + 1 dc in next st, 1 dc + 1 hdc in next st, 1 sc in next st, switch to C2, 1 fpdc around fpdc, switch to C1) repeat around. Join into back loop of first sc using sl st. Fasten off C2. (66 sts + 11 fpdc)
Part 3: Outer Rind & Edging
Rind Layer (Round 6):
- R6: Working in BLO with C2: Ch 3, 1 hdc in next st, 1 sc in next 2 sts, 1 hdc in next st, 1 dc in next st, 1 fpdc around fpdc st. (1 dc in next st, 1 hdc in next st, 1 sc in next 2 sts, 1 hdc in next st, 1 dc in next st, 1 fpdc around fpdc) repeat around. Join with sl st to top of ch 3. (66 sts + 11 fpdc)
Edge Round (Rounds 7–8):
- R7: With C2, ch 1, 1 sc in each st around (working through both loops). Join with sl st. (77 sc)
- R8: Fasten off C2, attach C1 (Yellow/Green). Work 1 sc in next 10 sts, 2 sc in next st. (1 sc in next 10 sts, 2 sc in next st) repeat around. Fasten off with invisible join. (84 sc)
Part 4: Assembly & Finishing
- Finishing Steps:
- Pull center magic ring tight and weave in yarn tail securely on the back.
- Use a yarn needle to weave all carried threads into the back loops.
- Lightly steam iron or block flat if necessary to prevent curling.
Detailed Pattern Breakdown
1. Central Core & Segment Foundation (Rounds 1–4):
- The coaster starts from a standard magic ring of 11 double crochet stitches.
- Front post double crochet (
fpdc) stitches worked in white (C2) create 11 raised, radiating lines resembling natural citrus segment membranes. - Regular increases in yellow (
C1) between the white post stitches expand the circle evenly while building realistic wedge shapes.
2. Segment Shaping & Pith Transition (Rounds 5–6):
- Round 5 uses a combination of
sc,hdc, anddcstitches to create gentle curves within each segment wedge. - Working Round 6 in
BLO(Back Loop Only) leaves a clean front ridge, visually isolating the juicy fruit pulp from the white inner pith.
3. Outer Rind & Durability (Rounds 7–8):
- Round 7 stabilizes the edge with a full round of single crochet in white.
- Round 8 adds the final bright outer rind in yellow or lime green, featuring evenly spaced increases (
2 sc in next st) every 11th stitch to keep the coaster perfectly flat and sturdy inside cup holders.
Pattern Questions
Question: How do I stop my carried yarn from showing through on the front side?
Answer: Keep the non-working strand pulled slightly taut along the back of your stitches as you work over it. Do not pull too tightly, or the coaster will pucker. Changing colors on the final loop of the preceding stitch ensures clean line definitions without color bleeding.
Question: My coaster is curling at the edges, how can I fix this?
Answer: Curling usually happens if your tension is too tight during front post double crochets or if you missed an increase in Round 8. Check your stitch counts, and gently steam-block your coaster under a damp cloth with an iron on low heat.
Question: Can I adjust the size to fit a larger mug instead of a car cup holder?
Answer: Yes! To enlarge the coaster for standard mug size, repeat the increase pattern by adding another round of double crochets (e.g., 3 dc, inc) before moving on to the shaping and rind rounds.