

Ready to add a charming, handmade touch to your holiday dinner table?
These festive Christmas tree cutlery holders are the perfect project to bring warmth and holiday cheer to your dining setup!
Crafted using textured chevron stitches to mimic evergreen branches, this project comes together quickly and serves as a delightful gift or party favor.
Materials and Preparation
Materials:
- Yarn: Medium weight anti-pilling acrylic yarn (Green, White, or Red for the main tree body; Brown for the tree trunk).
- Tapestry Needle: For weaving in ends and seaming pieces together.
Tools:
- Crochet Hook: Size 3.0 mm crochet hook.
- Scissors: Standard yarn scissors.
Preparation Notes:
- Leave a short tail when creating your starting slip knot, as you will wrap this tail over your hook to create corded foundation stitches.
- Maintain a steady tension throughout so that both the front pocket piece and the back base piece align perfectly during assembly.
Abbreviations and Notes
Abbreviations:
- ch: Chain
- sc: Single Crochet
- hdc: Half Double Crochet
- dc: Double Crochet
- sl st: Slip Stitch
- st(s): Stitch(es)
- ch-sp: Chain space
Pattern Notes:
- The turning chain 3 (
ch 3) counts as the first double crochet throughout the pattern. - Rounds 3 through 10 are worked on the right side only, fastening off at the end of each round and reattaching yarn on the right side.
Gauge, Approximate Size, and Pattern Notes
Gauge:
Gauge is not critical for this decorative item, but working with a 3.0 mm hook creates a firm fabric that holds cutlery securely.
Finished Size:
The long backing piece measures approximately 6.7 inches (17 cm) in height.
Special Techniques:
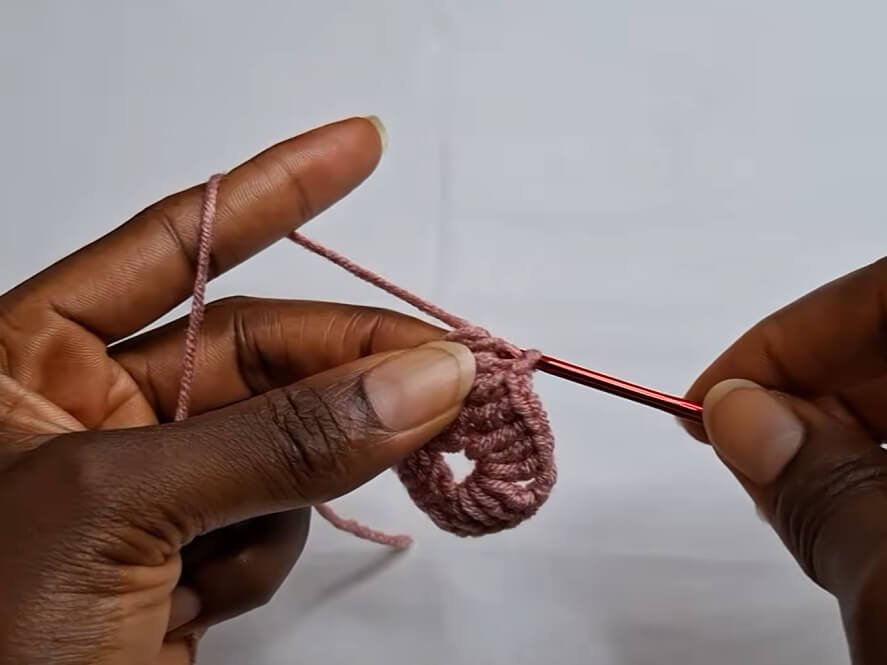
- Corded Foundation Start: Wrapping the yarn tail over the hook before pulling through creates a sturdy base.
- Whip Stitch Joining: Joining the front loop of one layer to the back loop of the other layer produces a neat edge seam.
Step-by-Step Pattern
Part 1: Back Tree Panel (10 Rounds)
Using main color yarn (Green, White, or Red):
- Foundation: Leave a small tail and make a slip knot. Wrap the tail over the hook, yarn over and pull through 2 loops on hook (1 st made). Repeat 3 more times until you have 4 foundation stitches.
- R1: Ch 3 (counts as 1 dc), 1 dc in first st, 3 dc in next st, ch 3, 3 dc in same st, 1 dc in each of next 2 sts.
- R2: Ch 3, turn, 2 dc in same space, 1 dc in each st across to ch-3 sp, (3 dc, ch 3, 3 dc) in ch-3 sp, 1 dc in each st across to last st, 3 dc in last st (top of turning ch-3). Ch 1, fasten off leaving a short tail.
- R3: Working on right side only, skip first 4 sts, reattach yarn in 5th st. Ch 3 (counts as 1 dc), 2 dc in same st, 1 dc in next 4 sts, (3 dc, ch 3, 3 dc) in ch-3 sp, 1 dc in next 4 sts, 3 dc in next st. (Leave remaining 4 sts unworked). Ch 1, fasten off.
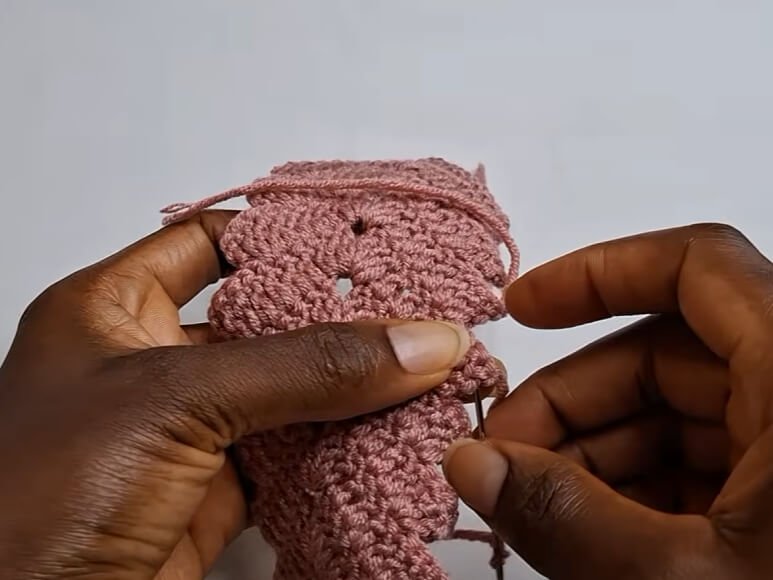
- R4–R10: Repeat the Round 3 logic, working across to the center ch-3 sp, placing (3 dc, ch 3, 3 dc) in the center point, and leaving 4 sts unworked on each outer edge. Fasten off at the end of each round. Weave in all yarn tails on the back.
Part 2: Front Tree Pocket (6 Rounds)
Using main color yarn:
- R1–R6: Follow the exact instructions from Part 1 for Rounds 1 through 6. Fasten off.
Part 3: Assembly & Tree Trunk
Assembly:
- Place the smaller 6-round front piece directly over the larger 10-round back piece, aligning the bottom edges.
- Using a yarn needle and main color yarn, join the two pieces together along the outer edges from top side to bottom and up the opposite side using front loop and back loop seaming. Fasten off and weave in ends.
Tree Trunk:
- R1: Attach brown yarn at the bottom center base of the tree. Ch 2, work 4 hdc evenly across the bottom base space (5 hdc total including ch-2).
- R2: Ch 2, turn, work 1 hdc in each st across (5 hdc).
- Ch 1, fasten off and weave in all remaining ends.
Part 4: Edging, Assembly & Finishing
- Ensure all loose ends from the individual rounds are neatly woven into the back stitches.
- Press flat with hands or steam gently if needed to enhance the chevron tree points.
Detailed Pattern Breakdown
1. Back Tree Panel Breakdown:
- The foundation uses a corded chain technique that creates a thick, stable base for the tree apex.
- The central shaping relies on consistent expansion in the middle using
(3 dc, ch 3, 3 dc)within the peak chain space, creating the pointed tree silhouette. - Skipping 4 stitches at each edge from Round 3 onward produces the stepped branch effect along the sides of the tree.
2. Front Tree Pocket Breakdown:
- Mapped identically to the first 6 rounds of the back panel, creating a smaller scaled chevron that fits over the lower portion of the tree base.
- The open top edge allows cutlery handles to slide easily into the pouch while holding forks and spoons neatly together.
3. Joining & Trunk Breakdown:
- Edge joining uses single loops from each piece to keep the seam flat without adding bulk.
- The trunk adds a structured 2-row rectangle in
hdcat the center bottom base to anchor the design visually.
Pattern Question:
Question: Why do we fasten off after every round starting from Round 3 instead of turning the work?
Answer: Fastening off and reattaching yarn on the right side for each round ensures that all double crochet stitches face forward, giving the tree branches a clean, uniform texture.
It also allows you to skip four edge stitches cleanly on each side without having to slip stitch across them.