
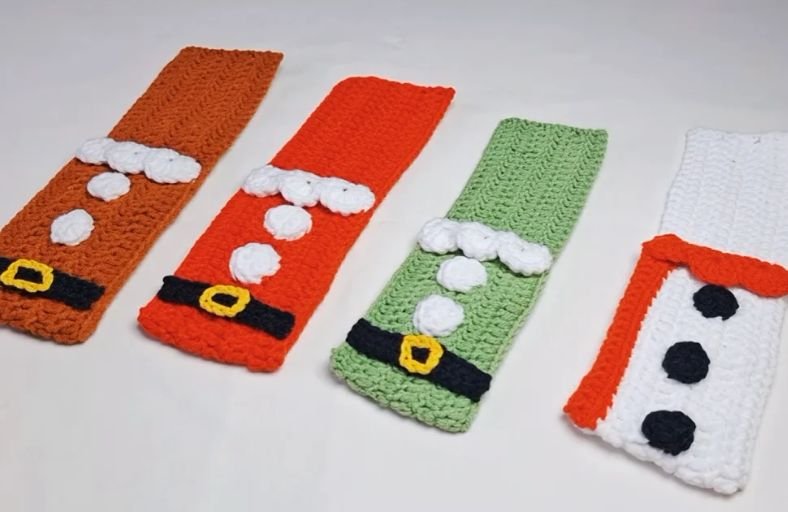
Ready to dress up your holiday dinner table with extra festive cheer? These adorable crochet Christmas cutlery holders are the ultimate holiday table accessory, adding a cozy handmade touch to any family feast!
Whether you want to deck your dining table out in classic Santa red, festive elf green, warm gingerbread brown, or frosty snowman white, these pouches are super easy to customize and quick to stitch up.
Materials and Preparation
Materials:
- Yarn: Medium weight yarn (Category 4 / Worsted Weight) in your choice of holiday colors: Red, Green, Brown, or White for the main pouch base, plus small amounts of White, Black, and Yellow for the decorative trims, buttons, and belt details.
- Craft Glue or Sewing Thread (Optional): Fabric glue can be used if you prefer gluing the embellishments onto the pouch instead of sewing them with yarn tails.
Tools:
- Crochet Hook: Size 3.5 mm crochet hook.
- Yarn Needle: Tapestry needle for sewing the side seams and attaching decorative pieces.
- Stitch Markers: Required to mark placement for folding the pouch pocket.
- Scissors: Scissors for trimming yarn ends.
Preparation Notes:
- Leave a long yarn tail at the very beginning when making your initial slip knot, as you can use it to help sew or secure your edges.
- Maintain a smooth, consistent tension while working double crochet rows so your cutlery pocket lays flat and uniform.
Abbreviations and Notes
Abbreviations:
- ch: Chain
- sc: Single Crochet
- hdc: Half Double Crochet
- dc: Double Crochet
- sl st: Slip Stitch
- MR: Magic Ring
- st(s): Stitch(es)
Pattern Notes:
- The main body of the cutlery holder is crocheted as a long flat rectangle using double crochet stitches worked back and forth in rows.
- Turning chains (
ch 3at the start of double crochet rows) count as your first stitch of the row. - The pocket is created by folding 42 stitches from one end and seaming up both side edges using a yarn needle.
- Embellishments (fur trim, buttons, and belt buckle) are crocheted separately and then sewn or glued onto the main pouch body.
Gauge, Approximate Size, and Pattern Notes
Gauge:
Gauge is not critical for this decorative project. Aim for a neat, comfortable fabric density that holds utensils sturdy without sagging.
Finished Size:
Approximately 3.5 inches in width by 9.5 inches in total length (8.9 cm x 24.1 cm), fitting standard dining forks, knives, and spoons snugly.
Special Techniques:
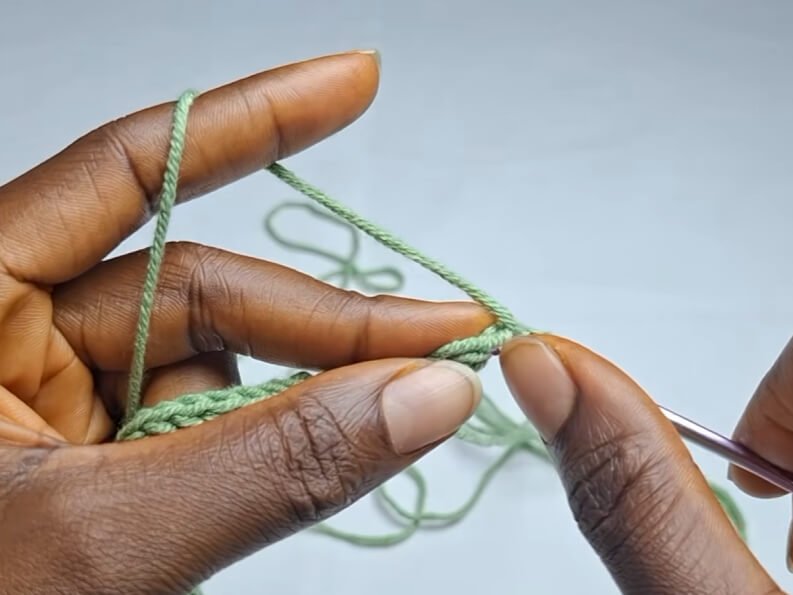
- Cord Foundation / Extended Chain Start: Wrap your long initial yarn tail around the hook to create a sturdy foundation chain base before starting your main rows.
- Surface Slip Stitching: Used on the black belt strip to construct a clean, raised rectangular yellow belt buckle outline directly on top of the black stitches.
- Seam Joining: Using the front loops and back loops of side stitches with a tapestry needle to assemble the pocket edges neatly.
Step-by-Step Pattern
Part 1: Main Pouch Base
Worked flat in rows using your main color choice (Red, Green, Brown, or White):
- Foundation: Leave a long yarn tail, make a slip knot. Wrap the tail around your hook, yarn over, and pull through to form foundation stitches. Work a total of 60 foundation stitches.
- Row 1: ch 3 (counts as 1st dc), work 1 dc into the next stitch and into each stitch across to the end. Turn.
- Row 2: ch 3 (counts as 1st dc), skip the very first stitch base, work 1 dc in each stitch across to the end. Turn.
- Row 3–6: Repeat Row 2 for a total of 6 rows of double crochet. Fasten off leaving yarn ends to weave in.
Part 2: Pouch Assembly
- Step 1: Count 42 stitches from one end of your long crocheted strip and place a stitch marker.
- Step 2: Fold the opposite end up to meet the stitch marker, creating the front pouch pocket.
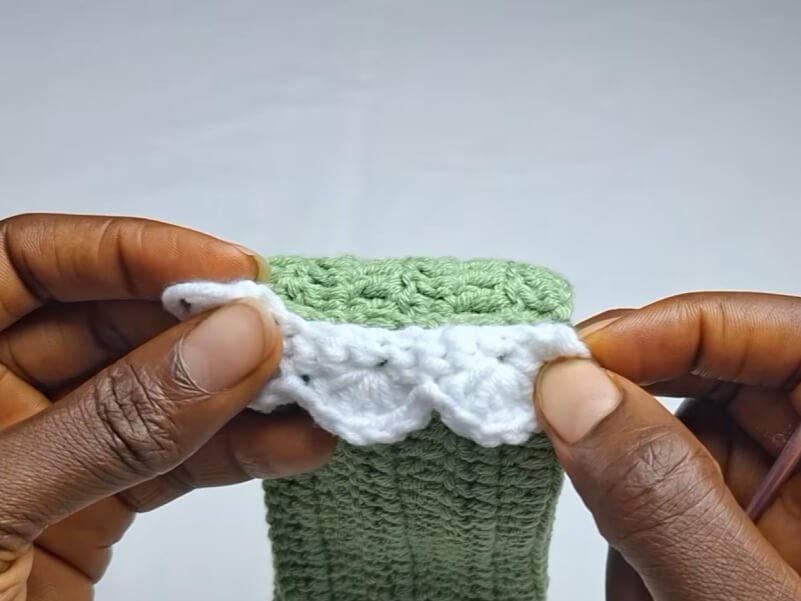
- Step 3: Thread your yarn needle with main color yarn. Sew down both outer side edges by capturing the front loop and back loop of the side stitches to close the pocket.
- Step 4: Weave in all loose ends securely.
Part 3: Decorative Details and Accessories
White Collar Trim (Santa / Elf / Gingerbread version)
Worked in white yarn to form a decorative scalloped trim:
- Foundation: ch 13.
- Row 1: Skip the first ch from the hook, work 1 sc in each remaining ch across to the end. ch 1, turn.
- Row 2: 1 sl st in the first st. In the next st, work 6 dc. 1 sl st in the next st. *Skip 2 sts, work 6 dc in the next st, 1 sl st in the next st; repeat from * once more (skipping the next st and working a sl st into the last st). ch 1. Fasten off, leaving a long tail for sewing (or trim short if gluing).
Round Buttons (Make 2 or 3)
Worked in White (for Santa/Elf) or Black (for Snowman):
- Round 1: Make a MR, ch 2. Work 8 hdc into the magic ring. Pull the ring tight. Join with a sl st to the top of the initial ch 2. ch 1. Fasten off, leaving a long tail for attachment.
Belt & Buckle Assembly
Worked in Black yarn with a Yellow buckle accent:
- Belt Base (Black Yarn):
- Foundation: ch 13.
- Row 1: Skip the 1st ch, work 1 sc in each ch across to the end. ch 1, turn.
- Row 2: Work 1 sc in each st across. Fasten off.
- Buckle Accent (Yellow Yarn):
- Attach yellow yarn with a slip knot between the 4th and 5th stitch of the black belt strip.
- Work 3 surface slip stitches upward across the belt height, turn 90 degrees and work surface slip stitches across, turn 90 degrees and work 3 surface slip stitches down, and turn to complete the square buckle frame.
- Fasten off and weave in ends.
Part 4: Assembly & Finishing
- Placement:
- Place the white scalloped collar trim across the top opening of the cutlery pocket.
- Arrange 2 to 3 round buttons vertically down the center front of the pouch body.
- Position the black belt strip with the yellow buckle near the lower third of the pocket.
- Attachment: Use your tapestry needle and reserved yarn tails to neatly stitch each applique piece onto the front wall of the pouch (or secure firmly with fabric glue).
- Final Touch: Weave in any remaining yarn ends neatly inside the pouch. Slide in your favorite holiday fork, knife, and spoon set!
Detailed Pattern Breakdown
1. Main Base Strip Breakdown:
- The base of the cutlery holder is built as a long flat rectangle using simple back-and-forth rows of double crochet. Starting with a sturdy wrapped chain foundation of 60 stitches gives the holder clean, non-curling outer edges.
- Working 6 full rows of double crochet establishes the perfect width to hold full-sized dining cutlery comfortably. Folding 42 stitches up creates a deep pocket structure where the utensils rest securely without tipping over.
2. Scalloped Trim & Accent Breakdown:
- The white collar trim uses alternating shell elements to mimic fluffy holiday fleece. By placing 6 double crochet stitches into a single foundation stitch and anchoring them with slip stitches on either side, it creates a crisp scalloped edge. The small buttons rely on an 8 hdc magic ring base, providing a compact, circular 3D pop on the suit front.
3. Belt & Surface Stitch Breakdown:
- The belt strip is built from two simple rows of single crochet to create a flat, dense black strap. Instead of crocheting a separate buckle piece and sewing it down, surface slip stitching with yellow yarn directly through the black fabric creates a seamless, perfectly flush square buckle detail.
Pattern Question:
Question 1: How can I adjust the size of this holder if my dining cutlery is longer or wider than average?
Answer 1: You can easily customize the dimensions! To make the pouch wider, add more stitches to your starting foundation chain (for instance, increase from 60 to 66 or 70 stitches).
To make the pocket deeper or the backing taller, add 1 or 2 extra rows of double crochet to the main base rectangle before folding and seaming.
Question 2: Is it better to sew the appliques (buttons, trim, belt) on with yarn or use fabric glue?
Answer 2: Both methods work wonderfully! Sewing with yarn tails and a tapestry needle ensures the pieces stay attached through laundering and long-term storage. However, if you are making a large set for a big party in a hurry, high-quality fabric glue or hot glue saves a lot of time and holds flat accents securely on yarn.
Question 3: Can I adapt this pattern to make character themes other than Santa?
Answer 3: Absolutely! Swap your main body yarn to brown for a Gingerbread Man theme, bright green for a Christmas Elf, or solid white for a Snowman. For the Snowman version, simply use black buttons down the front and add a red scalloped collar trim at the top pocket edge!