
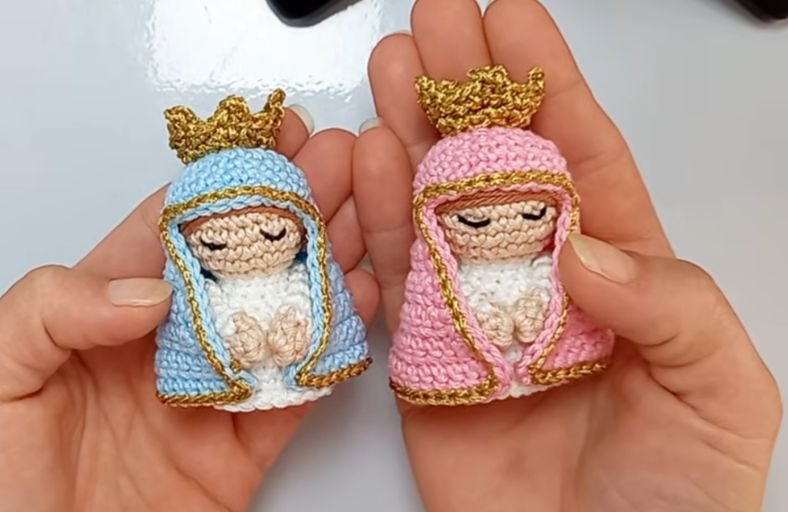
Ever wanted to make a tiny, adorable guardian angel or holy figurine that actually stays upright without falling over? Meet the Beautiful Amigurumi Our Lady!
This little holy companion is cute, quick to craft, and makes for a lovely keychain, baptism gift, or sweet desk buddy.
With a sturdy hidden base and a delicate glittering crown, she is bound to bring a smile to anyone’s face.
Materials and Preparation
Materials:
- Yarn:
- Skin tone yarn for the head and hands.
- White yarn for the inner dress and sleeve detail.
- Light blue (Hortênsia) yarn for the outer mantle.
- Gold metallic yarn (Fio Encanto or similar metallic thread) for the crown and mantle edging.
- Brown yarn for the hair.
- Dark brown / black embroidery thread for the eyes and eyelashes.
- Stuffing: Polyfill stuffing.
- Base Stabilizer: 1 small plastic circle cut from clean household plastic packaging (coin-sized) to keep the bottom flat.
Tools:
- Crochet Hook: 2.0 mm to 2.5 mm hook.
- Yarn Needle & Tapestry Needle: For sewing parts and weaving in ends.
- Stitch Marker: To keep track of rounds.
- Scissors: Standard craft scissors.
- Craft Glue / Liquid Silicone Glue: For securing hair, mantle, and metallic threads.
- Pins: Positioning pins to hold pieces in place before gluing/sewing.
Preparation Notes:
- Maintain firm and even tension throughout the body and head to prevent polyfill from poking through the stitches.
- Cut your plastic base circle to fit precisely within the bottom circle (R4:R5 area) so it does not distort the upper rows.
- Avoid using cardboard for the base insert, as moisture or washing will dissolve it and stain the yarn.
Abbreviations and Notes
Abbreviations:
- MR: Magic Ring
- ch: Chain
- sc: Single Crochet
- inc: Single Crochet Increase (2 sc in the same stitch)
- dec: Single Crochet Decrease / sc2tog
- sl st: Slip Stitch
- BLO: Back Loop Only
- FLO: Front Loop Only
- picot: Picot Stitch (ch 3, sl st into the first chain or base)
Pattern Notes:
- Body & Head: Crocheted in one continuous piece from the bottom up in continuous rounds.
- Mantle: Started in the round for the top of the head, then worked back and forth in flat rows with increases along the sides and center.
- Arms & Crown: Made separately and assembled at the end.
Gauge, Approximate Size, and Pattern Notes
Gauge:
Gauge is not critical for this project. Keep stitches tight enough so stuffing remains hidden.
Finished Size:
Measures approximately 2.75 to 3.5 inches (7 to 9 cm) tall, depending on yarn weight and hook size.
Special Techniques:
- Inverted Magic Ring: Used at the top of the head for a clean, flat finish.
- Flat Base Insertion: Inserting a plastic disc into the base before decreasing to ensure the figurine stands upright.
- Picot Stitching: Creates the sharp points on the gold crown.
Step-by-Step Pattern
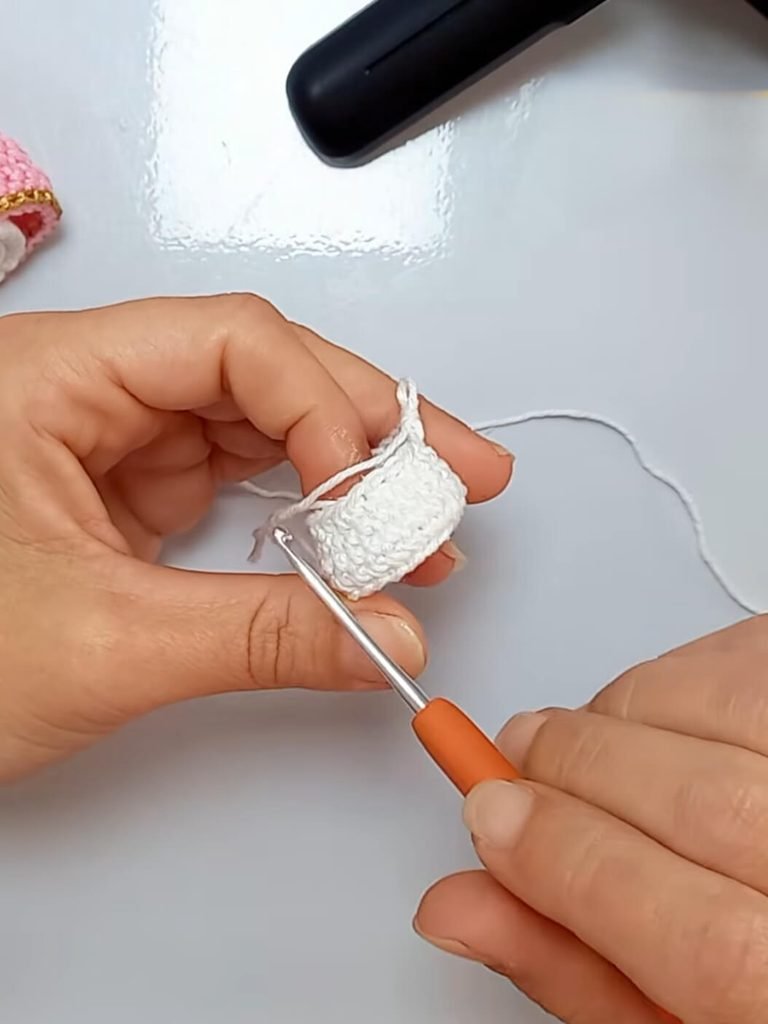
Part 1: Main Body & Head
Worked in white yarn for the body base:
- R1: MR 6 sc (6)
- R2: 6 inc (12)
- R3: (sc, inc)*6 (18)
- R4: (2 sc, inc)*6 (24)
- R5: BLO 24 sc (24)
- R6–R7: 24 sc (24) (Insert the plastic base circle into the bottom of the body now with a tiny drop of craft glue)
- R8: (2 sc, dec)*6 (18)
- R9–R10: 18 sc (18)
- R11: (sc, dec)*6 (12)
- R12–R13: 12 sc (12) (Stuff the lower body lightly)
Change to skin tone yarn on the last stitch of R13:
- R14: (sc, inc)*6 (18)
- R15: (2 sc, inc)*6 (24)
- R16–R18: 24 sc (24)
- R19: (2 sc, dec)*6 (18)
- R20: (sc, dec)*6 (12) (Add remaining polyfill to fill out the neck and head firm)
- R21: 6 dec (6) Fasten off, weave yarn end through the front loops of the final 6 stitches using a tapestry needle, and pull tight (Inverted MR).
Part 2: Mantle / Cloak
Worked in light blue yarn (or the color chosen for the mantle):
Top Head Portion (In the Round):
- R1: MR 6 sc (6)
- R2: 6 inc (12)
- R3: (sc, inc)*6 (18)
- R4: (2 sc, inc)*6 (24)
- R5–R6: 24 sc (24)
Cloak Body (Flat Rows, back and forth):
- Row 7: 12 sc, ch 1, turn (12)
- Row 8: inc, 10 sc, inc, ch 1, turn (14)
- Row 9: 3 sc, inc, 6 sc, inc, 3 sc, ch 1, turn (16)
- Row 10: inc, 14 sc, inc, ch 1, turn (18)
- Row 11: 4 sc, inc, 8 sc, inc, 4 sc, ch 1, turn (20)
- Row 12: inc, 18 sc, inc, ch 1, turn (22)
- Row 13: 5 sc, inc, 10 sc, inc, 5 sc, ch 1, turn (24)
- Row 14: inc, 22 sc, inc, ch 1, turn (26)
- Row 15: 6 sc, inc, 12 sc, inc, 6 sc, ch 1, turn (28)
- Row 16: inc, 26 sc, inc, ch 1, turn (30)
- Row 17: 7 sc, inc, 14 sc, inc, 7 sc, ch 1, turn (32)
- Row 18: inc, 30 sc, inc, ch 1, turn (34)
- (Optional Row 19 if your body turn turned out taller: 8 sc, inc, 16 sc, inc, 8 sc, ch 1, turn (36)) Fasten off.
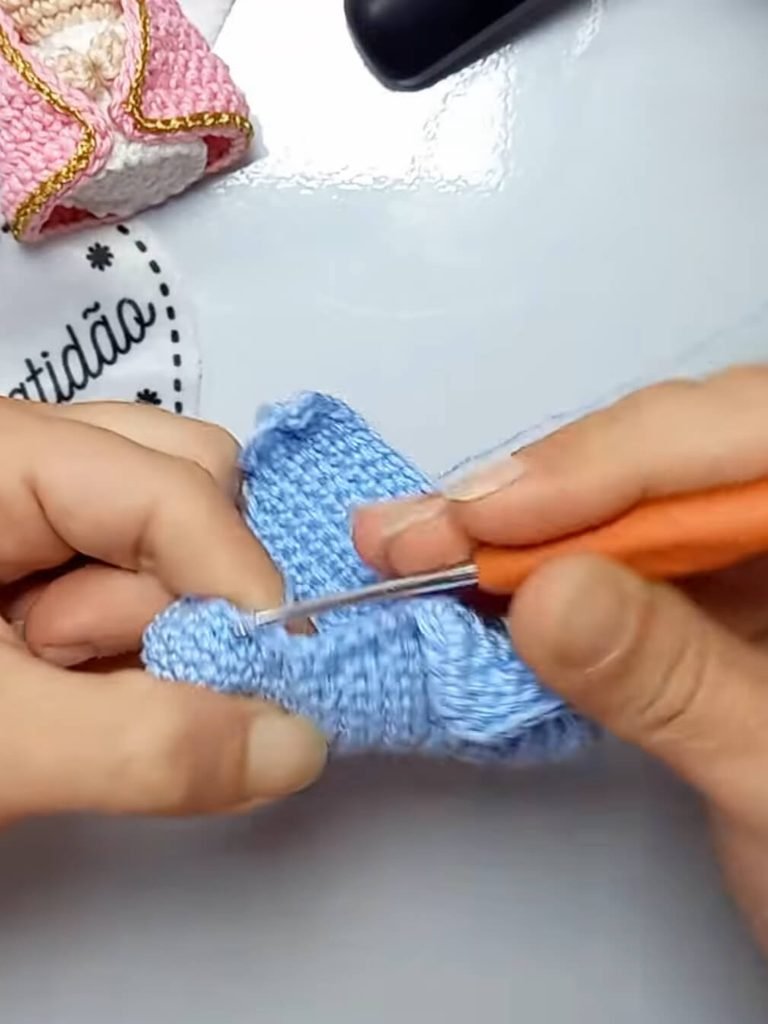
Part 3: Small Accessories & Components
Arms (Make 2):
- R1: Start with skin tone yarn: MR 6 sc (6)
- R2: 6 sc (6)
- R3–R7: Change to white yarn: 6 sc (6) Fasten off, leaving a long tail for joining.
Crown:
Worked in gold metallic yarn:
- Foundation: ch 15, sl st to first ch to form a ring (15)
- R1: ch 1, 15 sc, sl st to join (15)
- R2 (Picot Peaks): [sc 1, picot (ch 3, sl st into base), sk 1, sc 1]*5 (5 picot peaks total) Fasten off, weave in ends securely.
Part 4: Edging, Assembly & Finishing
- Dress Hem Trim:
- Hold the body upside down. Attach white yarn to the unworked front loops (FLO) of R5 on the body.
- Work
(sl st 1, ch 1)in every stitch around the bottom ring to create a delicate ruffled hem. Fasten off and hide ends.
- Gold Mantle Edging:
- Attach gold metallic yarn to one bottom corner of the mantle.
- Work 1 sl st in each stitch along the entire outer edge of the mantle for a shiny metallic border.
- Facial Features & Hair:
- Embroider sleeping eyes with black thread between R17 and R18, spaced 2 stitches apart. Apply a tiny dot of silicone glue to curve the thread gently downward.
- Wrap brown yarn 3 times around 3 fingers, align the strands across the upper forehead, and glue in place just above the eyes.
- Assembly:
- Flatten the tops of the arms and attach them near the neck, positioning them slightly forward so the hands can meet at the front in prayer. Secure with glue or a few quick stitches.
- Place the mantle over the head, aligning the center. Secure with a tiny drop of glue at the top and front bottom corners.
- Glue the gold crown onto the top of the mantle, centering one picot peak to the front.
Step by Step Guide
Part 1
Part 2
Pattern Question
Q1: How do I keep the bottom of the amigurumi flat so it stands up on its own?
Answer: Insert a small disc of flat household plastic (cut from a clean food container or bottle) into the base right after R7 before adding polyfill stuffing. The plastic insert stops the stuffing from pushing the base outward, keeping the bottom flat and stable.
Q2: What is the best way to get delicate curved eyes without embroidering thick stitches?
Answer: Lay a single straight strand of black embroidery thread across two stitches. Place a tiny drop of clear liquid silicone glue on a pin, touch it to the middle of the thread, and push the thread slightly downward into a soft curve. Hold for a few seconds until set.
Q3: Can I adjust the size of this Our Lady amigurumi?
Answer: Yes, simply alter your yarn weight and hook size. Using fine lace/fingering cotton yarn with a 1.5 mm hook yields a tiny 2-inch keychain charm, while DK or worsted weight yarn with a 3.0 mm hook creates a larger 5-inch display piece without needing any changes to the stitch pattern.
Detailed Pattern Breakdown
1. Main Body & Head Breakdown
- Bottom Base Construction (R1–R4): Expands radially using standard circle increases
(6 -> 12 -> 18 -> 24)to form a flat circular foundation. - Base Ridge (R5): Utilizing
BLOleaves an exposed front loop ridge that defines the bottom edge and serves as the anchor point for the ruffled dress hem later. - Tapering & Neck Structure (R8–R13): Symmetric decreases taper the body inward to form the neck before expanding immediately for the head, eliminating the need to attach separate head/body components.
2. Mantle Breakdown
- Crown Cap (R1–R6): Mapped as a fitted dome to sit snug over the back of the head.
- Draped Wings (Row 7 onwards): Transitions from working in rounds to working in rows across 12 stitches (half the circumference). Side edge increases
(inc at start and end of rows)widen the cloak so it drapes past the shoulders and wraps gracefully toward the front hands.
3. Crown & Finishing Breakdown
- Picot Spikes: The
(ch 3, sl st)sequence separated by skipped stitches(sk 1)translates standard circular crochet into 5 sharp points suitable for a miniature royal crown. - Ruffled Hem Detail: Alternating
sl standch 1in theFLOloop creates small structural bumps that mimic a scalloped lace hemline around the base.