
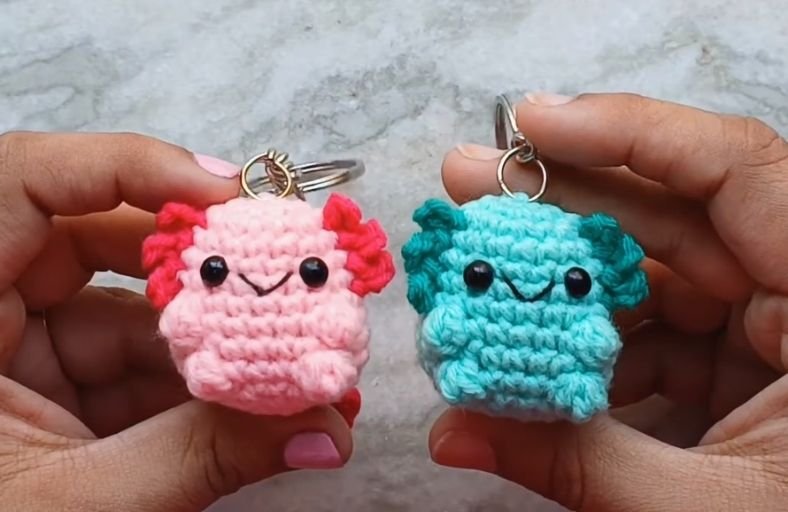
Have you ever looked at a tiny sea creature and thought: “I absolutely need to hook that into existence right this second”?
Meets the ultra-cute Baby Axolotl Amigurumi, an almost no-sew project that turns a small handful of yarn into the sweetest underwater buddy!
With little bobble hands, textured gills, and an irresistible stitched smile, this quick-to-make keychain pal is perfect for gifting, bag flair, or simply spreading crochet joy.
Grab your favorite pastel yarn and let us jump straight into crafting this adorable creature!
Materials and Preparation
Materials:
- Yarn: 4-ply yarn in two shades of the same color (e.g., Light Teal for the main body and Dark Teal for the gills/tail trim, or Light Pink and Dark Pink). A small piece of black yarn for the embroidered mouth.
- Stuffing: Polyfill stuffing.
- Safety Eyes: 4 mm safety eyes (1 pair).
- Keychain Hardware: Blank keychain ring with jump ring (optional).
Tools:
- Crochet Hook: 3.0 mm crochet hook (or a hook size smaller than recommended for your yarn to keep stitches tight so stuffing does not peek through).
- Yarn Needle: For assembly, embroidering, and hiding yarn ends.
- Stitch Marker: A stitch marker, paper clip, or scrap yarn to mark rounds.
- Scissors: Sharp craft scissors.
Preparation Notes:
- Work in continuous spiral rounds without joining at the end of each round unless specified.
- Keep your tension firm and tight to ensure a neat, structured finish that hides the inner stuffing completely.
Abbreviations and Notes
Abbreviations:
- MR: Magic Ring
- ch: Chain
- sc: Single Crochet
- inc: Single Crochet Increase (2 sc in the same stitch)
- dec / inv dec: Invisible Decrease (sc2tog using front loops only)
- bo: Bobble Stitch / 3-dc Bobble (Yarn over, insert hook, pull up loop, yarn over, pull through 2 loops; repeat 3 times in same stitch, then yarn over and pull through all 4 loops on hook)
- picot: Picot Stitch (ch 3, sl st into the 1st ch)
- sl st: Slip Stitch
- FLO: Front Loop Only
Pattern Notes:
- The head and body are worked as one single piece from top to bottom.
- The arms and legs are created directly while working the body rounds using bobble stitches.
- Only the tail is made separately and sewn onto the back.
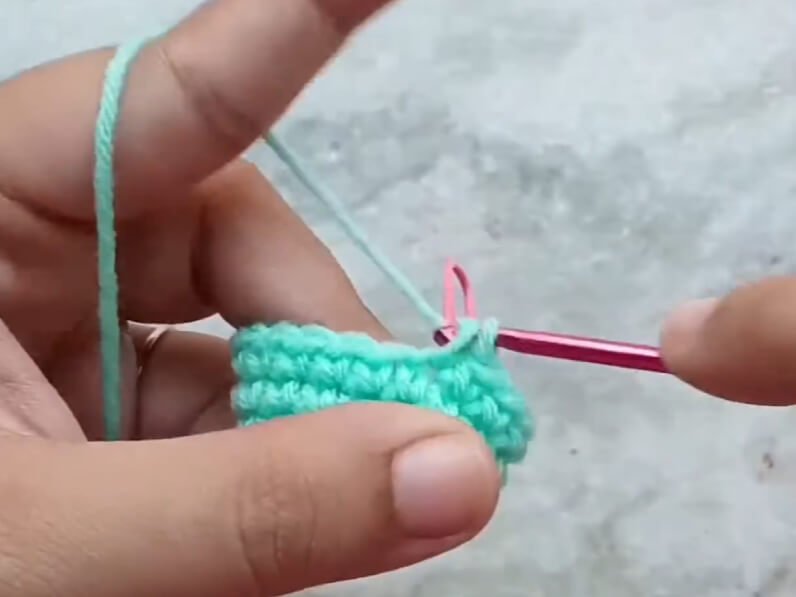
Gauge, Approximate Size, and Pattern Notes
Gauge:
Gauge is not critical for this project, but stitches should be tight enough to prevent polyfill from showing.
Finished Size:
Approximately 2.5–3.0 inches (6.35–7.62 cm) in length, making it ideal for keychains and bag charms.
Special Techniques:
- Bobble Stitch (bo): Used to form tiny 3D arms and legs in a single step during main body rounds.
- Picot Stitch (picot): Worked directly onto the head and tail to create soft, textured gill frills.
- Invisible Decrease (inv dec): Pick up the front loops of two adjacent stitches, yarn over, pull through two loops, yarn over, and pull through both remaining loops.
Step-by-Step Pattern
Part 1: Main Body & Head
Worked in continuous rounds using Light Color Yarn:
- R1: MR, ch 1 (does not count as st), 6 sc into MR (6)
- R2: 6 inc (12)
- R3: (sc, inc)*6 (18)
- R4: 18 sc (18)
- R5: (5 sc, inc)*3 (21)
- R6: 21 sc (21)
- R7: (6 sc, inc)*3 (24)
- R8 (Arm Round): 8 sc, 1 bo (arm), 1 sc, 4 sc, 1 bo (arm), 9 sc (24)
- R9: 24 sc (24)
- R10 (Leg Round): 9 sc, 1 bo (leg), 4 sc, 1 bo (leg), 9 sc (24)
Attach Safety Eyes: Insert 4 mm safety eyes between Round 5 and Round 6, placed 3 stitches apart, lined up with the inner edge of each arm. Secure backings.
- R11: (2 sc, inv dec)*6 (18)
- R12: (1 sc, inv dec)*6 (12) Stuff the body firmly with polyfill (do not overstuff).
- R13: 6 inv dec (6) Fasten off, weave the tail through the FLO of the remaining 6 stitches, pull tight to close, and bring the yarn tail up through the top of the head for attaching the keychain.
Part 2: Tail
Worked in continuous rounds using Light Color Yarn:
- R1: MR, ch 1, 4 sc into MR (4)
- R2: (1 sc, inc)*2 (6)
- R3: 6 sc (6)
- R4: 2 sc, 2 inc, 2 sc (8)
- R5: 8 sc (8) Sl st into the next stitch, fasten off leaving a long tail for sewing. Stuff the tail with a tiny bit of polyfill.
Part 3: Gills & Tail Frills
Gills (Side 1):
Join Dark Color Yarn on the side of the head between R6 and R7, 1 stitch away from the eye:
- Sl st between R6 and R7, ch 3, sl st in 1st ch (1st picot).
- Sl st between R5 and R6 directly above, ch 3, sl st in 1st ch (2nd picot).
- Sl st between R4 and R5 directly above, ch 3, sl st in 1st ch (3rd picot). Fasten off and leave a tail to weave in.
Gills (Side 2):
Join Dark Color Yarn on the opposite side of the head between R3 and R4, 1 stitch away from the eye:
- Sl st between R3 and R4, ch 3, sl st in 1st ch (1st picot).
- Sl st between R4 and R5 directly below, ch 3, sl st in 1st ch (2nd picot).
- Sl st between R5 and R6 directly below, ch 3, sl st in 1st ch (3rd picot). Fasten off and leave a tail to weave in.
Tail Frills:
Join Dark Color Yarn on one side of the tail between R3 and R4:
- Work 2 picot stitches along one side of the tail (ch 3, sl st in 1st ch for each).
- Work 1 picot stitch right at the tip of the tail.
- Work 2 picot stitches down the opposite side of the tail. Fasten off and weave in ends.
Part 4: Assembly & Finishing
- Attach Tail: Position the tail along the lower center back of the body with the upward curve facing higher. Sew neatly around the base using a yarn needle.
- Embroider Smile: Using a single strand of black yarn, make a small “V” shaped smile across Round 6 centered right between the safety eyes. Secure ends inside the body.
- Attach Keychain: Pass the remaining top yarn tail through the jump ring of your keychain fixture twice for security, tie off securely, and hide the knot inside the body.
Detailed Pattern Breakdown
1. Head & Body Construction (One-Piece Design)
- R1–R7 (Head Expansion): Starting with
MR 6 sc, the pattern expands systematically through standard increment steps (6 scrightarrow12 scrightarrow18 scrightarrow21 scrightarrow24 sc). This creates a smooth rounded head shape. - R8 & R10 (Integrated Limbs): Instead of crocheting four separate limbs and sewing them on individually, bobble stitches (
bo) are worked directly into R8 (arms) and R10 (legs) separated by plainscstitches. The 3D bobble pushes outward when followed by a snugsc. - R11–R13 (Bottom Closure): The body uses
inv decsteps (24 scrightarrow18 scrightarrow12 scrightarrow6 sc) to taper cleanly at the base, locking the stuffing in place with zero gaps.
2. Gill & Tail Fin Surface Work
- Surface Slip Stitching: The signature feathery gills are worked directly onto the finished head surface without sewing separate pieces. By anchoring slip stitches into the gaps between rounds (
R6/R7,R5/R6,R4/R5), the 3-chain picots stand out as three cute ruffled gills on each side. - Tail Trim: The tail base is shaped with subtle increases to curve gently. Darker yarn is joined along the edge to surface-crochet picot clusters along both sides and top tip, mimicking real axolotl fins.
Pattern Questions & Answers
Q: Can I use plush blanket yarn instead of 4-ply cotton yarn for this pattern?
A: Absolutely! Using plush velvet or chenille yarn with a larger hook (around 4.0 mm to 5.0 mm) will scale up your tiny axolotl into a super soft, squishy palm-sized plushie. Just make sure to increase your safety eye size (e.g., 8 mm or 10 mm) so they remain proportionate!
Q: My bobble stitches are popping inside out into the body. How do I fix this?
A: When you complete your bo stitch, use your finger from the back to push the stitch cluster forward so it bulges outward. Making the very next single crochet extra tight helps lock the bobble firmly on the outside surface of the body.
Q: How do I ensure the surface picot gills stay evenly spaced and symmetrical?
A: Count your stitches carefully relative to the safety eyes! Anchoring your first slip stitch exactly 1 stitch outward from each eye gives you a clean guidepost. Work vertically in a straight vertical line from round to round to keep both sides balanced.