
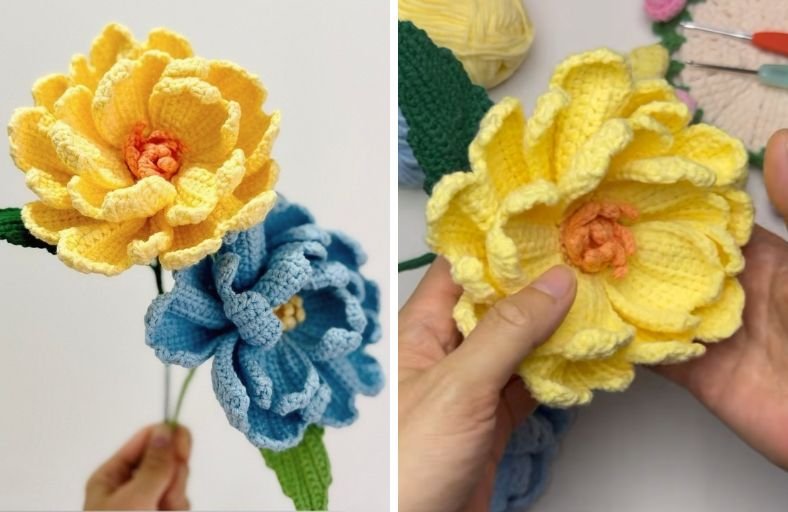
Did you know that peonies symbolise romance, good fortune, and prosperity, but their real life blossoms fade in just a couple of weeks?
What if you could capture that lush, breathtaking bloom forever using nothing more than a ball of yarn and a crochet hook?
The Crochet Butterfly Peony Flower is an absolute masterpiece of botanical crochet, featuring multi-layered, undulating petals that mimic the fluttering wings of a butterfly in full bloom.
Whether you are crafting a permanent floral bouquet for your living room or making a heartfelt handmade gift, this comprehensive step-by-step tutorial will guide you through every twist and loop.
Materials and Preparation
Materials:
- Yarn (Sport / Fine Weight):
- Yellow yarn: For the central pistil stamens (or choose a contrasting shade).
- Petal yarn: Yellow, Sky Blue, or Soft Pink (for the main layered flower petals).
- Green yarn: For the flower sepal, stem base, and realistic leaf.
- Floral Wire / Stem Wire:
- 1 Thick stem wire for the main flower stem.
- 1 Thin craft wire (approx. 40 cm / 15.7 inches) to structure and shape the leaf.
- Tape: Green floral tape for wrapping the main stem.
Tools:
- Crochet Hook: 2.0 mm – 2.5 mm hook (a slightly smaller hook size helps keep the petals firm and structured).
- Yarn Needle: Tapestry needle for weaving in ends and securing the base.
- Stitch Markers: Essential for marking row ends and base stitches on complex multi-row petals.
- Small Rubber Bands / Clips: Helpful for holding completed petals out of the way while working on inner layers.
- Scissors: Sharp craft scissors.
Preparation Notes:
- Layer Tracking: This design utilizes multi-row shaping where several rows attach into the exact same base stitch. Keep stitch markers handy to track your base loops!
- Pistil & Petal Architecture: The pistil and petal layers work off a combination of Front Loops Only (FLO) and Back Loops Only (BLO) to create distinct overlapping depth.
Abbreviations and Notes
Abbreviations:
- MR: Magic Ring
- ch: Chain stitch
- sc: Single Crochet
- inc: Single Crochet Increase (2 sc in the same stitch)
- dec: Single Crochet Decrease (sc2tog / invisible decrease)
- hdc: Half Double Crochet
- sl st: Slip Stitch
- FLO: Front Loop Only
- BLO: Back Loop Only
Pattern Notes:
- Turning Chains:
ch 1at the start of rounds/rows does not count as a stitch unless explicitly stated. - Base Loop Distribution:
- Layer 1 (Inner Petals): 5 petals total, each built across 3 base stitches.
- Layer 2 (Outer Petals): 5 petals total, each built across 4 base stitches.
- Sepal: 5 sepal points, each built across 6 base stitches.
- Special Petal Turning Technique: When turning work on petals, pay strict attention to whether you skip the first stitch (
sl stor turning chain) and work directly into the second stitch to build dramatic scalloped ruffles.
Gauge, Approximate Size, and Pattern Notes
Gauge:
Gauge is not critical for this floral project, but maintaining consistent, firm tension ensures the petals curl naturally and hold their butterfly-like shape without drooping.
Finished Size:
- Flower Bloom Diameter: Approximately 3.9 inches – 4.7 inches (10 cm – 12 cm).
- Stem Length: Customizable, typically around 11.8 inches – 13.8 inches (30 cm – 35 cm) depending on your floral wire length.
Special Techniques:
- Working on Vertical Bars: The sepal and leaf sections utilize the back ridge / vertical bars of chain stitches to build flexible, ribbed realistic greenery.
- Wire Framing (Leaf): Crocheting directly over thin floral wire along the central chain allows you to bend and pose the peony leaf in realistic curves.
Step-by-Step Pattern
Part 1: Central Pistil (Stamens)
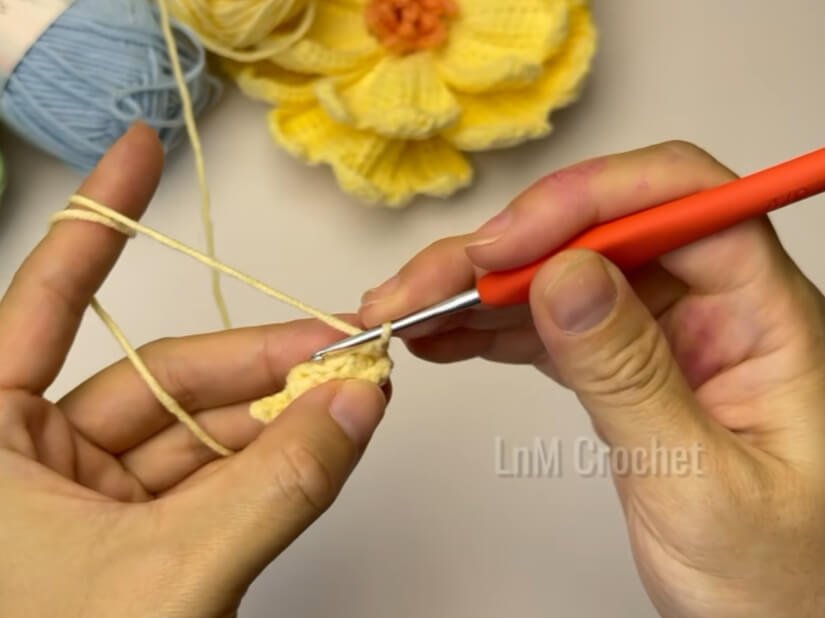
Start with Yellow Yarn:
- R1: MR, ch 1 (does not count as a stitch), 5 sc into ring. Pull loop tight. Join with sl st to first sc. (5)
- R2: ch 1, 5 inc. Join with sl st into the FLO of the first stitch. (10)
- R3 (First Layer of Pistil – FLO):
- Working in FLO throughout:
- [ch 4, start from 2nd chain from hook: 3 sl st down the chain, sl st back into the same front loop. sl st into next FLO, sl st into next FLO]
- Repeat around to create the inner cluster of pistil spikes.
- R4 (Base for Second Pistil Layer – BLO):
- Join yarn to the BLO of R2. ch 1, (1 sc, 1 inc) * 5. Join with sl st into the FLO of the first stitch. (15) (Mark the back loop of the first stitch for later).
- R5 (Second Layer of Pistil – FLO):
- [ch 5, start from 2nd chain from hook: 4 sl st down the chain, sl st into same FLO, skip 1 FLO, sl st into next FLO]
- Repeat around to make 7 taller pistil spikes. Sl st into last st. Fasten off yellow yarn. (7 pistil spikes)
- R6 (Pistil Stem Collar):
- Attach yellow/green yarn to the marked BLO from R4. ch 1, 15 sc in BLO around. Join with sl st into the FLO of the first stitch. (15)
Part 2: Inner Petals (Layer 1 – 5 Petals)
Attach main petal color yarn to the FLO of R6. Each petal is worked back and forth across 3 base stitches:
Petal Construction (Repeat 5 times):
- Foundation: ch 11.
- Row 1: From 2nd ch from hook: 8 hdc, 2 sc. Sl st into the FLO of the 2nd base stitch. Turn.
- Row 2: Skip the sl st, 2 sc, 8 hdc. ch 1, turn.
- Row 3: 8 hdc, 2 sc. Sl st into the same 2nd base stitch. Turn.
- Row 4: Skip the sl st, 2 sc, 6 hdc. ch 4, turn.
- Row 5: From 2nd ch from hook: 9 hdc, 2 sc. Sl st into the FLO of the 3rd base stitch. Turn.
- Row 6: Skip the sl st, 2 sc, 9 hdc. Turn.
- Row 7: Skip 1st st, work in 2nd st: 8 hdc, 2 sc. Sl st into the same 3rd base stitch. Turn.
- Row 8: Skip the sl st, 2 sc, 8 hdc. ch 1, turn.
- Row 9: Skip 1st st, work in 2nd st: 7 hdc, 2 sc. Sl st into the FLO of the 4th base stitch (this serves as the ending sl st for Petal 1 and starting anchor for Petal 2).
- Repeat Rows 1–9 for all 5 petals around the bloom.
- Fasten off at the end of Layer 1.
Part 3: Outer Petals (Layer 2 – 5 Petals) & Sepal
Base Row for Layer 2:
- Attach petal yarn to the BLO behind Layer 1.
- Base Round: ch 1, (2 sc, 1 inc) * 5. Join with sl st into the FLO of the first stitch. (20)
Layer 2 Petal Construction (Repeat 5 times across 4 base stitches each, 15 rows per petal):
- Foundation: ch 13.
- Row 1: From 2nd ch from hook: 10 hdc, 2 sc. Sl st into the 1st base stitch. Turn.
- Row 2: Skip sl st, 2 sc, 11 hdc. ch 1, turn.
- Row 3: 11 hdc, 2 sc. Sl st into the 2nd base stitch. Turn.
- Row 4: 2 sc, 11 hdc. ch 1, turn.
- Row 5: 2 sl st, 9 hdc, 2 sc. Sl st into the same 2nd base stitch. Turn.
- Row 6: Skip sl st, 2 sc, 8 hdc. ch 4, turn.
- Row 7: From 2nd ch from hook: 3 hdc on chain, 8 hdc across body (11 hdc total), 2 sc. Sl st into the 3rd base stitch. Turn.
- Row 8: Skip sl st, 2 sc, 12 hdc. ch 1, turn.
- Row 9: Skip 1st st, 11 hdc, 2 sc. Sl st into the same 3rd base stitch. Turn.
- Row 10: 2 sc, 11 hdc. ch 1, turn.
- Row 11: Skip 1st st, 10 hdc, 2 sc. Sl st into the 4th base stitch. Turn.
- Row 12: Skip sl st, 2 sc, 8 hdc. ch 4, turn.
- Row 13: From 2nd ch from hook: 3 hdc on chain, 8 hdc across body (11 hdc total), 2 sc. Sl st into the same 4th base stitch. Turn.
- Row 14: 2 sc, 10 hdc. ch 1, turn.
- Row 15: Skip 1st st, 9 hdc, 2 sc. Sl st into the 5th base stitch (first base st of next petal).
- Repeat for all 5 outer petals. Fasten off.
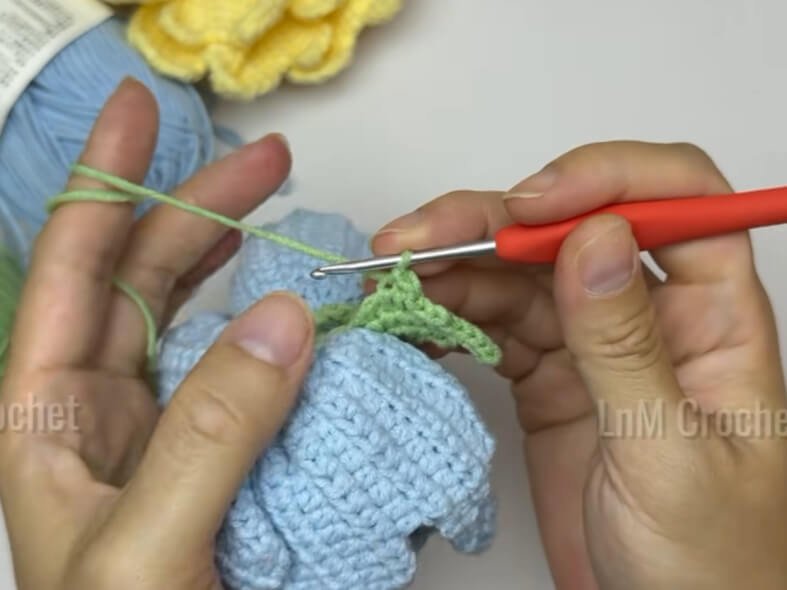
Green Sepal (Underneath Bloom)
Attach Green Yarn to the back loops behind Layer 2:
- Sepal Base Round: ch 1, (1 sc, 1 inc) * 10. Join with sl st. (30)
- Sepal Leaves (Make 5 points, worked over 6 base stitches each):
- Row 1: ch 5. From 2nd vertical bar: 3 unfinished sc, 1 unfinished sc into next base FLO (5 loops on hook). Pull yarn through 2 loops at a time until 1 loop remains.
- Row 2: ch 3. From 2nd vertical bar: 5 unfinished sc down side bars, 1 unfinished sc in next base FLO (7 loops on hook). Pull through 2 loops at a time.
- Row 3: ch 5. From 2nd bar: 4 sl st. Work 5 unfinished sc in side bars, 1 unfinished sc in next base FLO (7 loops on hook). Pull through 2 loops at a time.
- Row 4: ch 1. From 2nd bar: 2 sl st, 3 unfinished sc, 1 unfinished sc in next base FLO. Pull through 2 loops at a time.
- Row 5: ch 1. From 2nd bar: 3 sl st, sl st into next base FLO.
- Repeat 5 times around the base to form the 5 leafy sepal points.
Stem Receptacle Base (Decreasing Cone):
- Attach green yarn to BLO behind sepal:
- R1: 30 sc in BLO. (30)
- R2: (4 sc, 1 dec) * 5. (25)
- R3: (3 sc, 1 dec) * 5. (20)
- R4: (2 sc, 1 dec) * 5. (15)
- R5: (1 sc, 1 dec) * 5. (10)
- Insert stem wire wrapped with floral tape through the center hole.
- R6: 5 dec. Fasten off, weave tail through remaining front loops, pull tight around the stem wire, and secure.
Part 4: Leaf & Assembly
Wire-Framed Peony Leaf (Make 1 or 2):
Take 40 cm thin craft wire, fold slightly at top:
- Foundation Chain: ch 29 with green yarn, fold wire along chain, ch 2 more.
- Side 1 (Working over wire in back vertical bars):
- Sl st into 1st bar near wire. 17 sc along chain over wire. Turn.
- Skip 1st st, 11 sc, 1 sl st. ch 1, turn.
- Skip 1st st, 1 sl st, 10 sc, 1 sc in bar, 1 hdc at junction, 3 hdc in base chain. Turn.
- Skip 1st st, 10 sc, 1 sl st. ch 1, turn.
- Skip 1st st, 1 sl st, 10 sc, 1 sc in bar, 1 hdc at junction, 4 hdc in base chain. Turn.
- Skip 1st st, 10 sc, 1 sl st. ch 1, turn.
- Skip 1st st, 1 sl st, 10 sc, 1 sc in bar, 1 hdc at junction, 4 hdc in base chain. Turn.
- Skip 1st st, 10 sc, 1 sl st. ch 1, turn.
- Skip 1st st, 1 sl st, 10 sc, 1 sc in bar, 1 hdc at junction, 1 sc in last st. Fasten off Side 1.
- Side 2: Attach yarn to 5th V-stitch from top on opposite side. Repeat symmetry (15 sc, stepped scallops back and forth following Side 1).
- Wrap yarn tail tightly around exposed leaf wire stem.
Assembly & Finishing:
- Shape the flower petals gently with your fingers, curling the ruffled tops outward to recreate a peony in full bloom.
- Secure the green sepal points smoothly up against the bottom of the flower head.
- Position the leaf stem 2 – 3 inches below the flower base against the main stem wire.
- Wrap green floral tape tightly around the main stem, securing the leaf wire as you wrap down to the bottom.
Detailed Pattern Breakdown
1. Central Pistil Cluster Breakdown:
- Textured Center: The pistil uses MR 5 sc expanded to 10 sts. Working in FLO allows short picot-style chain extensions (
ch 4andch 5with slip stitches back down) to stand upright like natural stamens. - Layering Depth: By using BLO on Round 4 to create a 15-stitch platform, the second tier of stamens sits neatly behind the inner ring, creating a full, natural pistil center.
2. Multi-Tiered Butterfly Petal Geometry:
- The Butterfly Ruffle Effect: Unlike flat flower petals, these petals are constructed with asymmetrical short rows (
hdcstep-downs andch 4extensions). - Anchoring Strategy:
- In Layer 1, each 9-row petal anchors into only 3 base stitches. Working multiple rows into the same base loop forces the fabric to wave and flutter like butterfly wings.
- In Layer 2, expanding to a 20-stitch base allows 5 larger 15-row petals (4 base stitches each) to cup around the inner core.
3. Leaf & Sepal Engineering Breakdown:
- Sepal Structural Pointing: The sepal uses an advanced vertical-bar pick-up method (
unfinished scpulled through 2 loops at a time) to create stiff, elongated green leaves that support the heavy yarn bloom. - Wired Leaf Realism: Crocheting over craft wire during the foundation chain provides structural support, allowing you to curve and pose the scalloped peony leaf naturally.
Pattern Question
Question: Why are my peony petals bunching up awkwardly, and how do I prevent losing my place when working multiple rows into the same base stitch?
Answer: Because each petal requires up to 15 rows worked back and forth while anchoring into only 3 or 4 base loops, the base of the bloom gets very crowded! Here are three essential tips to handle this:
- Use Stitch Markers on Base Loops: Before starting a petal, place stitch markers into sets of 3 or 4 base stitches across the ring so you never accidentally slip stitch into the wrong base loop.
- Secure Finished Petals: As you finish each petal, bind it gently with a small rubber band or craft clip to keep it away from your hook while working on adjacent layers.
- Count Turning Chains: Always ensure you skip the exact turning stitch or slip stitch indicated in the pattern (e.g., skipping the anchor
sl stto start your next row with2 sc). This precise row-ending technique is what gives the peony its ruffled, butterfly-wing edges!