
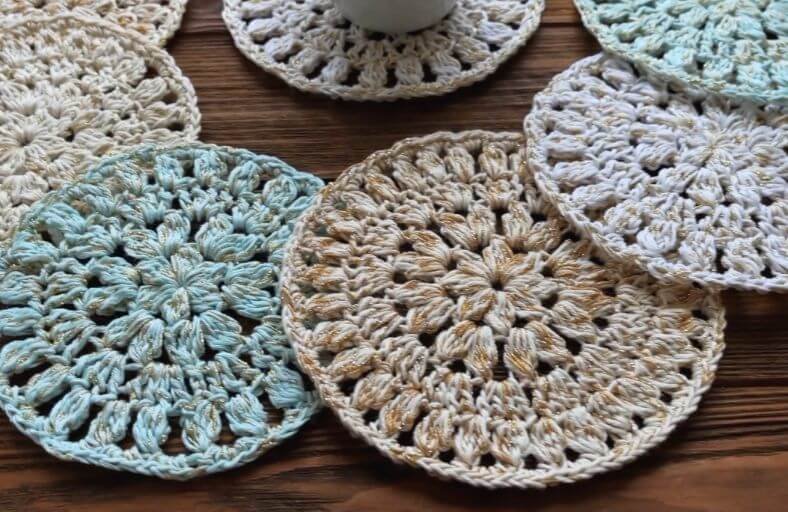
Ever looked at your morning cup of coffee and felt like it deserved a tiny, handcrafted throne?
Whether you are guarding your favorite wooden coffee table from unsightly ring stains or simply trying to elevate your cozy tea-time aesthetic, this gorgeous textured crochet coaster is here to save the day!
Featuring delicate puff stitches and a lovely starburst center, this quick project transforms leftover yarn into an elegant, multifunctional home accessory.
Materials and Preparation
Materials:
- Yarn: Nako Amigurumi (Cotton/Acrylic blend) combined with a thin metallic or shiny thread (like Art thread) to add a subtle, sophisticated shimmer. You can use any DK or Sport weight cotton yarn of your choice.
- Optional Starch: Fabric starch (if you prefer a stiff, structured finish for your coasters).
Tools:
- Crochet Hook: 3.0 mm crochet hook.
- Tapestry / Yarn Needle: For seamless invisible finish and weaving in ends.
- Scissors: For trimming yarn.
- Stitch Marker: Optional, for tracking rounds.
Preparation Notes:
- Using a yarn with high cotton content works best if you plan to starch your coasters for a crisp, flat shape.
- Keep your puff stitches uniform by pulling your loops up to the same height (height of a double crochet or 3 chain stitches) during each pull.
Abbreviations and Notes
Abbreviations:
- MR: Magic Ring
- ch: Chain stitch
- sc: Single crochet
- dc: Double crochet
- sl st: Slip stitch
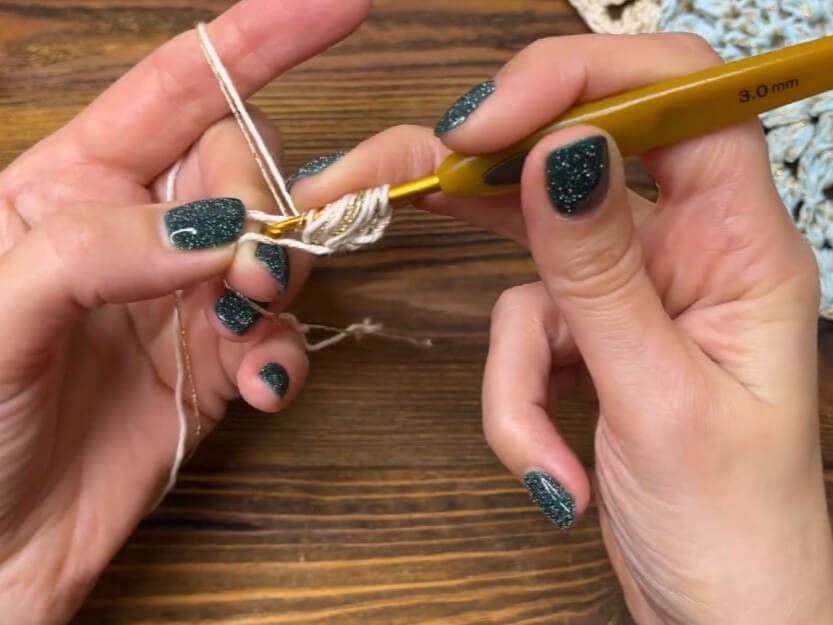
- Puff st: 5-Yo Puff Stitch (Yarn over, insert hook, pull up loop to height of ch 3. Repeat 5 times in total into the same space, yarn over, pull through all loops on hook).
Pattern Notes:
- This pattern is worked in joined rounds. Each round is finished with a slip stitch (
sl st). - When transitioning under chain spaces between rounds, use a slip stitch (
sl st) to position your hook correctly before starting the new round. - Original design and pattern credit belongs to Iryna Tsokalo Crochet.
Gauge, Approximate Size, and Pattern Notes
Gauge:
Gauge is not critical for this project. However, maintaining consistent tension ensures your coaster lays flat without cupping or rippling.
Finished Size:
Approximately 4.5 inches to 5 inches (11.5 cm to 12.7 cm) in diameter when using Sport/DK weight cotton yarn with a 3.0 mm hook.
Special Techniques:
- 5-Yo Puff Stitch: Creates a plump, textured starburst bead effect.
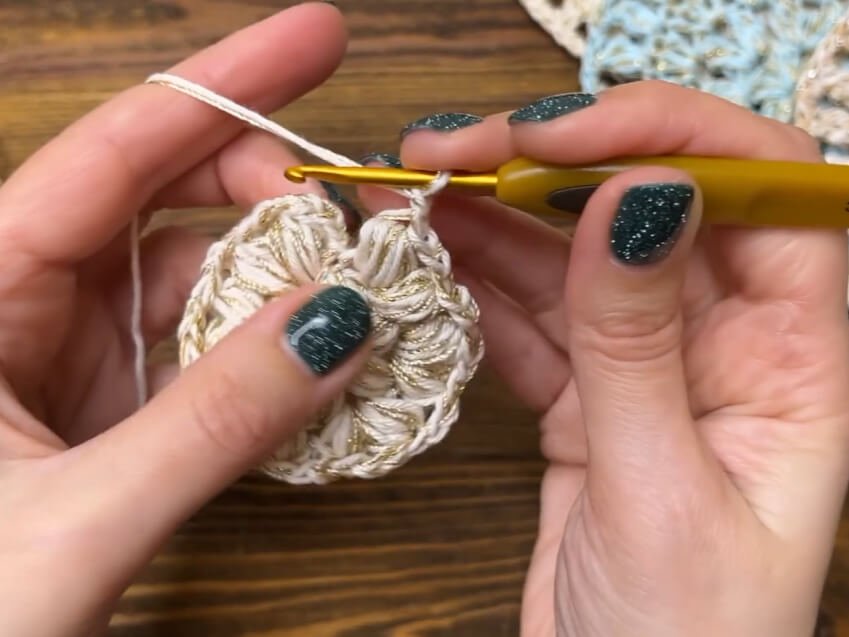
- Seamless Needle Join / Invisible Finish: Used at the end of Round 5 to create an invisible, perfectly smooth border.
Step-by-Step Pattern
Part 1: Starburst Center
Worked in joined rounds starting with a Magic Ring:
- R1: In a MR, ch 3 (does not count as a stitch), [1 Puff st, ch 2] 6 times. Pull magic ring tight. Sl st to the top of the first Puff st to join. (6 Puff sts, 6 ch-2 spaces)
Part 2: Expanding the Burst
Move into the first ch-2 space with a sl st:
- R2: Sl st under the first ch-2 space. Ch 3, 1 Puff st under the same ch-2 space, ch 2, 1 Puff st under the same ch-2 space, ch 2. [1 Puff st, ch 2, 1 Puff st, ch 2] under the next ch-2 space. Repeat * to * 4 more times around. Sl st into the top of the first Puff st to join. (12 Puff sts, 12 ch-2 spaces)
Part 3: Solid Double Crochet Layer & Outer Puff Shells
Solid Shell Base:
- R3: Sl st under the first ch-2 space. Ch 3 (counts as 1 dc), 3 dc under the same ch-2 space. Work 4 dc under every ch-2 space around. Sl st into the 3rd ch of the initial ch 3 to join. (48 dc)
Outer Puff Ring:
- R4: Sl st to the 2nd dc stitch of the previous round. Ch 3, 1 Puff st in the same stitch, ch 2, skip 1 st. 1 Puff st in the next st (which lands on the 4th/2nd dc of the previous round groups), ch 2, skip 1 st. Repeat * to * around. Sl st into the top of the first Puff st to join. (24 Puff sts, 24 ch-2 spaces)
Part 4: Edging, Assembly & Finishing
Edging:
- R5: Sl st under the first ch-2 space. Ch 1, work 3 sc under the same ch-2 space. Work 3 sc under every ch-2 space around. (72 sc)
Finishing:
- Cut the yarn leaving a 4-inch tail and pull the loop straight out.
- Thread the tail onto a yarn needle. Insert the needle under both loops of the first sc of Round 5 (from front to back).
- Insert the needle back down into the center of the last sc stitch where the yarn tail originated (from top to bottom).
- Pull gently to mimic a continuous stitch loop. Weave the end securely on the back side of the coaster.
- (Optional Starch): Wet or spray with fabric starch, pin flat on a blocking board into a perfect circle, and allow to dry completely for a crisp, stiff result.
Detailed Pattern Breakdown
1. Starburst Center Breakdown (R1 – R2):
- Round 1 Foundation: Starting with a Magic Ring ensures the center hole pulls tight. The 6 initial 5-Yo Puff stitches form a dense, flower-like core. The 2-chain gaps give the necessary room for radial expansion in the subsequent round.
- Round 2 Duplication: By placing a pair of Puff stitches (separated by ch-2) into every chain-2 space of Round 1, the total count doubles from 6 to 12 Puff stitches. This geometrical increase keeps the circle flat while enhancing the plush 3D texture.
2. Solid Double Crochet Layer Breakdown (R3):
- Bridging the Gaps: Round 3 transitions the textured openwork into a sturdy, solid surface so cup bottoms sit level. Placing 4 double crochets into each of the 12 chain spaces creates a total of 48 stitches, establishing a balanced foundation that prevents the coaster from curling up into a bowl shape.
3. Outer Puff Shells & Edging Breakdown (R4 – R5):
- Precision Placement (R4): Moving to the 2nd stitch of Round 3 positions the outer Puff stitches evenly across the circle. Skipping 1 stitch between each Puff stitch maintains symmetry, generating 24 distinct textured spokes with ch-2 air pockets in between.
- Scalloped Border (R5): Filling every outer ch-2 space with 3 single crochets rounds off the open edges into a clean, smooth frame, anchoring the entire structure.
Pattern Question:
Question: My coaster is curling into a bowl shape at Round 3, or the edges look wavy. How can I fix this and make it lay completely flat?
Answer: Curling usually happens if your tension is too tight, or if the Puff stitches in Rounds 1 and 2 are not pulled up high enough. Make sure that every time you yarn over for a Puff stitch, you pull the loops up to the full height of a double crochet stitch (or 3 chains).
If it still curls slightly, do not worry: cotton yarn responds wonderfully to blocking! Dampen your finished coaster, gently flatten it with your hands on a blocking mat, pin the edges in a circle, and let it dry completely (or apply fabric spray starch for extra stiffness).