
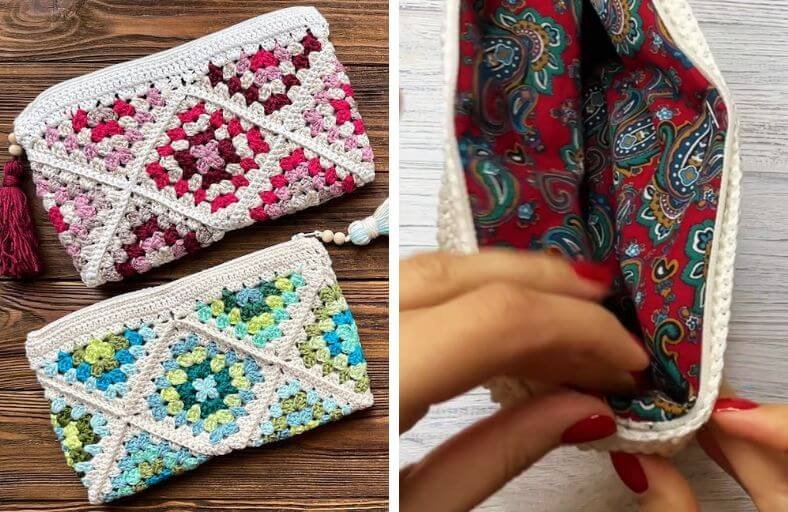
Have you ever looked at your leftover yarn scraps and thought, “You belong together in a fabulous retro pouch”?
If your stash of colorful yarn is taking over your craft room, this project is your ultimate salvation!
Joining classic granny squares and half-granny triangles together like a geometric jigsaw puzzle, this chic clutch purse is equal parts bohemian charm and functional style.
Grab your hook, pick your favorite shade combination, and let us turn those vibrant stitches into your new go-to makeup pouch or everyday clutch!
Materials and Preparation
Materials:
- Yarn: Cotton or acrylic yarn in 4–5 complementary colors (e.g., shades of pink/magenta/cream or turquoise/teal/lime/beige) plus a neutral shade (cream/white) for the join and top border.
- Lining Fabric: A small piece of cotton fabric matching your purse dimensions.
- Interfacing/Stabilizer: Non-woven fusible interfacing (flizelin) to give the fabric lining extra structure and firmness.
- Zipper: 1 zipper matching the top length of your purse (approx. 20–25 cm / 8–10 in).
- Optional Accent: Wooden beads and yarn tassel for the zipper pull.
Tools:
- Crochet Hook: 2.5 mm – 3.5 mm (select according to your yarn weight to keep stitches neat and firm).
- Yarn Needle: Tapestry needle with a wide eye for weaving in ends and joining pieces.
- Sewing Needle & Thread: For hand-sewing the lining and zipper (or a sewing machine).
- Scissors & Sewing Pins: For measuring, cutting, and holding fabric in place.
Preparation Notes:
- You should be comfortable with basic crochet techniques including working in the round, double crochet clusters, working in turning rows, and color changing.
- Ensure all yarn ends are neatly woven in as you finish each square and triangle to make final assembly effortless.
Abbreviations and Notes
Abbreviations:
- ch: Chain
- sc: Single Crochet
- dc: Double Crochet
- sl st: Slip Stitch
- ch-sp: Chain Space
- dc cluster: Group of 3 Double Crochet stitches worked into the same space
Pattern Notes:
- The motif body of this purse consists of 6 Granny Squares and 4 Half-Granny Triangles.
- Color changes take place at the beginning of each round or row.
- Each new round on squares begins in a corner or side space with a standing double crochet or
ch 3(counts as firstdc). - All elements are assembled together before working the top border and attaching the zippered lining.
- Original design and pattern credit belongs to Iryna Tsokalo Crochet.
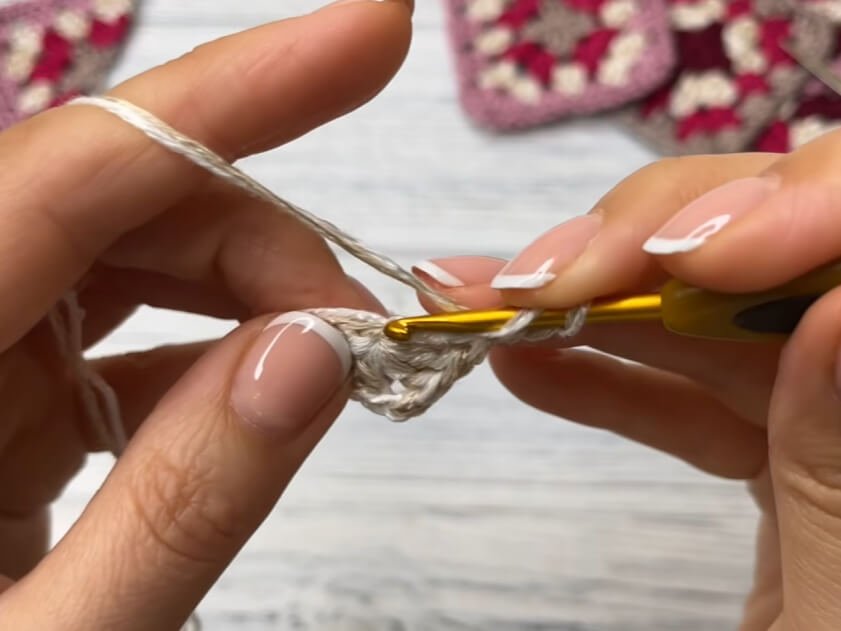
Gauge, Approximate Size, and Pattern Notes
Gauge:
Each 4-round granny square measures approximately 7 cm x 7 cm (2.75 in x 2.75 in). Precise gauge is not critical, but consistency across all squares and triangles is essential for seamless assembly.
Finished Size:
Approximately 9.5 in x 5.5 in (24 cm x 14 cm) when laid flat.
Special Techniques:
- Granny Square & Triangle Joining: Joining motifs along the edges using double crochet cluster connection rows to create a continuous fabric.
- Fused Fabric Lining: Applying fusible interfacing to lightweight fabric to prevent sagging under weight.
- Seamless Zipper Installation: Hand-sewing or machine-stitching the zipper directly between the fabric lining and crochet top edge.
Step-by-Step Pattern
Part 1: Classic Granny Square (Make 6)
- Round 1: Start with
ch 4,sl stinto the 1stchto form a ring (or use a magic ring).ch 3(counts as1 dc), work2 dcinto the ring,ch 2,3 dcinto the ring,ch 2; repeat from * to * 2 more times. Join withsl stto top of startingch 3. Fasten off color. (4 groups of 3 dc, 4 ch-2 corner spaces) - Round 2: Join new color in any corner
ch-2space.ch 3,2 dc,ch 2,3 dcinto the same corner space.ch 1, in next corner space work (3 dc,ch 2,3 dc); repeat from * to * 2 more times,ch 1, join withsl stto top of startingch 3. Fasten off color. - Round 3: Join new color in any corner
ch-2space.ch 3,2 dc,ch 2,3 dcinto corner space.ch 1,3 dcin nextch-1side space,ch 1, (3 dc,ch 2,3 dc) in next corner space; repeat from * to * around, join withsl st. Fasten off color. - Round 4: Join new color (or main neutral shade) in any corner space. Repeat the granny square pattern, adding
3 dcclusters into each sidech-1space and (3 dc,ch 2,3 dc) in each corner space. Fasten off and weave in ends.
Part 2: Half-Granny Triangle (Make 4)
- Row 1:
ch 4,2 dcin 1stch(center ring),ch 2,3 dcin samech,ch 2,1 dcin samech. Fasten off color. Turn. - Row 2: Join new color in the first
1-dcspace at the edge.ch 3,2 dcin same edge space,ch 1, (3 dc,ch 2,3 dc) in top cornerch-2space,ch 1,3 dcin last edge space,ch 2,1 dcin same space. Fasten off color. Turn. - Row 3: Join new color in edge space.
ch 3,2 dcin same space,ch 1,3 dcin next sidech-1space,ch 1, (3 dc,ch 2,3 dc) in top corner space,ch 1,3 dcin sidech-1space,ch 1,3 dcin edge space,ch 2,1 dcin same space. Fasten off color. - Row 4: Repeat the triangle building principle to match the number of rounds in your granny squares. Fasten off and weave in ends.
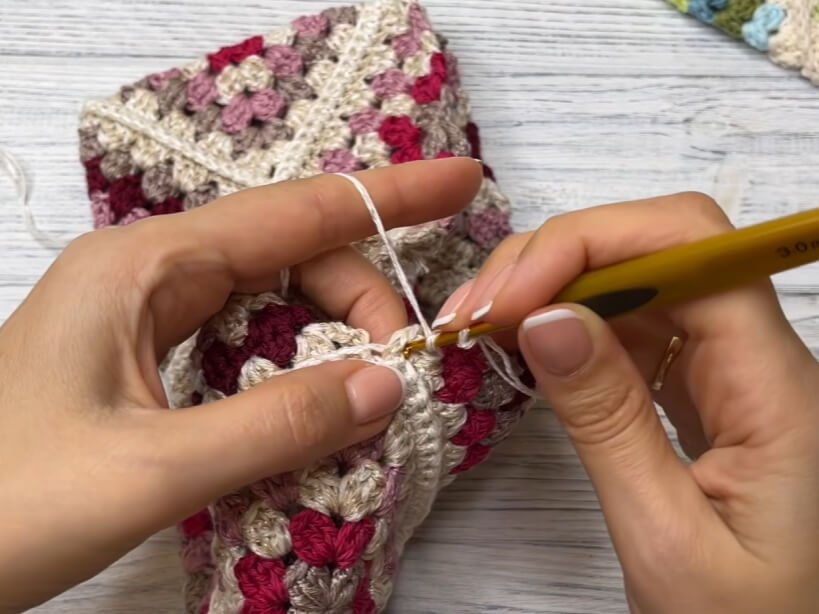
Part 3: Assembly & Top Border
Motif Layout & Joining:
Arranging 6 squares diagonally and filling the top/bottom serrated edges with 4 triangles creates a rectangular pouch shape folded at the base:
- Arrange the 6 squares point-to-point in a grid layout (3 squares on front panel, 3 squares on back panel, tilted at a 45-degree angle).
- Place the 4 triangles into the top and bottom V-shaped gaps to square off the top edge and lower corners.
- Join motifs together on the wrong side or right side using
sl storscseams using your main neutral yarn color.
Top Edge Border:
Working in continuous rounds along the top opening of the assembled purse:
- Round 1 (Cluster Decreases): Join neutral yarn at top corner. Work groups of
3 dcin eachch-1side window around the top opening. At side folds and center dip junctions, work2 dcunder one chain space and2 dcunder the next chain space to keep the top edge straight and prevent bulging. Join withsl st. - Round 2 (Double Crochet Row):
ch 2(counts as1 dc), work1 dcinto everydcstitch from the previous round across the entire top circumference. Join withsl st. - Round 3 (Single Crochet Finishing):
ch 1, work1 scinto every stitch around for a firm, clean top edge. Join withsl st, fasten off, and weave in all remaining ends.
Part 4: Lining, Zipper & Finishing
- Cutting Fabric: Fold your lining fabric in half. Lay the crocheted pouch on top and trace around the outer edge. Cut the fabric leaving a 1 cm (0.4 in) seam allowance on the sides and 1–2 cm (0.4–0.8 in) at the top.
- Interfacing: Iron fusible interfacing (flizelin) onto the wrong side of the fabric pieces for structural support.
- Attaching Zipper:
- Place zipper face down along the top edge of the right side of the fabric lining.
- Sew along the zipper tape edge (by machine or hand with small backstitches).
- Repeat for the second top edge of the fabric lining on the other zipper side.
- Side Seams: Unzip the zipper halfway. Fold lining right sides together and stitch down both side seams.
- Attaching Lining to Crochet Pouch:
- Insert the sewn fabric lining inside the crocheted body.
- Pin the top edge of the lining (just below the zipper teeth) to the inner side of the top single crochet border.
- Hand-sew around the top perimeter using neat, hidden blind stitches.
- Zipper Pull Accent (Optional): Thread wooden beads onto a handmade yarn tassel and tie securely to the zipper slider loop.
Detailed Pattern Breakdown
1. Granny Square & Triangle Geometry Breakdown:
The purse uses classic 3-dc granny cluster logic, but with an intelligent layout variation:
- Square Motifs: Starting from a central
ch-4ring, each round expands outwards by adding3 dcclusters into side spaces and double clusters (3 dc, ch 2, 3 dc) into 90-degree corners. - Triangle Motifs: Function as exact half-squares. Instead of working in a full circle, you work back and forth in rows, turning at the end of each row. The top peak acts as a 90-degree corner, while the base line stays flat by ending each row with a single
dcseparated bych 2.
2. Layout Puzzle & Seam Assembly Breakdown:
- Diagonal Alignment: Rather than aligning squares straight horizontally, the 6 squares are turned 45 degrees into diamonds. This diagonal layout creates built-in envelope-style triangular points on the sides and bottom fold.
- Gaps Filling: The 4 half-granny triangles fit precisely into the V-shaped notches at the top opening and bottom corners, turning a jagged motif assembly into a flat top edge suitable for a zipper.
3. Edge Stabilization & Professional Lining Breakdown:
- Contouring the Opening (Round 1 Decrease): Where two motifs meet at a valley or seam, standard
3-dcclusters would create unwanted ruffling. By dropping from3 dcto2 dcworked across adjacent spaces, the stitch count is reduced just enough to pull the opening into a flat, straight line. - Structured Interior: Crochet fabric is naturally stretchy. Adding fusible interfacing to cotton lining ensures that heavy items inside the purse (like lipsticks, coins, or keys) won’t stretch or deform the bottom stitches.
Pattern Questions & Answers
Question: Why does the top opening of my granny square purse flare out instead of lying flat before sewing the zipper?
Answer: Flaring happens when too many stitches are worked across the valleys where the squares and triangles join. On Round 1 of your top border, make sure to reduce stitch bulk across every junction by working 2 dc under one chain space and 2 dc under the next chain space instead of full 3-dc clusters. This slight decrease draws the top circumference inward into a neat, straight edge.
Question: How can I make sure my zipper doesn’t catch on the yarn when opening and closing the purse?
Answer: Position your lining so that the zipper tape sits slightly elevated above the fabric, while keeping the crocheted sc border roughly 2–3 mm below the zipper teeth. When hand-sewing the lining to the crochet edge, make sure your stitches anchor firmly into the base of the sc row rather than loose loops, ensuring the crocheted yarn stays pulled back away from the zipper teeth.
Question: Can I make this purse larger without changing the number of motifs?
Answer: Yes! You can easily scale up the size by adding 1 or 2 extra rounds to each granny square and half-granny triangle using the established pattern logic (3 dc in each side space, 3 dc, ch 2, 3 dc in corners). Just ensure that all 6 squares and 4 triangles have the exact same total number of rounds so their edges line up perfectly during assembly!