
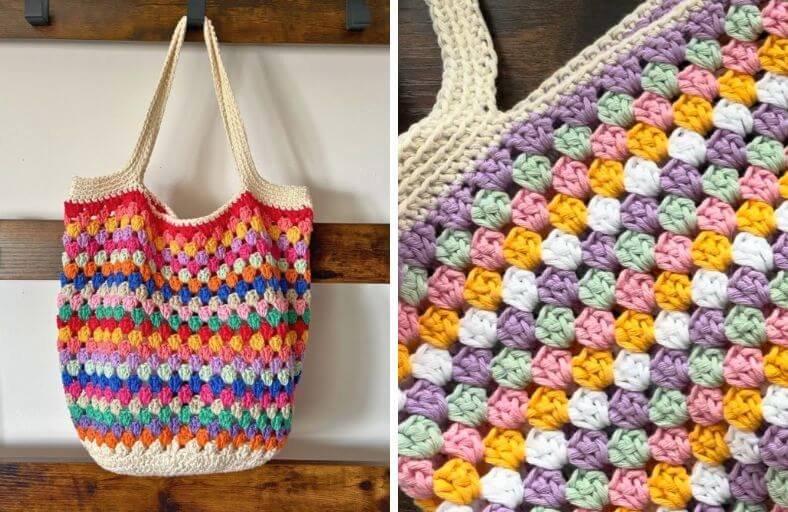
Looking for a vibrant, eco-friendly accessory that transforms your leftover yarn scraps into pure handmade joy?
The Granny Stitch Market Bag is here to steal your heart and become your go-to companion for farmer’s market runs, beach days, or casual weekend strolls!
Featuring a solid sturdy circular base, classic breezy granny stitch clusters, and comfy ribbed handles, this project is as fun to make as it is to carry.
Materials and Preparation
Materials:
- Yarn: Cotton Aran weight yarn (100% cotton recommended, such as Drops Paris, Paintbox Yarns Cotton Aran, or Yarnsmiths Cotton Aran).
- Approximately 50 g in a neutral/cream shade for the circular base and sturdy handles.
- About 15 g per round in various vibrant rainbow colors, pastel shades, or leftover scrap yarn for the bag body.
- Total required: 6 balls (50 g each).
Tools:
- Crochet Hook: 5.0 mm (US H/8) crochet hook.
- Yarn Needle: Darning needle with a large eye for weaving in ends.
- Stitch Marker: 1 stitch marker to track continuous rounds at the base.
- Scissors: Craft scissors for trimming ends.
Preparation Notes:
- Using 100% cotton yarn ensures your tote remains durable, breathable, and strong enough to carry heavy groceries without over-stretching.
- Feel free to play with color combinations: stick to a scheduled 5-color pastel rotation or go wild with your scrap basket!
Abbreviations and Notes
Abbreviations:
- MR: Magic Ring (Magic Circle)
- ch: Chain stitch
- sc: Single Crochet
- dc: Double Crochet
- sl st: Slip Stitch
- BLO: Back Loop Only
- inc: Increase (2 dc worked into the same stitch)
- st(s): Stitch(es)
Pattern Notes:
- The Base (Rounds 1 to 8) is worked in continuous spiral rounds of double crochet without joining, except at the end of Round 8. Always place a stitch marker in the first stitch of each round.
- The Granny Stitch Body is worked in joined rounds. Each cluster consists of 3 double crochets worked into the chain space or gap between clusters of the previous round.
- The Handles and Edging are worked in single crochet, utilizing BLO (Back Loop Only) stitches to create a comfortable, ribbed texture that minimizes strap stretching.
Gauge, Approximate Size, and Pattern Notes
Gauge:
- Base diameter after Round 8: Approximately 8.5 to 9 inches (21.5 to 23 cm).
- Exact gauge is not critical for this bag, but consistent tension ensures a smooth circular base and sturdy straps.
Finished Size:
- Bag Width: Approximately 15 inches (38 cm) laid flat.
- Bag Height (excluding handles): Approximately 14 inches (35.5 cm).
- Handle Drop: Approximately 10 inches (25.5 cm).
Special Techniques:
- Continuous Round Spiral: Working without joining slip stitches on the base keeps the circle seamless and flat.
- Back Loop Only (BLO) Ribbing: Working sc into the back loop of stitches along the straps adds structural integrity and an elegant ribbed finish.
Step-by-Step Pattern
Part 1: Solid Base
Worked in continuous spiral rounds using neutral/cream yarn:
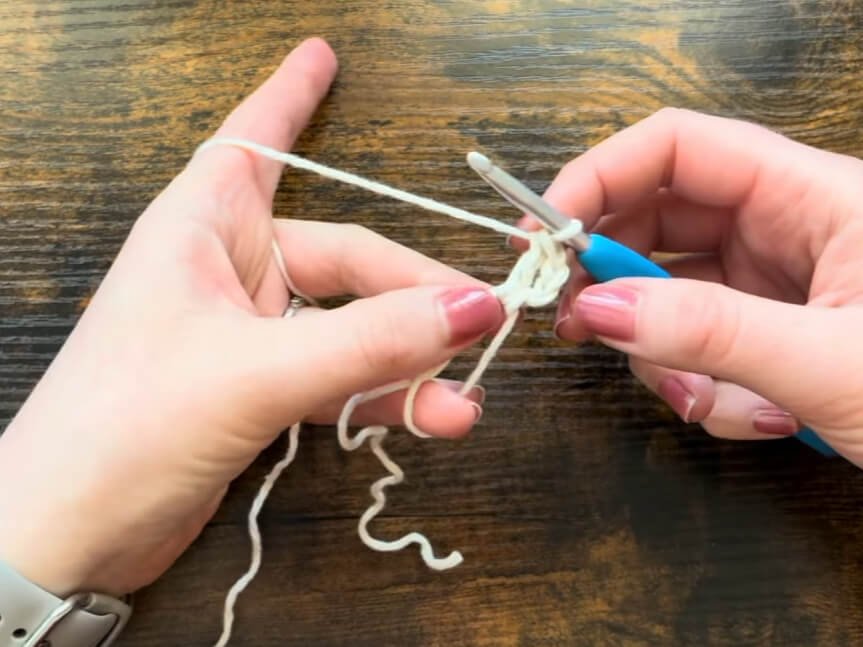
- R1: Make a MR, ch 2 (counts as 1st dc), work 11 dc into the ring. Pull tail to close ring. Do not join. (12 sts)
- R2: Work 2 dc into the top of the ch-2 from R1 (place stitch marker in 1st dc made). Work 2 dc in each st around. (24 sts)
- R3: (2 dc in next st, 1 dc in next st) repeat 12 times around. (36 sts)
- R4: (2 dc in next st, 1 dc in each of next 2 sts) repeat 12 times around. (48 sts)
- R5: (2 dc in next st, 1 dc in each of next 3 sts) repeat 12 times around. (60 sts)
- R6: (2 dc in next st, 1 dc in each of next 4 sts) repeat 12 times around. (72 sts)
- R7: (2 dc in next st, 1 dc in each of next 5 sts) repeat 12 times around. (84 sts)
- R8: (2 dc in next st, 1 dc in each of next 6 sts) repeat 12 times around. Remove marker, sl st to 1st st of round. Fasten off. (96 sts)
Part 2: Granny Stitch Main Body
Worked in joined rounds using colorful yarn. Change color each round or as desired:
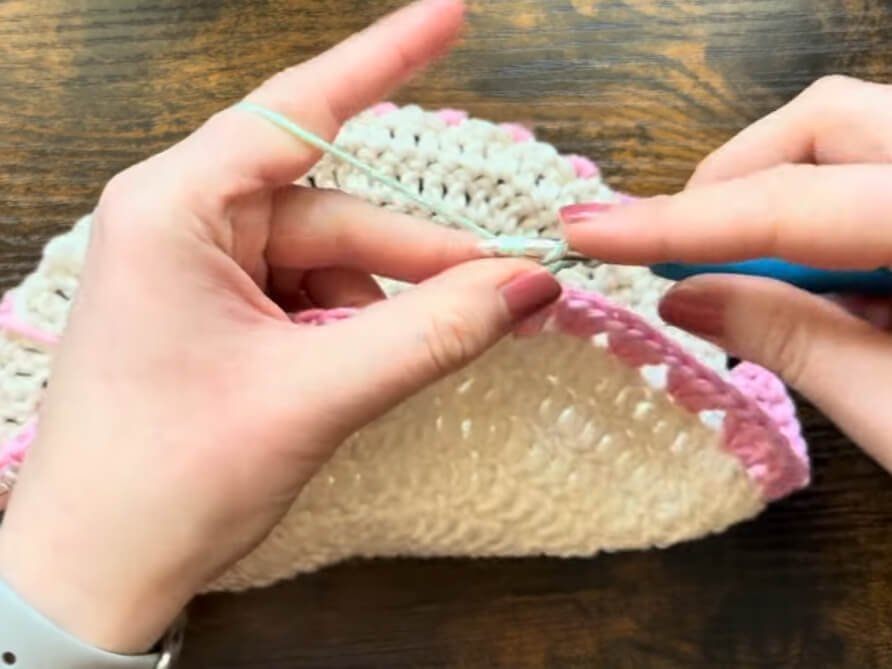
- R9 (First Granny Round): Join 1st color with sl st in the same st as fasten off. Ch 3 (counts as dc), 2 dc in same st (1st cluster made). Skip 2 sts, work 3 dc in next st. Repeat (skip 2 sts, 3 dc in next st) around until 2 sts remain. Sl st to top of starting ch-3. Fasten off. (32 clusters total)
- R10: Join 2nd color with sl st in any space between two 3-dc clusters from R9. Ch 3 (counts as dc), 2 dc in same space. Work 3 dc in each space between clusters around. Sl st to top of starting ch-3. Fasten off. (32 clusters total)
- R11–R31: Repeat R10, changing yarn colors each round for a total of 23 granny stitch rounds (or until desired bag height is achieved). Fasten off and weave in ends as you go.
Part 3: Top Rim & Handle Construction
Worked in rounds using neutral/cream yarn:
- R32 (Top Rim Base): Join neutral yarn with sl st in any space between clusters. Ch 1 (does not count as st). Work 1 sc in each st around (work 1 sc into every dc across the clusters). Sl st to 1st sc. (96 sts)
- R33 (Handle Foundation Round): Ch 1, 1 sc in same st, 1 sc in each of next 11 sts (12 sc total). Ch 55 for 1st handle. Skip 23 sts along bag rim. Work 1 sc into 24th st. Work 1 sc in each of next 23 sts (24 sc total across center). Ch 55 for 2nd handle. Skip 23 sts along bag rim. Work 1 sc in each of remaining 12 sts. Sl st to 1st sc. Ch 1.
- R34 (BLO Strap Shaping): 1 BLO sc in first 12 sts. Work 1 sc in each of the 55 chs across handle. Work 1 BLO sc in next 24 sts across side. Work 1 sc in each of the 55 chs across 2nd handle. Work 1 BLO sc in remaining 12 sts. Sl st to 1st sc. Ch 1.
- R35: Work 1 BLO sc in every st around (including all sts along both handles). Sl st to 1st sc. Ch 1.
- R36: Work 1 BLO sc in every st around. Sl st to 1st sc. Fasten off.
Part 4: Assembly & Finishing
- Weaving Ends: Thread your yarn needle and securely weave all loose color-change tails along the inside granny clusters.
- Blocking (Optional): Steam-block or wet-block the finished market tote lightly to open up the granny cluster mesh and smooth out strap edges.
Detailed Pattern Breakdown
1. Solid Base Construction Breakdown:
- The base utilizes a flat circle growth formula starting with 12 double crochets in a Magic Ring.
- In each subsequent round from R2 through R8, 12 increase stitches (
2 dc worked into 1 st) are added evenly spaced between straight double crochet sections (1 dc in each st). - Working in continuous spiral rounds prevents a noticeable diagonal seam across the bottom, ensuring structural integrity to bear weight.
2. Granny Stitch Shell Mesh Breakdown:
- Transitioning from 96 base stitches to 3-dc clusters is seamless because 96 is divisible by 3 (
96 / 3 = 32 clusters). - Skipping 2 stitches between each 3-dc group creates open mesh spaces, reducing weight while allowing flexibility to hold bulky items.
- Inserting hook into the spaces between clusters in subsequent rounds guarantees that clusters interlock harmoniously.
3. Handle & Rim Architecture Breakdown:
- R32 anchors the open granny mesh into a tight, solid row of single crochet.
- R33 splits the 96 stitches into four symmetrical zones: two 12-st outer quarter sections, two 23-st skipped center sections for handle gaps, and one 24-st middle section.
- Applying BLO (Back Loop Only) single crochet from R34 to R36 creates horizontal ridge lines that absorb tension, stopping straps from sagging under heavy loads.
Pattern Question:
Question: Why are my bag straps stretching out too much when I put heavy items inside, and how can I fix it?
Answer: Cotton yarn naturally has slight give, but working single crochet into the Back Loop Only (BLO) along the straps helps reinforce the stitches against excessive vertical stretching.
To make your straps extra sturdy, ensure your tension is firm when working across the foundation chain (R34). Alternatively, you can add a final round of slip stitches around the inner and outer edges of the handles or sew a cotton ribbon lining behind the straps!