
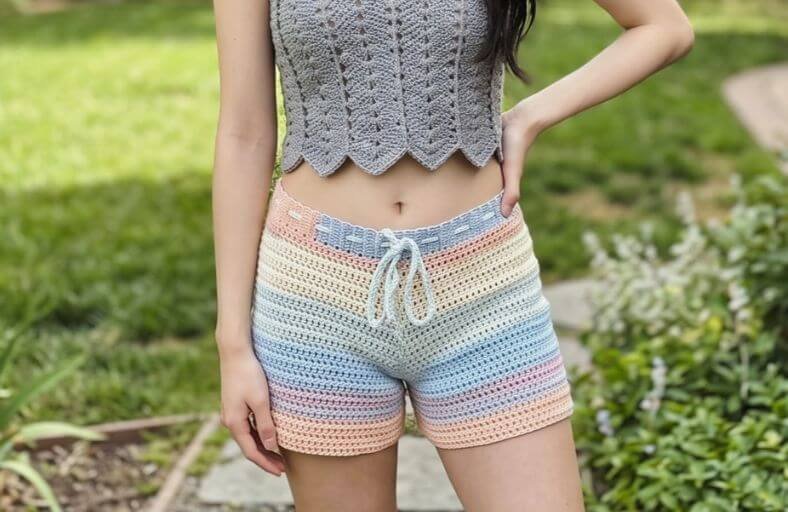
Ready to level up your handmade wardrobe with the ultimate summer beach staple or cozy PJ shorts?
These adorable, custom-fit crochet shorts feature a stretch-ribbed waistband with an adjustable drawstring, lovely subtle shaping around the hips, and breezy leg panels.
Perfect for lounging at home or throwing over a swimsuit at the beach, this made-to-measure design will quickly become your favorite weekend project.
Materials and Preparation
Materials:
- Yarn:
- Weight 4 Medium / Worsted Weight Yarn (approx. 60 yards per ounce, such as Caron Cotton Cakes or Loops & Threads Skinny Chenille / velvet yarn for a super plush feel).
- Drawstring / Cord: Self-made crochet cord from matching yarn.
Tools:
- Crochet Hooks:
- 4.0 mm (US G/6) hook (for the ribbed waistband and drawstring).
- 4.5 mm (US 7) hook (for the main shorts body and legs).
- Tape Measure: Essential since this pattern is fully made-to-measure.
- Yarn Needle (Darning Needle): For seaming the panels and weaving in ends.
- Stitch Markers: To mark increase points and secure stitches.
- Scissors: For cutting yarn.
Preparation Notes:
- Take accurate measurements before starting: Measure around your waist (where you want the shorts to sit), the widest part of your hips/butt, and around one upper thigh.
- Use the smaller 4.0 mm hook for the waistband to keep the ribbing firm, and switch to the 4.5 mm hook for the body to ensure a soft, comfortable drape.
- This garment is created in two identical main leg panels worked directly off the waistband, then seamed along the crotch/hip rise.
Abbreviations and Notes
Abbreviations:
- ch: Chain
- sc: Single Crochet
- dc: Double Crochet
- inc: Double Crochet Increase (2 dc in the same stitch)
- sl st: Slip Stitch
- BLO: Back Loop Only
- ST / STS: Stitch / Stitches
Pattern Notes:
- US Crochet Terms: All instructions are written using standard US Crochet Terms.
- Made-to-Measure Fit: The waistband uses Back Loop Only single crochet for high elasticity. Pull the waistband snugly when checking against your waist measurement.
- Drawstring Eyelets: Eyelet holes are created directly inside the waistband ribbing during the repeat rows.
- Coverage Note: Double crochet stitches provide a lightweight, breathable, and slightly open fabric, making these shorts ideal as PJ shorts, lougewear, or beach cover-ups.
- Original design and pattern credit belongs to maxine.
Gauge, Approximate Size, and Pattern Notes
Gauge:
Since this pattern is constructed to your custom measurements, exact gauge is not strict. Ensure your double crochets are even so the fabric retains a soft drape without excessive gaping.
Finished Size:
Fully customizable to any size (XS through XXL+). Measurements throughout the guide are referenced in inches, with International System (SI) units in centimeters in parentheses. Example waist reference: 29 inches (73.7 cm); Hip reference: 37 inches (94 cm); Thigh reference: 24.5 inches (62.2 cm).
Special Techniques:
- BLO Ribbing: Working single crochets in the back loop only creates a stretchy knit-like elastic band.
- Center & Edge Shaping: Strategic increases (2 dc in one stitch) extend the hip curve seamlessly down into the leg openings.
- Direct Panel Seaming: Using a darning needle to whip-stitch or mattress-stitch the inner rise seam cleanly.
Step-by-Step Pattern
Part 1: Ribbed Waistband with Drawstring Eyelets
Use 4.0 mm hook:
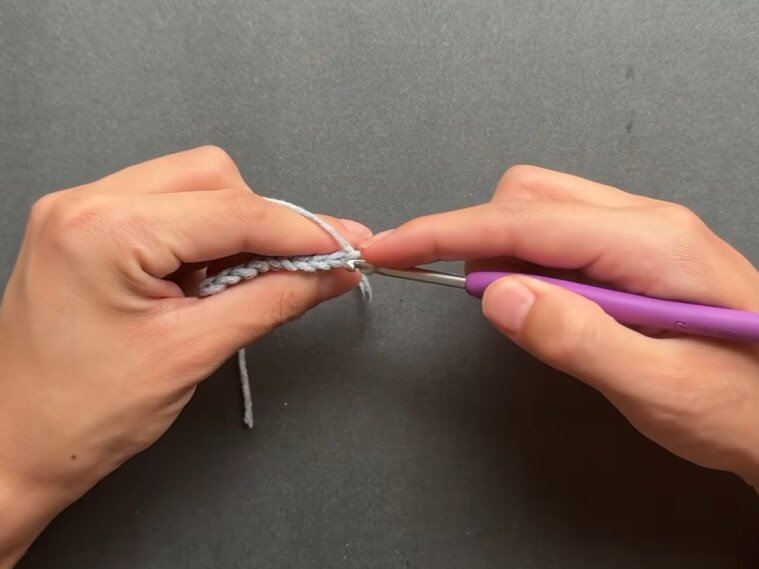
- Foundation Chain: Ch 10.
- Row 1: Skip 1st ch, sc in remaining 9 ch, ch 1, turn. (9 sc)
- Row 2 (Drawstring Hole Row): BLO sc in first 4 sts, ch 1, skip 5th st, BLO sc in last 4 sts, ch 1, turn. (8 BLO sc, 1 ch-space)
- Row 3: BLO sc in first 4 sts, 1 sc directly into the ch-1 hole space, BLO sc in last 4 sts, ch 1, turn. (9 sc)
- Row 4: BLO sc in all 9 sts across, ch 1, turn. (9 sc)
- Row 5 (Drawstring Hole Row): BLO sc in first 4 sts, ch 1, skip 1 st, BLO sc in last 4 sts, ch 1, turn. (8 BLO sc, 1 ch-space)
- Repeat Rows 6–8:
- Row 6: BLO sc in 4 sts, 1 sc into hole, BLO sc in 4 sts, ch 1, turn.
- Row 7: BLO sc in all 9 sts, ch 1, turn.
- Row 8: BLO sc in 4 sts, ch 1, skip 1 st, BLO sc in 4 sts, ch 1, turn.
- Length Adjustment: Continue repeating this 3-row pattern until the unstretched waistband stretches comfortably to meet your waist measurement (e.g., 29 inches / 73.7 cm stretched) and you have an even number of drawstring holes.
- Final Waistband Row: Complete 1 final row with 4 BLO sc, 1 sc in the hole st, 4 BLO sc, ch 1.
- Joining Waistband: Bring short edges together, sc across through both ends to form a continuous waistband loop. Do not cut yarn.
Part 2: First Leg Panel (Right Side / Back-to-Front)
Switch to 4.5 mm hook:
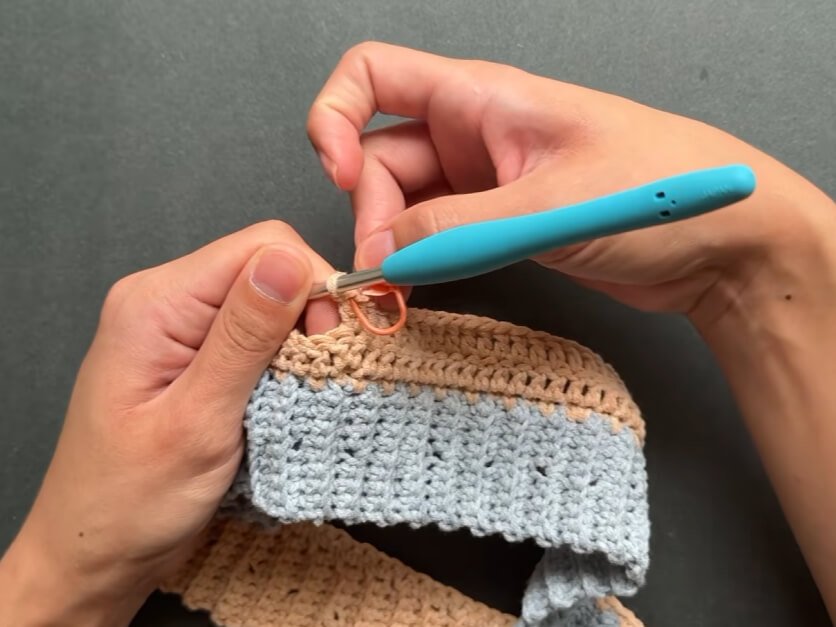
- Base Foundation Round: Ch 1, work 1 sc into the edge of each waistband row all the way around. Total sc count must be an even number (e.g., 114 sts). Sl st to first sc to join, ch 1.
- Stitch Calculation: Divide total waistband sts by 2 for each leg panel (e.g., 114 / 2 = 57 sts per panel). Divide panel count by 2 for the center increase location (e.g., 57 / 2 = 28.5, round up to 29, add 1 st = 30 sts).
- Row 1 (BLO Base): Turn work. BLO dc in first 30 sts (or calculated number), work dc inc (2 BLO dc in next st), place stitch marker in the 2nd dc of this increase. BLO dc in remaining sts to reach the half-way mark (total 57 sts covered). Ch 1, turn.
- Row 2 (Center Increase Row): Dc across to stitch marker. Remove marker, work 2 dc into that st (dc inc), place stitch marker into the 2nd dc of the increase. Dc across to end of panel. Ch 1, turn.
- Rows 3–15 (Hip Expansion): Repeat Row 2 until the width across the panel reaches half of your total hip measurement (e.g., 18.5 inches / 47 cm).
- Rows 16–22 (Thigh & Crotch Increase Rows):
- Remove center stitch marker.
- Row 16: Work 2 dc in the very first st (dc inc), dc across to last st, work 2 dc in last st (dc inc). Ch 1, turn.
- Repeat Row 16 until the folded panel comfortably wraps around your upper thigh measurement (e.g., 24.5 inches / 62.2 cm).
- Leg Tube Connection:
- Do not chain 1. Fold panel edges together, sl st into the first st on opposite side of panel to join into a leg tube. Ch 1, turn.
- Place stitch marker in the joined st.
- Leg Extension Rows:
- Row 1 of Leg: Dc in each st around leg opening until reaching stitch marker. Sl st to first dc, ch 1, turn.
- Repeat Leg Rows until desired leg length is reached (e.g., 6 rounds total).
- Fasten off, leaving a tail for weaving.
Part 3: Second Leg Panel & Accessories
Second Leg Panel (Left Side / Front-to-Back)
- Yarn Attachment: Reattach yarn to the remaining open half of the waistband using a 4.5 mm hook.
- Calculated Setup: Count sts to position center increase symmetrically with the first panel.
- Row 1 (BLO Base): Ch 1, BLO dc in first 26 sts (or calculated st number), work dc inc (2 BLO dc in next st), place stitch marker in the first st of the increase. BLO dc across remaining sts to complete round. Ch 1, turn.
- Center Increase Repeat Rows: Repeat regular dc rows with 2 dc in the marked stitch (placing marker back into 1st dc of increase) for the exact same number of center increase rows performed on Panel 1 (e.g., 15 rows).
- Edge Increase Rows: Work 2 dc in the first st and 2 dc in the last st of each row for the exact same number of edge increase rows performed on Panel 1 (e.g., 7 rows).
- Leg Connection & Extension: Join into a tube with sl st, ch 1, turn. Work the exact same number of leg extension rounds as Panel 1. Fasten off.
Drawstring Cord
Use 4.0 mm hook:
- Foundation: Ch a length equal to double your waist measurement (e.g., 58 inches / 147.3 cm).
- Row 1: Sc into the back bar (bump) of each chain st all the way across.
- Fasten off and weave in cord ends.
Part 4: Assembly, Seaming & Finishing
- Preparing for Seam: Turn shorts inside out so right sides are facing inward. Align the inner crotch rise seams of Panel 1 and Panel 2.
- Seaming the Rise:
- Thread a darning needle with a strand of yarn cut to 3 times the length of the crotch seam.
- Insert needle through both panel edges near the top waistband seam, pulling through and securing with an extra stitch pass.
- Neatly stitch down one side of the crotch rise through outer st loops to avoid bulky seams.
- Continue seaming across the bottom center crotch and up the opposite rise until reaching the opposite side of the waistband. Secure tightly and fasten off.
- Inserting Drawstring:
- Identify whether each panel contains an even or odd number of drawstring eyelet holes.
- Thread drawstring through the eyelets starting from the back center:
- If odd number of holes per panel: Weave cord starting from underneath/inside out through the first hole next to seam.
- If even number of holes per panel: Weave cord starting from outside to inside.
- Weave cord in and out around both sides until both ends exit symmetrically at the front center waistband.
- Finishing: Turn shorts right-side out, weave in all remaining yarn tails neatly using a darning needle.
Detailed Pattern Breakdown
1. Waistband Structure and Eyelet Integration
The waistband is built horizontally as a long narrow strip using Back Loop Only single crochet (BLO sc). Working into the back loop creates flexible vertical ridges that mimic elastic knit ribbing:
- Elasticity & Recovery: Single crochet worked in
BLOstretches up to 15-20% beyond its resting state. This allows the waistband to slip smoothly over hips while hugging the waist firmly. - Built-in Eyelets: Instead of punching holes or sewing metal eyelets later, drawstring holes are engineered during fabrication. By replacing 1
scwith 1chin every 3rd row, clean openings are created. In the following row, working 1scdirectly into the chain space anchors the hole structure without dropping stitch counts.
2. Geometric Panel Expansion (Hips & Thighs)
Creating garments that fit 3D human curves requires controlled geometric expansion:
- Center Rise Shaping (Rows 1–15): The center increase (
dc inc) acts as an internal gusset wedge along the front and back center seams. By adding 1 st per row directly at the midline, the fabric widens specifically to accommodate the curve of the buttocks without creating excess fabric on the outer hips. - Outer Thigh Expansion (Rows 16–22): Once hip coverage is achieved, shaping shifts from the center to the outer edges. Adding 2
dcat the beginning and end of each row expands the bottom opening horizontally, transforming a flat panel into a wide leg bell that wraps comfortably around the upper thighs.
3. Tubular Joining and Crotch Seaming Mechanics
- Seamless Leg Tubes: Slip stitching the two outer edges of a single panel creates a hollow cylindrical leg tube. Rotating rows after every slip stitch (
ch 1, turn) keeps the double crochet stitches aligned straight rather than spiraling diagonally down the leg. - Invisible Structural Seaming: The inner crotch rise is joined using a tailored mattress stitch or whip stitch. Working through single thread loops keeps the seam flat and prevents friction or irritation along the inner thigh area.
Pattern Questions & Answers
Question 1: Why do my shorts feel too loose around the waist even though I followed my exact waist measurement?
Answer: Because BLO sc ribbing is highly elastic, measuring the waistband without stretching it will result in an oversized waist. Always pull the ribbed strip snugly against your waist with light tension while checking length with your tape measure. Stop crocheting rows when the stretched ribbing equals your actual waist measurement.
Question 2: Can I make these shorts full coverage instead of using double crochet stitches?
Answer: Yes! Double crochet (dc) provides a breezy, lightweight texture ideal for lounging or beachwear. For full coverage shorts with a denser fabric, replace all dc body stitches with half double crochet (hdc). Keep in mind that using hdc will require a few additional rows to reach the same vertical length since hdc stitches are slightly shorter than dc.
Question 3: How do I prevent my color changes or slip stitch joins from creating a visible diagonal seam down the legs?
Answer: Diagonal drifting happens when working continuous rounds in one direction. To maintain a perfectly straight seam line down the inseam, always sl st to join the round, ch 1, and turn your work to alternate direction for every single round. This counteracts stitch drift and keeps the join hidden along the inner leg.