

Is your dining table looking a little bare, or are you craving a quick, satisfying project that instantly adds handcrafted charm to your home? Look no further!
Today, we are creating a stunning two-tone crochet round doily.
Perfect as a decorative placemat, table mat, or mug rug, this design combines a clean geometric center with ruffled scallop borders for a timeless aesthetic.
Grab your favorite cotton yarn, and let us dive into this delightful step-by-step tutorial!
Materials and Preparation
Materials:
- Yarn: 100% Cotton Yarn (Nature Cotton Yarn or equivalent DK/Sport weight yarn) in two contrasting colors:
- Beige (Main body color)
- Dark Red / Burgundy (Contrast border color)
Tools:
- Crochet Hook: 2.5 mm crochet hook.
- Yarn Needle: Tapestry needle for weaving in loose ends.
- Scissors: Craft scissors.
Preparation Notes:
- Maintain a smooth, relaxed tension so the doily lays perfectly flat without buckling or curling at the edges.
- Blocking your finished doily with a light steam or wet-blocking technique will accentuate the scalloped edges and give it a crisp, professional finish.
Abbreviations and Notes
Abbreviations:
- MR / Ring: Magic Ring or Chain Ring
- ch: Chain
- ch-sp: Chain space
- sl st: Slip Stitch
- sc: Single Crochet
- dc: Double Crochet
- V-stitch: [1 dc, ch 2, 1 dc] worked in the same designated stitch or space
Pattern Notes:
- The center mat is worked in joined rounds starting with a chain-ring center.
- Initial chain counting:
- ch 4 at the beginning of R1 counts as [1 dc + ch 1].
- ch 2 at the start of R2 through R8 counts as the first
dcof the round. - ch 5 at the start of V-stitch rounds counts as [1 dc + ch 2].
- Color changes occur between the V-stitch foundation rounds (Beige) and the Shell/Fan rounds (Dark Red).
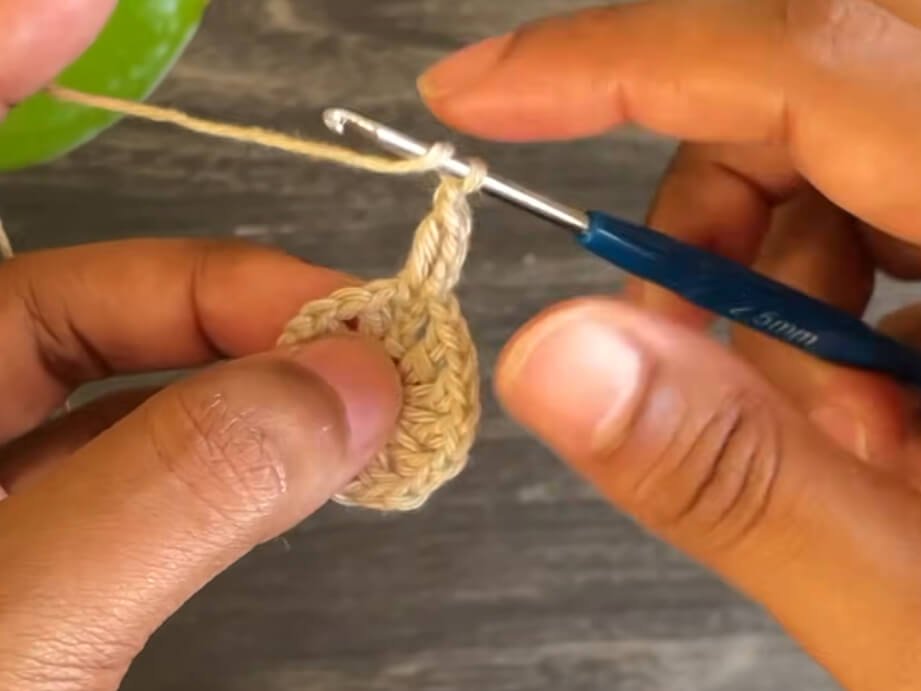
Gauge, Approximate Size, and Pattern Notes
Gauge:
Rounds 1–3 measure approximately 2.5 inches (6.35 cm) in diameter. Exact gauge is not critical, but consistent tension ensures a flat mat.
Finished Size:
Approximately 11 inches (27.94 cm) in diameter when completing all 3 border tiers as written.
Special Techniques:
- Radial Increasing: Each slice of the central wheel increases by 1
dcper round, forming neat textured ridges extending from the center. - Textured Fan Overlay: Alternating V-stitches and 5-dc fans across changing yarn colors creates an elegant 3D ruffled border effect.
Step-by-Step Pattern
Part 1: Central Doily Base
Worked in Beige Yarn:
- Foundation Ring: Ch 7, sl st into the 1st ch to form a ring.
- R1: Ch 4 (counts as 1 dc + ch 1), [1 dc into ring, ch 1] 11 times. Sl st into the 3rd ch of the starting ch-4. (12 dc, 12 ch-1 spaces)
- R2: Ch 2 (counts as 1 dc), 1 dc in same space, ch 1. *2 dc in top of next dc, ch 1; repeat from * around. Sl st to 2nd ch of starting ch-2. (24 dc, 12 ch-1 spaces / 12 sets of 2-dc)
- R3: Ch 2, 1 dc in next dc, 1 dc in same dc (increase in last dc of set), ch 1. *1 dc in next dc, 2 dc in next dc, ch 1; repeat from * around. Sl st to 2nd ch of starting ch-2. (36 dc, 12 ch-1 spaces / 12 sets of 3-dc)
- R4: Ch 2, 1 dc in next dc, 2 dc in last dc of set, ch 1. *1 dc in each of next 2 dc, 2 dc in next dc, ch 1; repeat from * around. Sl st to 2nd ch of starting ch-2. (48 dc, 12 ch-1 spaces / 12 sets of 4-dc)
- R5: Ch 2, 1 dc in each of next 2 dc, 2 dc in last dc of set, ch 1. *1 dc in each of next 3 dc, 2 dc in next dc, ch 1; repeat from * around. Sl st to 2nd ch of starting ch-2. (60 dc, 12 ch-1 spaces / 12 sets of 5-dc)
- R6: Ch 2, 1 dc in each of next 3 dc, 2 dc in last dc of set, ch 1. *1 dc in each of next 4 dc, 2 dc in next dc, ch 1; repeat from * around. Sl st to 2nd ch of starting ch-2. (72 dc, 12 ch-1 spaces / 12 sets of 6-dc)
- R7: Ch 2, 1 dc in each of next 4 dc, 2 dc in last dc of set, ch 1. *1 dc in each of next 5 dc, 2 dc in next dc, ch 1; repeat from * around. Sl st to 2nd ch of starting ch-2. (84 dc, 12 ch-1 spaces / 12 sets of 7-dc)
- R8: Ch 2, 1 dc in each of next 5 dc, 2 dc in last dc of set, ch 1. *1 dc in each of next 6 dc, 2 dc in next dc, ch 1; repeat from * around. Sl st to 2nd ch of starting ch-2. (96 dc, 12 ch-1 spaces / 12 sets of 8-dc)
- R9 (Solid Transition Round): Ch 2, work 1 dc in every st around and 1 dc in each ch-1 space around. Sl st to 2nd ch of starting ch-2. (108 dc)
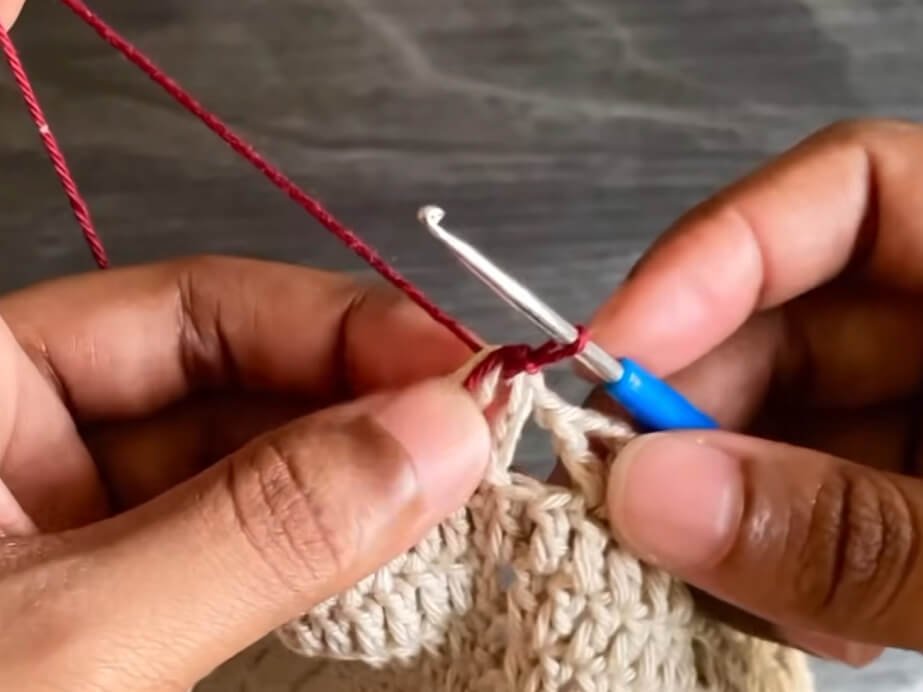
Part 2: Inner Lace & First Scallop Border
Round 10 (V-Stitch Mesh – Beige Yarn):
- R10: Ch 5 (counts as 1 dc + ch 2), 1 dc in same st (first V-stitch). Ch 1, skip 2 sts, *(1 dc, ch 2, 1 dc) in next st, ch 1, skip 2 sts; repeat from * around. Sl st to 3rd ch of starting ch-5. Fasten off Beige yarn. (36 V-stitches)
Round 11 (First Fan Round – Dark Red Yarn):
- R11: Join Dark Red yarn with a sl st in any ch-2 V-stitch space. Ch 3 (counts as 1 dc), 4 dc in same ch-2 space (total 5 dc in V-stitch). 1 sc in next ch-1 space. *5 dc in next ch-2 V-stitch space, 1 sc in next ch-1 space; repeat from * around. Sl st to 3rd ch of starting ch-3. Fasten off Dark Red yarn. (36 Fan Shells)
Part 3: Middle Lace & Second Scallop Border
Round 12 (Second V-Stitch Mesh – Beige Yarn):
- R12: Join Beige yarn with a sl st in any
scspace from R11. Ch 5 (counts as 1 dc + ch 2), 1 dc in same st (first V-stitch). Ch 1, *(1 dc, ch 2, 1 dc) in next sc st, ch 1; repeat from * around. Sl st to 3rd ch of starting ch-5. Fasten off Beige yarn. (36 V-stitches)
Round 13 (Second Fan Round – Dark Red Yarn):
- R13: Join Dark Red yarn with a sl st in any ch-2 V-stitch space. Ch 3 (counts as 1 dc), 4 dc in same space (total 5 dc). 1 sc in next ch-1 space. *5 dc in next ch-2 V-stitch space, 1 sc in next ch-1 space; repeat from * around. Sl st to 3rd ch of starting ch-3. Fasten off Dark Red yarn. (36 Fan Shells)
Part 4: Outer Lace, Final Scallop Border & Assembly
Round 14 (Third V-Stitch Mesh – Beige Yarn):
- R14: Join Beige yarn with a sl st in any
scspace from R13. Ch 5 (counts as 1 dc + ch 2), 1 dc in same st. Ch 1, *(1 dc, ch 2, 1 dc) in next sc st, ch 1; repeat from * around. Sl st to 3rd ch of starting ch-5. Fasten off Beige yarn. (36 V-stitches)
Round 15 (Final Fan Round – Dark Red Yarn):
- R15: Join Dark Red yarn with a sl st in any ch-2 V-stitch space. Ch 3 (counts as 1 dc), 4 dc in same space (total 5 dc). 1 sc in next ch-1 space. *5 dc in next ch-2 V-stitch space, 1 sc in next ch-1 space; repeat from * around. Sl st to 3rd ch of starting ch-3. Fasten off and weave in all ends. (36 Fan Shells)
Detailed Pattern Breakdown
1. Central Wheel Construction (Rounds 1–9)
- Mathematical Expansion: The motif relies on a 12-segment radial growth system. Round 1 establishes 12 spokes (
dc) separated bych 1spaces. - Consistent Edge Alignment: Increases always occur in the very last
dcstitch of each segment. This builds smooth wedge panels without disrupting the spiraling symmetry. - Solid Transition (R9): Filling every stitch and
ch 1gap with adccreates a sturdy foundation for the decorative lace border.
2. V-Stitch Base Framework (Rounds 10, 12, 14)
- Structural Spacing: The Beige V-stitches (
dc, ch 2, dc) act as anchoring anchors for the contrast shells. - Precision Anchoring: In Round 10, V-stitches are spaced by skipping 2 stitches between each anchor. In Rounds 12 and 14, V-stitches are anchored directly into the
scstitches located between the fan shells of the previous row.
3. Layered Scallop Fan Borders (Rounds 11, 13, 15)
- Contrast Petals: Working 5
dcinside each V-stitch creates full, rounded scallops. Securing each shell with anscin the intermediatech 1space pulls the edges downward, defining distinct fan shapes. - 3D Visual Depth: Alternating Beige V-stitches and Dark Red fans creates a layered, petal-like frame around the central mat.
Pattern Question:
Question: Why is my doily cupping into a bowl shape or ruffling at the edges during the center rounds? How do I fix it?
Answer: Cupping occurs when there are too few stitches per round (tension is too tight), while ruffling happens when there are too many stitches (tension is too loose). To ensure your mat stays flat:
- Double-check your stitch count at the end of each round (each round must increase by exactly 12
dc). - Make sure you are increasing only in the last
dcstitch of each set. - If your tension is naturally tight, switch to a 3.0 mm hook for the center base.
- Blocking your finished doily with water or light steam will flatten out mild tension irregularities.