
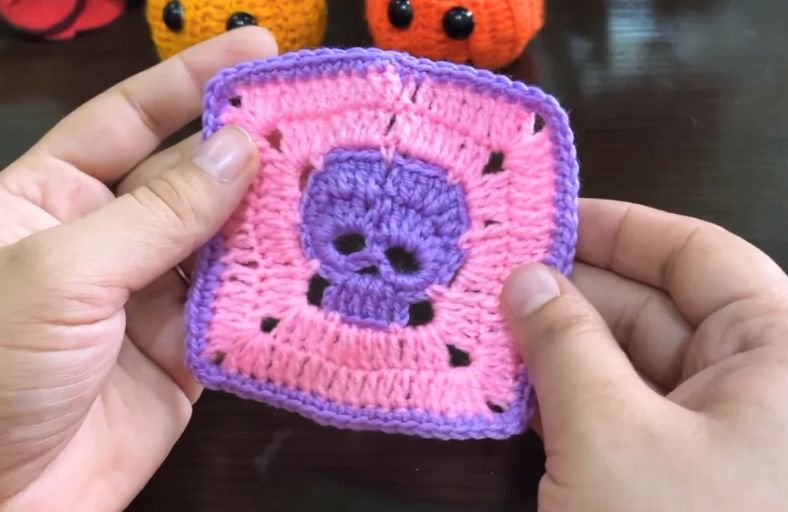
Ready to add a spooky yet adorable vibe to your Halloween craft stash?
Whether you are planning to whip up a cozy gothic blanket, a creepy-cute tote bag, or spooky coasters for your next Halloween party, this Easy Skull Granny Square is the ultimate beginner-friendly project!
It combines the classic charm of a granny square with a fun 2D skull motif centerpiece, making it both quick to stitch and incredibly satisfying to make.
Materials and Preparation
Materials:
- Yarn (Worsted Weight / Medium 4):
- Purple Yarn (for the central skull motif)
- Pink Yarn (for the main square background)
- Dark Purple / Magenta Yarn (for the outer border)
- Black Yarn (or Embroidery Floss) for embroidering the nose, eye, and teeth accents if needed.
- Stuffing: None required (this is a flat 2D granny square motif).
Tools:
- Crochet Hook: 3.5 mm – 4.0 mm hook (or size suitable for your chosen yarn weight).
- Yarn Needle: Tapestry needle for weaving in ends and embroidering details.
- Stitch Markers: To keep track of corner stitches.
- Scissors: Sharp craft scissors.
Preparation Notes:
- Practice your basic stitches (chain, single crochet, double crochet, and slip stitch) before starting.
- Maintain consistent yarn tension so the square stays flat and neat without curving at the edges.
- Block your finished square using steam or wet blocking for crisp edges and sharp square corners.
Abbreviations and Notes
Abbreviations:
- ch: Chain
- sl st: Slip stitch
- sc: Single crochet
- hdc: Half double crochet
- dc: Double crochet
- tr: Treble crochet
- inc: Increase (2 stitches in the same stitch)
- dec: Decrease / sc2tog (2 single crochet stitches worked together)
- MR: Magic Ring
- BLO: Back Loop Only
- FLO: Front Loop Only
- st(s): Stitch(es)
- sp: Space
Pattern Notes:
- The motif is worked from the center out: starting with the central skull shape in purple yarn, then switching to background color (pink) to transform the circular/oval skull into a clean square, and finishing with a contrasting border.
- Work in joined rounds unless otherwise specified, joining with a slip stitch (
sl st) to the first stitch of the round. - Turning chains (ch 3 for dc) count as the first double crochet stitch of the round unless stated otherwise.
Gauge, Approximate Size, and Pattern Notes
Gauge:
4 inches x 4 inches (10 cm x 10 cm) = 16 sts and 8 rows in double crochet pattern. Gauge is not critical for this project, but consistent tension keeps the square flat.
Finished Size:
Approximately 5.5 inches x 5.5 inches (14 cm x 14 cm) when made with worsted weight yarn and a 3.5 mm hook.
Special Techniques:
- Granny Square Corner Technique: Working
(2 dc, ch 2, 2 dc)or(3 dc, ch 2, 3 dc)into a single corner space to form clean 90-degree corners. - Eyehole Creation: Working chain spaces over skipped stitches on early rounds to form natural hollow eye sockets for the skull center.
- Surface Embroidery Details: Using dark yarn to stitch vertical tooth lines along the bottom jaw for a classic skull expression.
Step-by-Step Pattern
Part 1: Skull Center Motif
Worked in rounds using Purple Yarn:
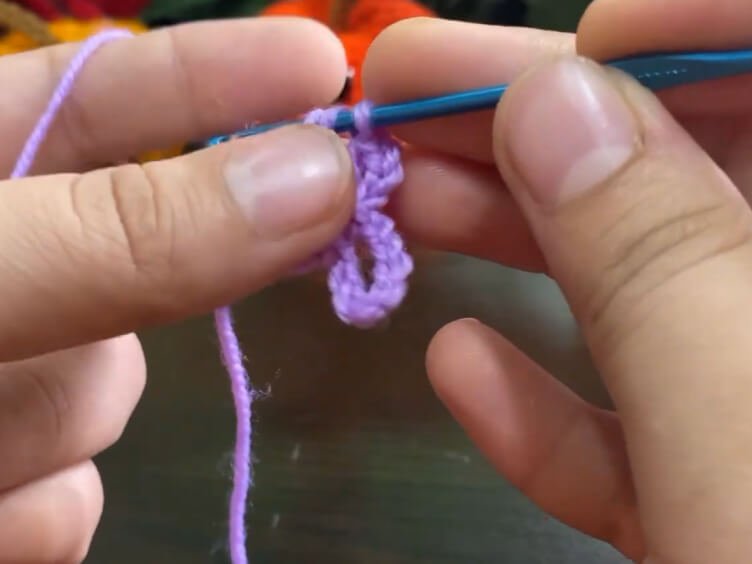
- R1: Start with a MR 9 sc.
- R2: 8ch , slst, 3 ch, 3 dc, 2 hdc in sam ch space, 4 sc, 3 ch slip knot, 4 sc, 2 hdc, 3 dc slst.
- R3 (Eye Sockets & Jaw Base): 3 ch, 2 dc in each next st, 2 dc. 2 hdc, 2 sc, 5 slip knot . 3 ch , 4 dc , 3 ch slip knot. 5 slip knot, 2 sc, 2 hdc. 2 dc, each next st, 2 dc slip knot
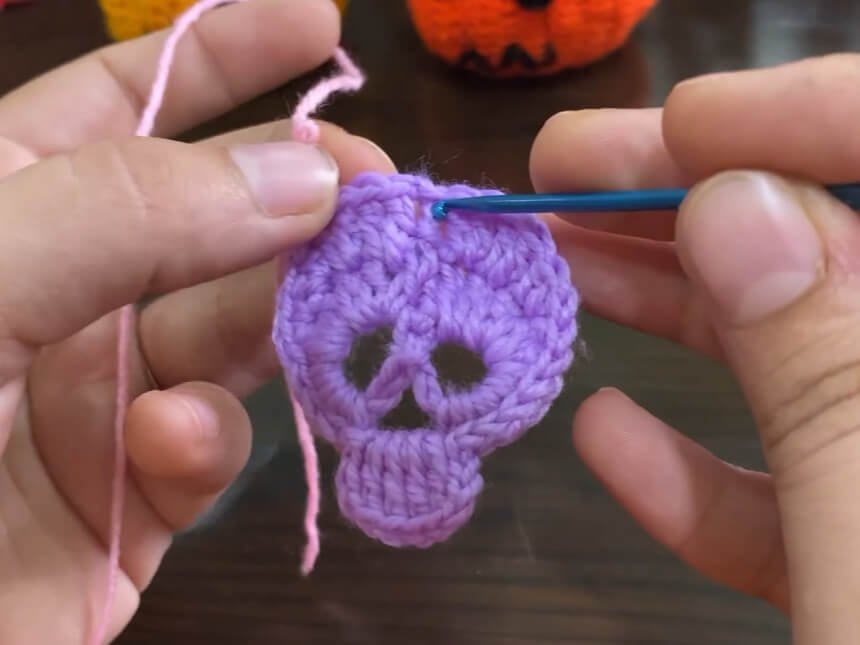
Part 2: Squaring off the Background
Attach Pink Yarn to any corner stitch position:
- R5 (Squaring Round): Attach pink yarn in top-right back head stitch. 4 ch, skip 3 sts 1 sc. 4 ch , skip 4 sts , 1 sc. 4 ch, skip 3 sts 1 sc. 4 ch , skip 4 sts , 1 sc.
- R6 (Background Expansion):
- 4 dc, ch in the space, 1 dc next scst, 3 dc, 3 ch, 3 dc, 1 dc.
- 4 dc, 1 dc next scst, 3 dc, 3 ch, 3 dc, 1 dc
- 4 dc, 1 dc next scst, 3 dc, 3 ch, 3 dc, 1 dc.
- 4 dc, 1 dc next scst, 3 dc, 3 ch, 3 dc, 1 dc
- R7: 3 ch , 7 dc, (3 dc, 3 ch, 3 dc), 14 dc, (3 dc, 3 ch, 3 dc), 14 dc, (3 dc, 3 ch, 3 dc), 14 dc, (3 dc, 3 ch, 3 dc), 7 dc, slst.
- R8: Change to purple wool , 7 sc , (3 sc) , 14 sc, (3 sc), 14 sc, (3 sc), 14 sc, (3 sc), 7 sc, slst.
Part 3: Border & Accents
Teeth & Facial Embroidery Details:
Using Black Yarn or tapestry thread:
- Nose: Stitch an inverted V-shape or small triangle centered below the eye sockets on the purple center.
- Teeth: Stitch 3 to 4 vertical straight lines across the pink/purple jawline transition to create defined skull teeth.
Part 4: Assembly & Finishing
- Blocking: Pin the square on a foam blocking board, spritz lightly with water or steam gently with an iron (do not touch iron to acrylic yarn), and leave to dry completely for crisp edges.
- Joining Options: If making a blanket or bag, join multiple skull granny squares together using whip stitch, single crochet join, or flat slip stitch join along the outer dark purple border.
Detailed Pattern Breakdown
1. Skull Motif Construction Breakdown:
- The skull centerpiece relies on circular foundation rounds (
R1andR2) that expand from 12 hdc to 24 sc. R3introduces negative space engineering: skipping 2 stitches while creatingch-3chains forms hollow eye sockets directly into the fabric without needing separate appliqué pieces.- The jaw extension in
R4utilizes a dense cluster of mixed-height stitches (sc,hdc,dc) to push the lower portion downward, turning a round circle into a distinct skull shape.
2. Squaring Technique Breakdown:
- Transforming a curved 2D skull motif into a symmetrical 4-sided square requires height compensation.
- Longer double crochet stitches (
dc) andch-2spaces are placed strategically at four cardinal points to create 90-degree corners. - Shorter single crochet (
sc) and half double crochet (hdc) stitches span across the wider sections of the skull to maintain an even, flat top edge without buckling.
3. Border and Decorative Accents Breakdown:
- The transition from purple skull to pink background creates a sharp contrast that makes the skull silhouette pop out visually.
- Simple straight-stitch surface embroidery brings character to the skull: three or four black thread passes create teeth along the bottom jaw, while a small central stitch defines the nasal cavity.
- A final round of single crochet (
sc) in a dark border color frames the entire piece, locking in the structure and preparing the square for easy joining into larger projects.
Pattern Questions
Question: Why is my skull granny square curving or bulking up in the center instead of laying completely flat?
Answer: Central curling usually happens when your gauge is too tight or when the corner increases don’t offer enough room for the fabric to expand outward.
Make sure to work all ch-2 corner spaces loosely and verify that your stitch counts for each side match the pattern exact numbers before starting the next round. Giving your finished piece a good steam blocking will also flatten any slight tension unevenness easily!
Question: Can I adjust the size of this skull square to make larger throw blankets or smaller coasters?
Answer: Absolutely! To make a smaller coaster size, stop after R5 or R6 and add a single border round. For a larger square, simply keep adding additional background rounds (repeating R6 logic: adding 2 dc into each corner and 1 dc in every side stitch across) using your main color until you reach your desired dimensions.
Question: What is the best way to switch yarn colors cleanly without leaving messy tails on the skull face?
Answer: When finishing the last stitch before a color change, perform the final yarn-over with your new color yarn and pull through the remaining loops to complete the stitch. Carry the dropped yarn color along the back or weave the loose ends through the back loops of the stitches on the wrong side so no dark threads peek through to the front.