

Are you ready to level up your summer wardrobe with the ultimate cozy yet stylish handmade piece?
Whether you want to rock a beach cover up, lounge around in style, or create the most comfortable high waisted shorts ever, this pattern is your new best friend.
Made entirely with the foundation of half double crochet, these shorts come together surprisingly fast and fit like a dream!
Materials and Preparation
Materials:
- Yarn: Medium worsted weight yarn (Yellow or your favorite shade for summer shorts).
- Drawstring Yarn: 4 strands held together for a sturdy braided tie string.
Tools:
- Crochet Hook: 4.5 mm (or 4.0 mm / 3.5 mm depending on your yarn weight and tension preference).
- Yarn Needle: Tapestry needle to weave in ends.
- Tape Measure: Essential for checking waist, hip, and length custom fit.
- Scissors: Sharp craft scissors.
- Stitch Markers: Optional (used to mark center points).
Preparation Notes:
- Custom Sizing & Stretch Factor: The waistband is designed with negative ease to stretch snugly around your body. For example, a 25 inch (63.5 cm) unstretched waistband will comfortably stretch to fit a 29 inch (73.7 cm) waist.
- Measurement Calculation: Take three key measurements before starting: waist, hips, and preferred length.
- Tension Tip: Keep your half double crochet stitches even so the ribbed waistband retains its elasticity throughout wear.
Abbreviations and Notes
Abbreviations:
- ch: Chain
- hdc: Half Double Crochet
- sl st: Slip Stitch
- st(s): Stitch(es)
- YO: Yarn Over
Pattern Notes:
- Waistband Construction: The waistband is worked flat in back-and-forth rows to create a ribbed elastic texture, then joined into a ring using half double crochet seam stitches.
- Body Construction: The main body is worked in turned rounds across the edge of the waistband, creating a seamless main body down to the crotch separation.
- Crotch Extension: A center chain bridge connects the front and back center points to form two separate leg openings.
- Turned Rounds: Always turn your work at the end of each round to maintain the textured stripe pattern.
Gauge, Approximate Size, and Pattern Notes
Gauge:
- Gauge depends on yarn choice, but aim for approx 14 hdc x 10 rows = 4 inches x 4 inches (10 cm x 10 cm).
Finished Size:
- Waist (Unstretched): 25 in (63.5 cm), stretches to 29 in (73.7 cm)
- Hips (Unstretched): 34 in (86.4 cm) to 36 in (91.4 cm), stretches to 40 in (101.6 cm)
- Total Length: 9 in (22.9 cm)
- Crotch Depth: 10 in (25.4 cm) to 11 in (27.9 cm) when stretched
Special Techniques:
- Ribbed Waistband Joining: Joining two flat edges together using hdc stitches to form a clean, stretchable waistband seam.
- Working into Row Ends: Working hdc stitches directly into the side posts of the waistband rows (2 hdc per wider row space).
- Center Chain Separation: Creating a crotch bridge in the middle of the piece to separate the left and right legs effortlessly.
Step-by-Step Pattern
Part 1: Ribbed Waistband
Work flat in back-and-forth rows:
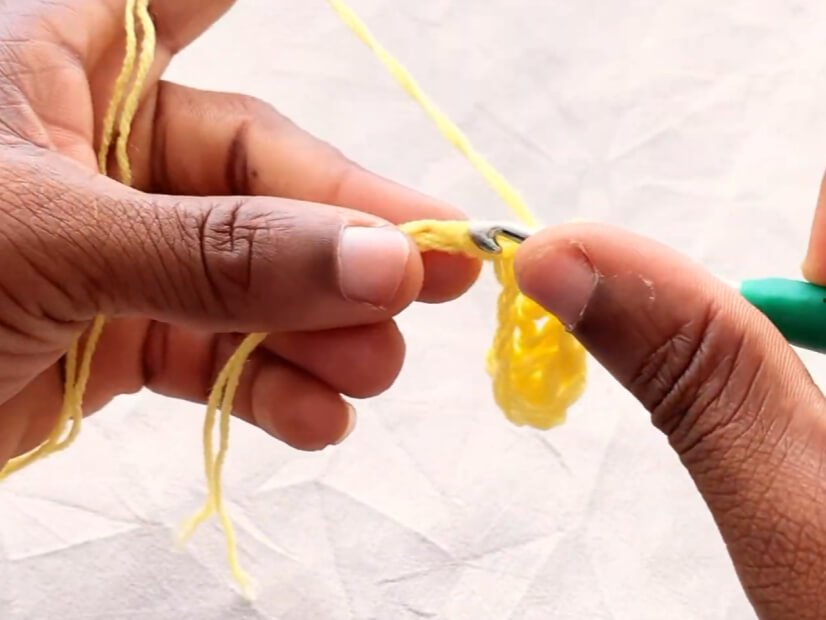
- Foundation Row: Make a slip knot, ch 10.
- R1: Skip first ch, 1 hdc in 2nd ch from hook, 1 hdc in each ch across (9 hdc, or 10 sts if counting initial ch-2).
- R2: Ch 2, turn. 1 hdc in the very first st space, 1 hdc in each st across to the end (9 hdc).
- R3–R(Waist Length): Repeat R2 until the band reaches your desired unstretched waist measurement (e.g., 25 in / 63.5 cm).
- Joining the Band: Fold the short ends of the waistband together. Ch 2, insert hook through both edges, work 1 hdc to join across each st. Fasten off or continue directly into the body.

Part 2: Main Body
Worked in turned rounds along the bottom edge of the waistband:
- R1: Ch 2, turn. Work 2 hdc into each wider row post space along the waistband edge, skipping small row gaps, sl st to top of starting ch-2 to join.
- R2: Ch 2, turn. 1 hdc in each st around, sl st to first st to join.
- R3–R12: Repeat R2 (turn every round, working 1 hdc in each st around). Continue until body reaches approximately 7.5 in (19.1 cm) in total height or 12 rows total.
Part 3: Crotch Extension & Legs
Part 3.1: Crotch Extension Chain
- Step 1: Fold the shorts body flat, aligning the back seam at the center back.
- Step 2: Mark the exact center front point directly opposite the seam (e.g., 9 in / 22.9 cm from side to side).
- Step 3: Attach yarn at center back seam, ch 12 for Small/Medium size (or ch 15–18 for Large/XL size).
- Step 4: Join ch 12 to the center front point with a sl st to form two separate leg openings.
Part 3.2: First Leg Opening
- R1: Ch 2, turn. Work 1 hdc in each st around the leg opening and 1 hdc into each of the 12 crotch chains (12 hdc along the crotch bridge), sl st to join.
- R2–R6: Ch 2, turn. 1 hdc in each st around the leg opening, sl st to join. Repeat for 6 rounds total (or desired leg length). Fasten off.
Part 3.3: Second Leg Opening
- Reattach yarn on the opposite leg opening at the crotch bridge.
- R1–R6: Repeat instructions for First Leg Opening across the second leg circumference. Fasten off and weave in ends.
Part 4: Drawstring & Finishing
- Drawstring: Holding 4 strands of yarn together, make a slip knot and crochet a long chain (approx. 45–50 in / 114–127 cm long).
- Threading: Weave the drawstring in and out through the waistband stitches along the front center (skipping every 1–2 rows).
- Finishing: Tie a knot or attach tassels to both ends of the drawstring, trim excess yarn, and weave in all loose ends.
Detailed Pattern Breakdown
1. Waistband Structure Breakdown:
- The waistband relies on simple flat row vertical construction. By chaining 10 sts and repeating 9 hdc back and forth, the ribbed texture automatically stretches and contracts without needing elastic inserts. Joining the two ends with half double crochet produces a smooth seam that matches the texture of the waistband.
2. Body Expansion Breakdown:
- After seaming the waistband, working 2 hdc into each row end along the bottom edge converts vertical rows into horizontal rounds. This creates the correct circumference needed to transition from the narrower waist down to the hips. Working in turned rounds prevents the seam from slanting diagonally across the hip.
3. Crotch Separation & Leg Geometry Breakdown:
- The crotch separation utilizes a center bridge chain (12 ch). This creates a comfortable 3D fit around the inner thighs while preserving overall hip elasticity. Adding 6 rounds of 1 hdc per stitch along each leg loop forms a clean hemline without twisting or puckering.
Pattern Question:
Question 1: How do I ensure these shorts fit my specific waist and hip measurements perfectly?
Answer: Because half double crochet fabric is stretchy, calculate your waistband length by subtracting 4 inches (10.2 cm) from your actual waist size. For example, if your waist is 29 inches (73.7 cm), crochet the waistband until it measures 25 inches (63.5 cm) unstretched.
Question 2: Why do my leg openings feel too tight or tug at the inner thighs?
Answer: If the crotch area feels tight, increase the crotch chain length from 12 chains to 15–18 chains, or add 2 extra rounds to the leg section to give more room around the upper thigh.
Question 3: Can I make these shorts longer or high-waisted?
Answer: Absolutely! To make them higher-waisted, add more rows to the initial waistband (e.g., ch 15 instead of ch 10) or add 2–4 extra rounds to the main body before making the crotch chain. To extend the leg length, simply continue repeating R2 on each leg until you reach your desired inseam.