
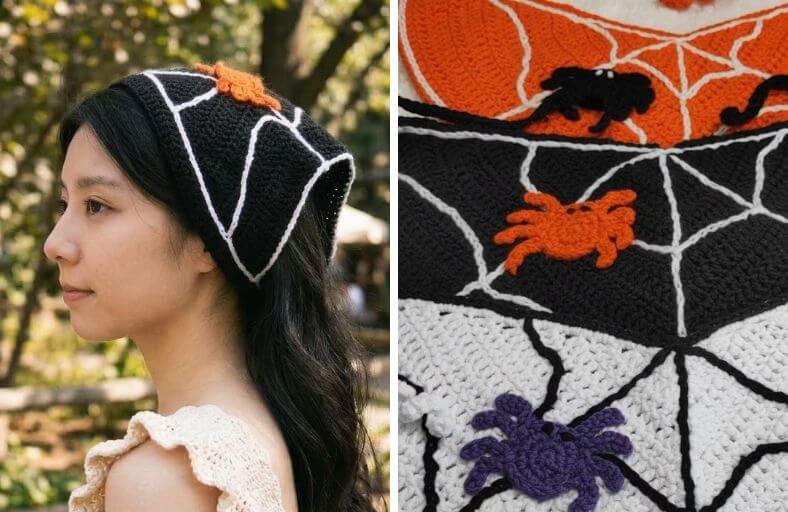
Ready to add a spooky, stylish twist to your handmade wardrobe without getting tangled in complicated stitches?
This Crochet Spider Web Bandana is the ultimate Halloween statement piece that seamlessly bridges gothic glamour with everyday bohemian charm!
Whether you are piecing together a last minute Halloween costume or simply celebrating the eerie season in style, this solid triangle kerchief paired with crisp surface embroidery creates an eye catching contrast that is as fun to craft as it is to wear.
Materials and Preparation
Materials:
- Main Bandana Yarn: Soft cotton yarn (or 50/50 cotton-acrylic blend) in your choice of base color (Orange, Black, or White).
- Embroidery Yarn: Soft cotton yarn in a contrasting color (Cream/Beige for the spider web embroidery).
- Spider Applique Yarn: Small amounts of Black cotton yarn for the spider body/legs and White cotton yarn for the eyes.
- Stuffing: Polyfill stuffing (optional, if making a 3D stuffed spider applique).
Tools:
- Crochet Hook: 3.0 mm crochet hook (or size matching your main yarn weight).
- Smaller Crochet Hook: 1.5 mm crochet hook (for weaving in short ends neatly).
- Darning / Tapestry Needle: For embroidery and sewing the spider applique.
- Stitch Markers: 2 or more stitch markers (essential for marking the top center corner and section points).
- Scissors: Sharp craft scissors.
- Ruler / Guide Yarn: Optional, for marking straight embroidery lines before stitching.
Preparation Notes:
- Master the basic double crochet (
dc) and treble crochet (tr) stitches before beginning, as they form the foundation of the solid triangle body. - Keep your gauge consistent throughout the solid triangle base so the edges remain straight and symmetrical.
- For the surface slip stitch embroidery, maintain a relaxed, uniform tension: pulling too tightly will pucker the fabric, while working too loosely will leave floppy loops on top.
Abbreviations and Notes
Abbreviations:
- MR: Magic Ring
- ch: Chain
- sc: Single Crochet
- dc: Double Crochet
- tr: Treble Crochet
- sl st: Slip Stitch
- Picot: 4 ch picot (ch 4, sl st back into the base stitch)
Pattern Notes:
- The bandana base is worked in turned rows starting from a center-bottom Magic Ring and expanding outward into a solid triangle.
- Each row increases symmetrically on both outer edges and at the center top peak.
- The side ties (laces) are created directly from the top corners of the finished triangle base without cutting yarn.
- Web lines are added after the base is completed using surface slip stitch embroidery worked from the front side.
Gauge, Approximate Size, and Pattern Notes
Gauge:
Exact gauge is not strictly critical for this project, but maintaining tight, even tension ensures a smooth, gap-free fabric for the embroidery.
Finished Size:
- Depth (Center base to top peak): Approximately 7.87 inches (20 cm) for adult sizing (easily adjustable to 7.08–7.48 inches / 18–19 cm for children).
- Tie Length: Approximately 9.84 inches (25 cm) per side lace.
Special Techniques:
- Solid Triangle Expansion: Every row increases by working 2 dc + 1 tr + 2 dc into the center peak stitch, and 2 dc + 1 tr into the edge chains, creating a seamless dense triangle.
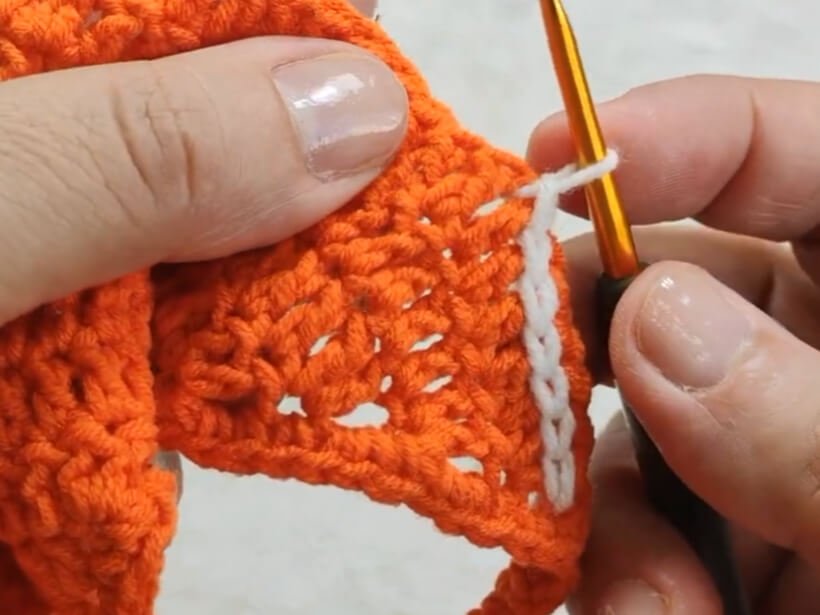
- Surface Slip Stitch Embroidery: Inserting the hook from front to back through the crocheted fabric, pulling yarn loops up from behind to build clean, chain-like web lines across the surface.
- Picot Edging Peaks: Decorative 4-chain picot loops stitched at the outer corners during embroidery to give the web a realistic spiky finish.
Step-by-Step Pattern
Part 1: Solid Triangle Base
Worked in turned rows using Main Color yarn (Orange/Black/White):
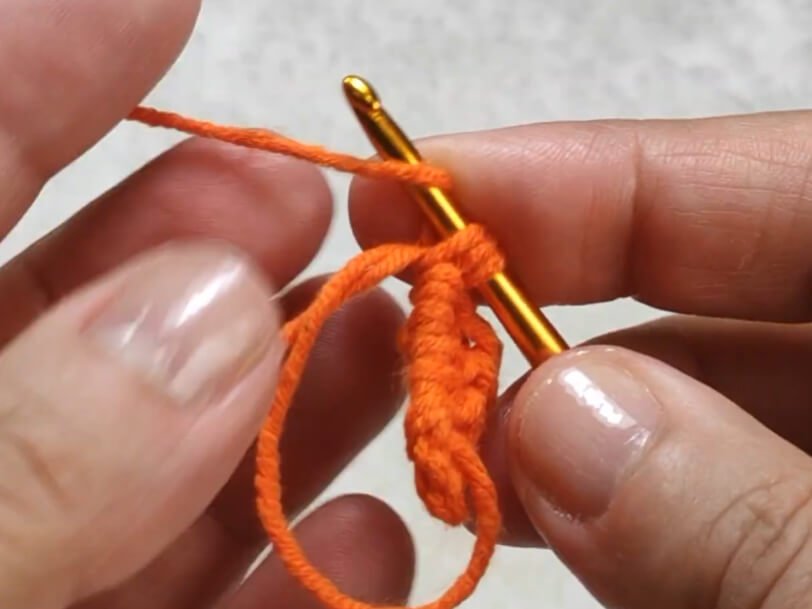
- R1: In MR, ch 4 (counts as 1 tr), 3 dc, 1 tr, 3 dc, 1 tr. Pull MR tight. Turn. (8 stitches total: 6 dc, 2 tr + ch 4)
- R2: Ch 4, turn. 2 dc in first stitch. 1 dc in each of next 3 dc. At top center tr: work (2 dc, 1 tr, 2 dc) all into top tr (place stitch marker in new tr). 1 dc in each of next 3 dc. In top of initial ch 4: work 2 dc, 1 tr. Turn. (16 stitches total, 8 sts on each side of top center tr)
- R3: Ch 4, turn. 2 dc in first stitch. 1 dc in each stitch across to marked center tr. At center tr: remove marker, work (2 dc, 1 tr, 2 dc) in same stitch, place marker in new tr. 1 dc in each stitch across to end. In top of turning ch 4: work 2 dc, 1 tr. Turn. (24 stitches total, 12 sts on each side)
- R4: Ch 4, turn. 2 dc in first stitch. 1 dc in each stitch across to marked center tr. At center tr: remove marker, work (2 dc, 1 tr, 2 dc) in same stitch, place marker in new tr. 1 dc in each stitch across to end. In top of turning ch 4: work 2 dc, 1 tr. Turn. (32 stitches total, 16 sts on each side)
- R5: Ch 4, turn. 2 dc in first stitch. 1 dc in each stitch across to marked center tr. At center tr: remove marker, work (2 dc, 1 tr, 2 dc) in same stitch, place marker in new tr. 1 dc in each stitch across to end. In top of turning ch 4: work 2 dc, 1 tr. Turn. (40 stitches total, 20 sts on each side)
- R6–R16: Repeat Row 3 pattern continuously until triangle reaches approximately 7.87 inches (20 cm) from center start to top peak (16 rows total for standard adult size). Do not fasten off.
Part 2: Border and Side Ties (Laces)
- First Tie: From the end of R16, ch 25 cm (approx. 50–60 chains depending on tension). Ch 1, turn. Work 1 sc in 2nd ch from hook and in each ch back toward the bandana corner.
- Top Edge Border: Work sc evenly along the top flat edge of the bandana base toward the opposite corner (approx. 1 to 2 sc per row end space depending on width).
- Second Tie: Upon reaching the second corner, ch 25 cm. Ch 1, turn. Work 1 sc in 2nd ch from hook and in each ch back to the bandana corner.
- Finishing Border: Sl st firmly to corner junction, ch 1, fasten off. Weave in ends securely on the back side using a darning needle or small hook.
Part 3: Web Embroidery & Spider Applique
Surface Web Embroidery (Cream Yarn)
- Outer Border & Picots: Fasten Cream yarn at one bottom corner. Work surface sl st along the outer left edge. At the top corner peak, work Picot (ch 4, sl st into base stitch), then surface sl st down the outer right edge. At the second corner peak, work another Picot. Continue surface sl st along the top border to complete the outer frame.
- Radial Web Lines (3 Spoke Lines):
- Center Line: Surface sl st straight from center bottom MR up along the tr line directly to top peak. Fasten off on back.
- Side Lines: Mark center points of left and right slanting edges with stitch markers. Surface sl st from center bottom MR diagonally to left edge marker (add Picot at edge). Repeat from center bottom MR diagonally to right edge marker (add Picot at edge).
- Concentric Arc Lines: Work 2 concentric curved arc rings across the spokes using surface sl st, dipping slightly between spokes to create realistic draped web arches. Fasten off on back.
Spider Applique
- Hand-craft a classic spider motif with Black cotton yarn (round body with 8 curved legs) and embroider tiny White eye dots.
Part 4: Assembly & Finishing
- Place the finished spider applique onto the embroidered web surface at your desired position.
- Using a tapestry needle and black yarn, sew the spider body and each leg securely to the bandana base.
- Turn bandana to the wrong side and steam iron lightly (holding iron slightly above fabric) to set stitches flat and neat.
Detailed Pattern Breakdown
1. Solid Triangle Base Construction:
- The base utilizes a top-down expansion logic where every row builds symmetrical stitch counts on both halves.
- By combining double crochet (
dc) body stitches with treble crochet (tr) turning/corner anchor points, the triangle spreads at a clean 90-degree corner angle without curling. - Replacing standard turning chains with
ch 4provides the extra height required for thetrend extensions, ensuring straight, unpuckered side borders.
2. Side Laces and Border Execution:
- Integrated side straps are worked as continuous chain extensions directly from the base corners, eliminating bulky knots or weak join points.
- Returning along the chain with single crochet (
sc) produces flexible, durable ties that resist stretching during wear. - The single crochet border across the raw top edge anchors all row ends together, creating a smooth line across the forehead.
3. Surface Embroidery Geometry & Applique Attachment:
- Surface slip stitching creates a raised, 3D chain texture that sits crisply on top of the solid double crochet base without disrupting fabric drape.
- The radial layout relies on structural center lines (
trcolumn markers) to maintain geometric balance across both wings. - Sweeping the arc embroidery in shallow downward curves between spokes simulates gravity and tension, turning a simple flat triangle into an iconic spider web pattern.
Pattern Question:
Question: How do I ensure my surface slip stitch web embroidery looks straight and clean without puckering the bandana base?
Answer: Puckering occurs when embroidery loops are pulled too tightly against the crocheted base. To maintain a smooth, flat finish, keep your working loop loose and match its length to the natural width of the base stitches underneath. If you struggle to maintain a straight line across diagonal sections, thread a contrasting piece of scrap yarn or place a ruler across the bandana to serve as a temporary visual guide before stitching your surface sl st along the path.